
Growing Food in Southern Lakes - May Edition: Build Soil, Save Seeds, Prepare for Spring
Growing food in the Southern Lakes just got easier. Fifteen local growers are teaming up to share what actually works in our climate, helping beginners get started with confidence.
Whether you are renting, working with pots or planter boxes, or have access to a small patch of land, now is the time to begin. This new monthly blog brings together practical, seasonal knowledge from across the region to help households grow food, forage, and build up their pantry for the year ahead. Each edition will offer clear, usable guidance for different growing spaces, from a single pot or sunny windowsill through to a productive garden bed.
As we head into winter, this month’s focus is on building soil, saving seeds, and setting yourself up for spring. Because yes, this is when it starts.
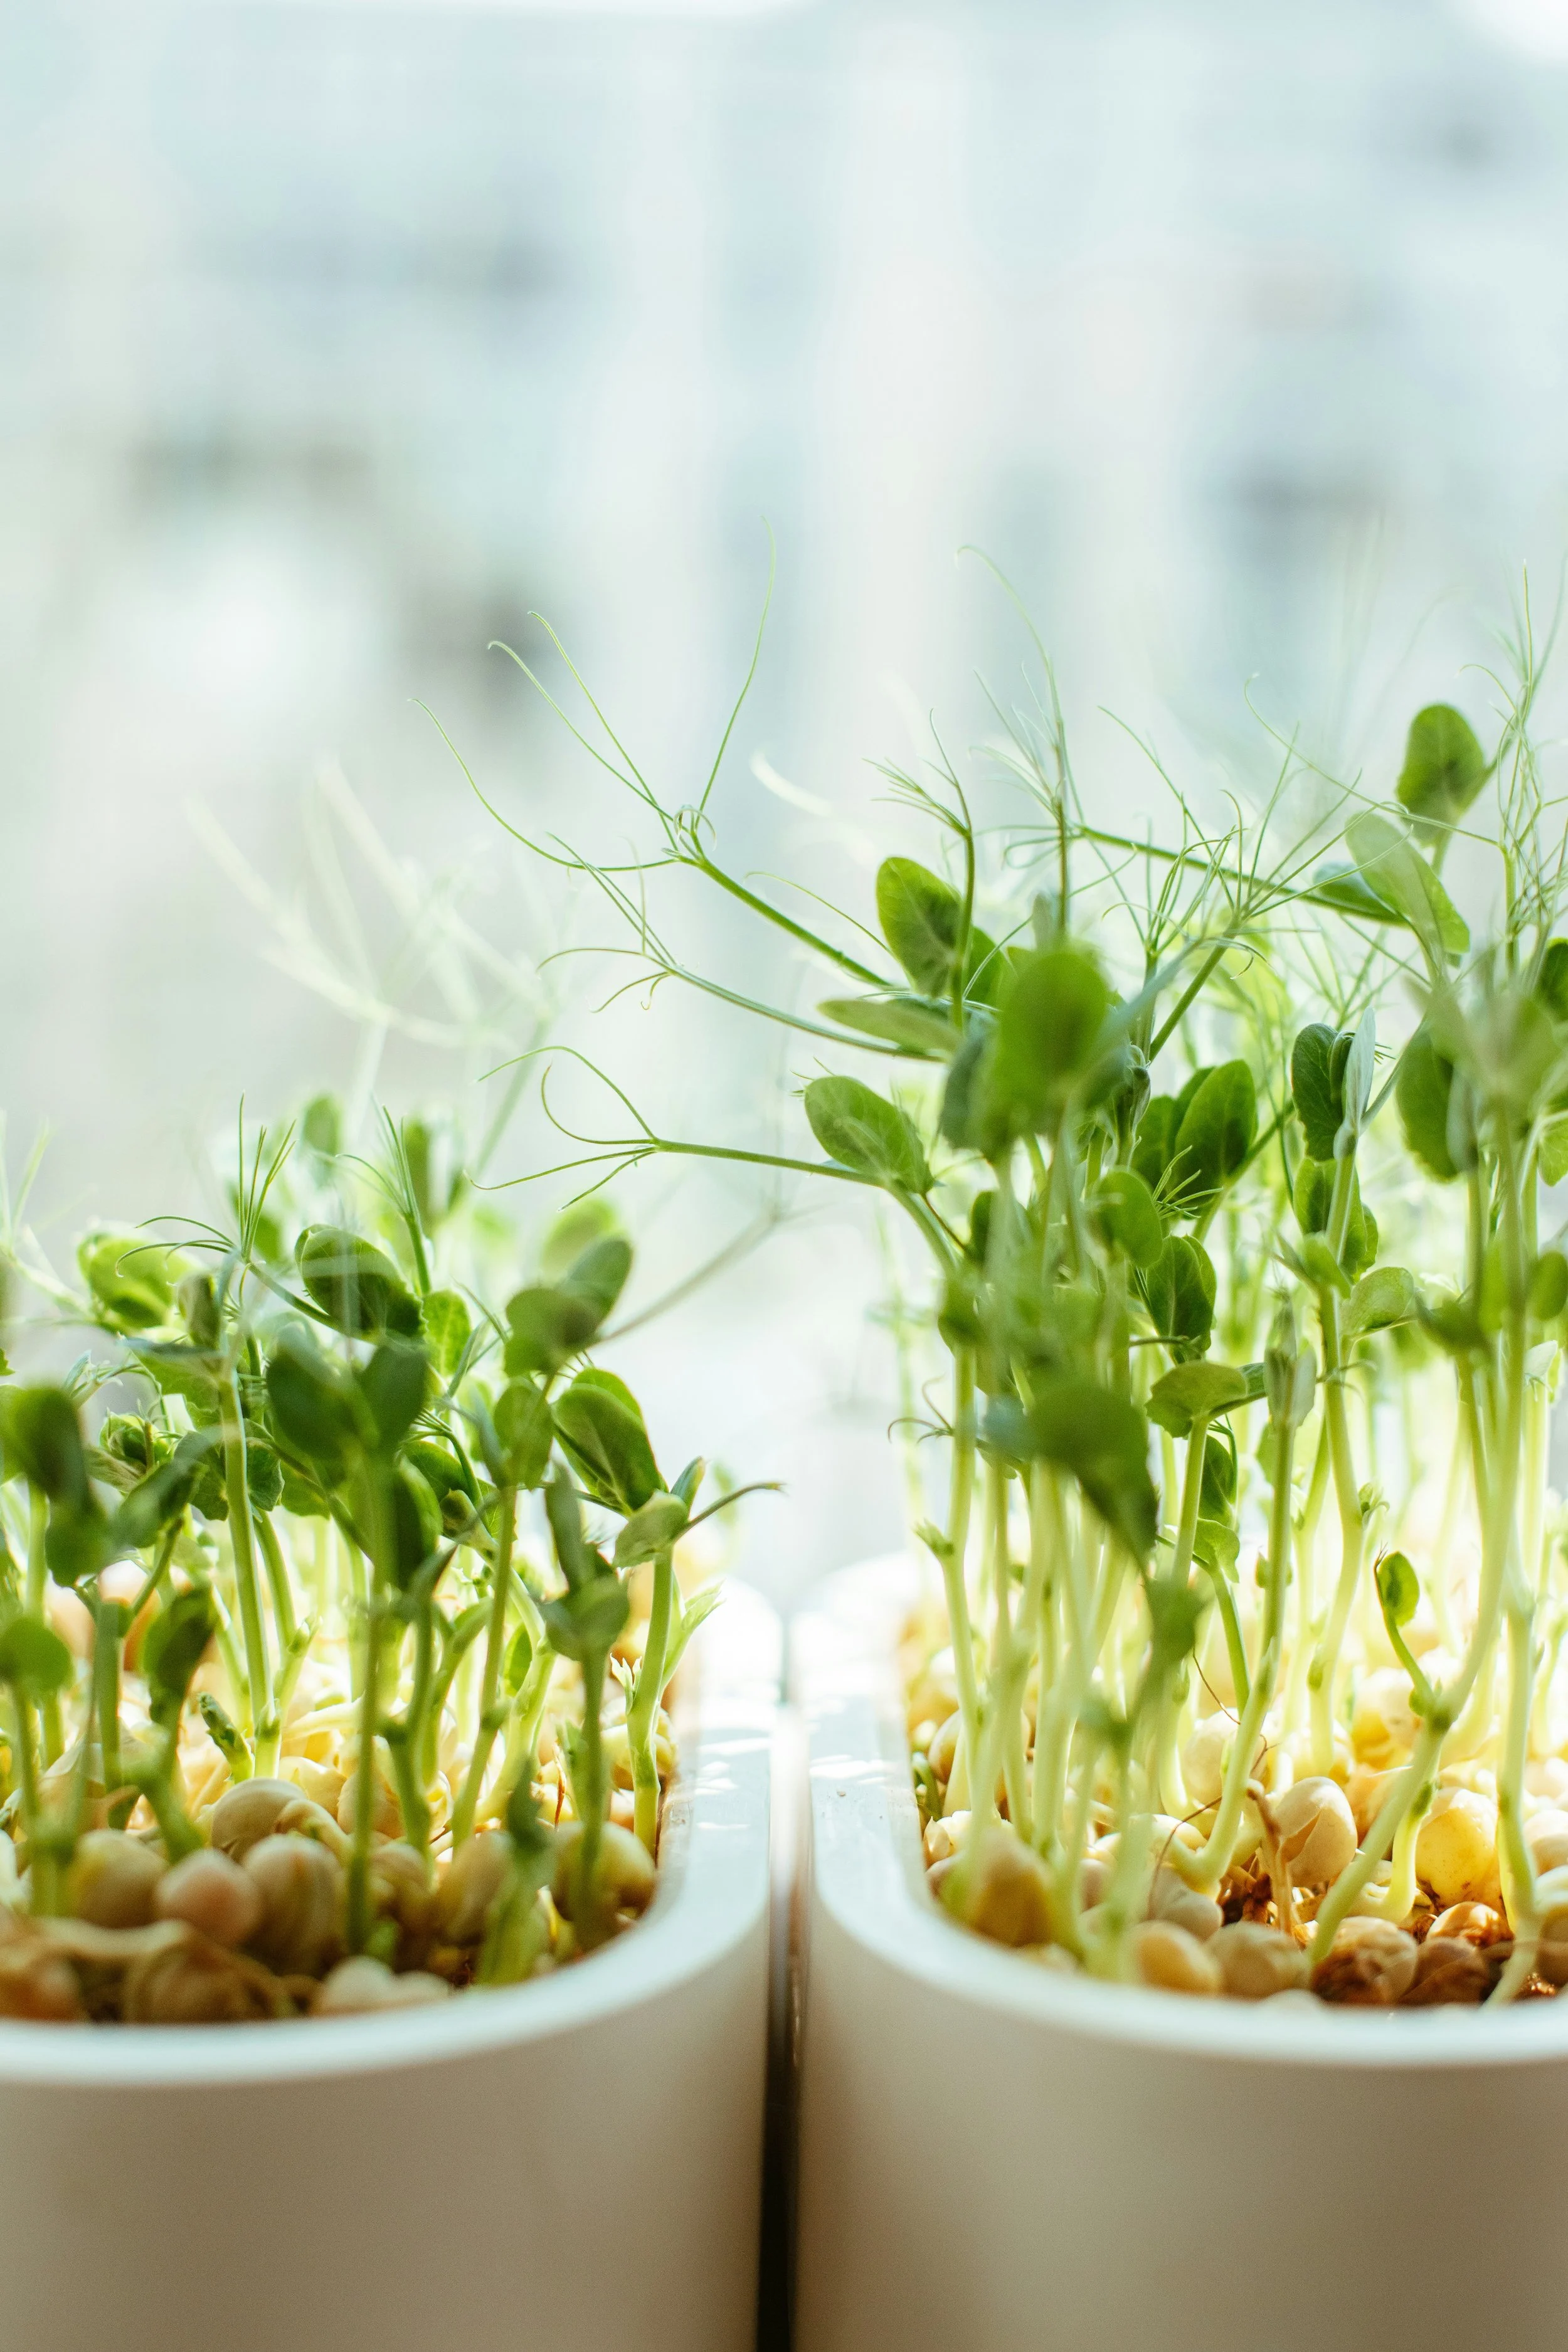
Microgreens are easy to grow indoors and packed with nutrients. A simple way to keep fresh food on your plate through the winter months when outdoor growing is more limited.
Brought to you by the Southern Lakes Kai Collective
〰️
Brought to you by the Southern Lakes Kai Collective 〰️
Get your hands in the soil, grow your own food, and find joy in the simple act of nurturing life.
Your May challenge!
Choose one… or more!
Build one garden bed or one veggie pot and feed your soil
Sow & grow microgreens
Save seeds
Stock pantry staples
Source apples and preserve them
Talk to a gardening neighbour
-
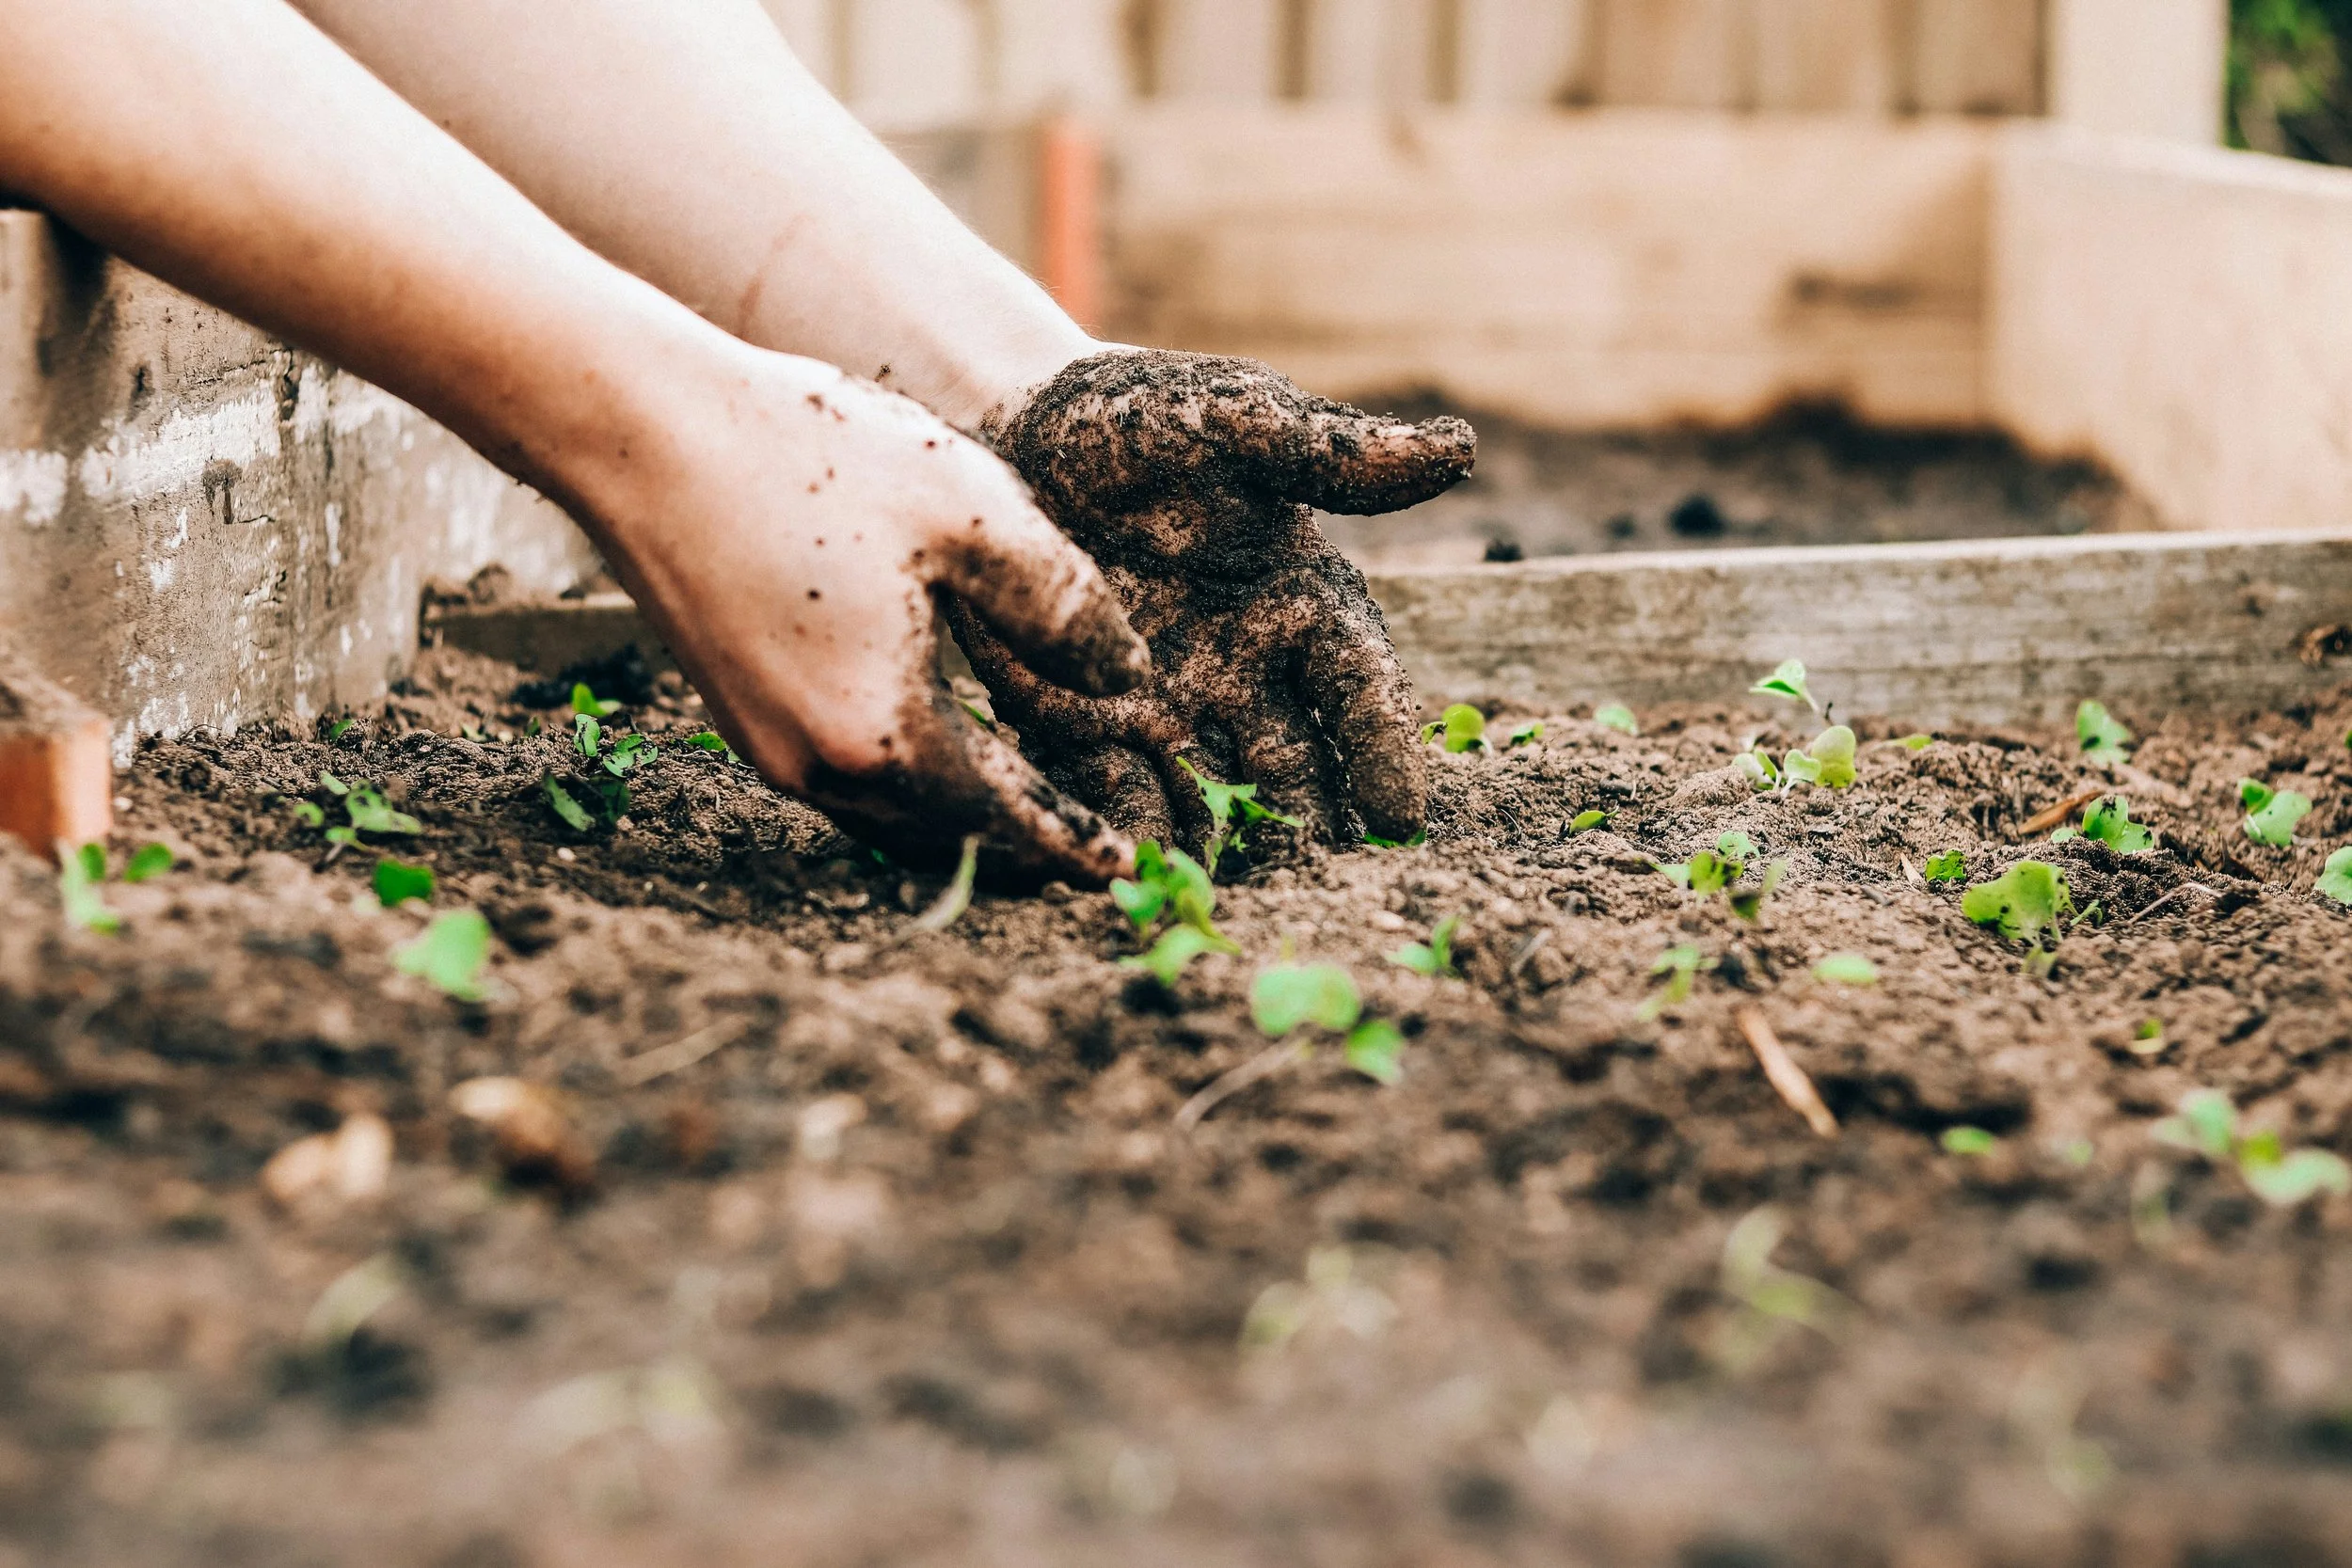
If you are just starting out, this is one of the easiest and most important things you can do in May. You do not need special skills or equipment. Just work through it step by step.
Equipment
If you start small using pots, you may only need:
a container in which to plant your mini-garden
an old bucket or two to mix soil/compost etc.,
a watering can
If you have an outdoor area you can grow food in, you may need:
Spade (for removing grass if starting from scratch)
Wheelbarrow or old buckets (moving compost, soil, leaves)
Shovel or buckets (for applying compost or soil)
Rake or hands (to level beds)
Fadge or sack (for collecting leaves, optional but useful)
4 pegs and chicken-wire to protect your garden from rabbits / dogs, etc.
A watering can or a hose with a spraying nozzle
1. Start small
Start small. One bed, one square metre, or one large pot is enough. Local growers consistently say manageable beats ambitious.
Start with:
A small in-ground or raised bed (max 1 x 3m, no wider than 1m for easy access)
Containers or planter boxes (use food-safe containers and avoid unknown plastics or containers that previously held chemicals)
A sunny corner with pots
A windowsill indoors
If gardening in pots, aim for at least 10 to 20 litres per pot for most vegetables. Bigger pots are easier to manage, with less drying out, more stable growth and fewer problems overall.
This allows you to:
Learn gradually
Build confidence
Avoid overwhelm
See real results quickly
For renters
You do not need to own land to grow food. You can use pots, buckets, and portable systems.
You could also consider speaking to your landlord about your intention to build food resilience and whether a small 1 x 3 m garden bed could be established on the property.
Community growing spaces
QLDC is providing reserve land and fruit and nut trees for organised community groups. Worth exploring if you can join or form a group.
2. Find your growing space (starting from scratch)
If you are starting from nothing, choose a space that:
Gets the most sun available (especially spring sun - aiming for 6+ hours)
Is easy to access for watering and care
Is not too large to maintain
Is reasonably sheltered from wind
Has pest protection if possible (rabbits are common)
You do not need perfection, just something workable.
Resources:
Your Garden Coach podcast has invaluable advice on how to set a garden up from scratch, listen to the podcast or book a consultation with Ali Soper (Lake Hawea)
Harvest Homegrown (Hawea Flat) offers great workshops to help you understand the basics: Understand Our Local Growing Climate and Planning an Efficient Garden and much more.
Dishes with Del recently started a budget garden project where she uses raised garden beds made from heat treated pallets - check it out here.
3. Clear the space
Option A: Sheet Mulch (recommended for beginners)
Lay cardboard over grass/weeds (it takes several months to kill off grass)
Wet thoroughly
Cover with compost, leaves or mulch
Then weigh it down with timber or stones
Option B: Manual clearing
Remove grass and roots (3–8 cm deep) using a spade
Remove persistent weeds fully (including roots)
Keep organic matter where possible
Then as above: wet, cover with compost, leaves or mulch
4. Build your soil foundation (priority step)
If you only do one thing, do this.
Think about what you want to grow in Spring and aim for the following recommended friable soil depths:
Leafy greens/herbs: 15–20 cm
Most vegetables: 20–30 cm
Deep-rooted crops (carrots, brassicas, tomatoes): 30–40 cm
Friable means the soil has a crumbly, loose texture in which plant roots can take hold. If the soil is compact, making the soil more friable can be achieved with gentle forking (place the broadfork in the soil and loosen slightly). It’s important, however, to only do this as a once-off, as repetitive forking can damage soil structure and make compaction worse in the long run.
Once you have cleared and forked a patch, add:
2–5 cm compost layer
Do not dig in (soil life will incorporate it naturally)
Aged, well-rotted manure if available
Reuse what you already have:
Cardboard (weed suppression)
Fallen leaves (Tip - pick up leaves with a lawn mower to mulch & mix in lawn clippings for instant compost/mulch mix)
Kitchen scraps & bokashi buckets (trench directly into the garden, or add to compost)
Garden trimmings - when clearing your gardens for winter, leave roots in the ground and chop and drop any non-seedy organics to compost in place, the soil life will love it.
If you already have a bed:
Remove large weeds (especially persistent weeds such as couch grass)
Do not dig deeply, aim to aerate the soil without turning it over. Use a garden fork.
Add compost and mulch, chop & drop old plants, dig in kitchen scraps over winter.
Alternative soil & compost sources:
Next month we’ll look at how to make your own compost and potting mix. For now, if you want to get a bed ready for spring, you may need to source some compost elsewhere:
Compost and topsoil from Mitre 10 or local suppliers
Mushroom compost and topsoil from Upper Clutha Transport (bring a trailer or buckets)
Green waste materials:
Wanaka Greenwaste and Landscaping Supplies
Location: Ballantyne Road (next to Wastebusters)
Hours: Monday - Sunday 10.00am - 3.00pm
Contact: 027 476 6034
Mulch, compost, bark and most landscaping supplies.
A few bags available. Or bring your trailer. Courtesy trailer available.
Community Greenwaste stations
Check your local community station for mulch sales
https://www.qldc.govt.nz/community/community-associations-and-groups
In Queenstown you can order compost from the good people at Waste to Wilderness
And/or get ready to make your own: Stock pile - leaves, grass clippings, small branches, animal bedding, larger garden waste that can’t be left on the bed to compost. Think about manure sources - can you access animal manure for free? Keep in mind that some animals may be drenched/medicated - Sheep poo, cow poo, chicken coop bedding, rabbit poo! Horse poo is abundant but must be heat treated first to avoid weeds transferring to your garden.
SeaCliff has some fabulous organic supplements. Use the SeaCliff Organics seed-raising mix sparingly only where your vegetable are being planted to save money while supporting plant growth.
5. Protect your soil over winter
Mulching means covering the soil surface with a protective layer of natural material. It protects from spring wind erosion, stops compaction from heavy rains & keeps soil moist which builds soil life.
Use:
Autumn leaves
Straw or pea straw
Untreated grass clippings (thin layers)
Wood chip
Shredded garden waste
Comfrey leaves
You can layer cardboard underneath to reduce weeds.
6. Leave it to rest
Once compost and mulch are in place:
Do not over-dig
Let worms and microbes work
Allow winter breakdown
Why this matters:
Healthy soil:
Stores nutrients
Holds moisture
Reduces weeds
Supports spring growth
Makes gardening easier
-
Outdoors
Miners Lettuce (Claytonia perfoliata) and Lambs Lettuce (Valerianella locusta (also called corn salad or mâche): both very frost tolerant, reliable winter crops. They can be sown or dug up (whole clumps with soil transplanted from another garden). Note: once it’s in your garden it will come back every winter!
Broad beans for November harvest: Direct sowing (preferred method) - Sow seed directly in the soil, about 5 to 7 cm deep, space seeds 15 to 20 cm apart in rows. Seeds stay dormant or grow slowly through winter
Strawberries (established plants or well rooted runners)
Parsley seedlings
Garlic (planting season is upon us, save large organic garlic bulbs, plant anytime from now through until July, the earlier the better for larger bulbs and less chance of disease)
If you have a tunnel or glasshouse, it’s ok to plant some quick-growing greens seedlings such as Asian Greens or mesclun salad mixes: Rocket, Mizuna, and Mibuna.
Any brassica seedlings, best to plant these after the shortest day now (after 21 June).
Any other greens, best to wait for August.
For existing gardens, look after your winter vegetables to encourage successive harvests. Clean up plants and beds to help prevent winter pests. Leave broccoli in the ground for side shoots. Harvest cabbage or fennel 1 cm above the base to encourage baby cabbages or fennel in spring. Cut Asian greens, lettuce, and spring onions 1 cm above the base for quick new shoots through winter.
Garden pests
Slugs are a common winter pest, beer traps and half-pipes for daytime hiding can work - consistent hunting and removal is key!
Indoors
Microgreens
Mesclun salad mixes - Rocket, Mizuna, Mibuna are the quickest
Asian Greens - Pak Choi, Tatsoi
Herbs
Sprouting seeds
Microgreens
Microgreens are especially good for beginners: fast, easy, reliable and nutritious. Compared with sprouts, they generally come out ahead for overall nutrition.
Use small flat trays with drainage holes, and 1-2cm depth of coconut coir, to grow things like Pea Shoots, Radish, Broccoli, Sunflower Shoots, Mung Bean Shoots. Sow densely over the entire surface, do not cover seeds with soil, instead water well and stack another tray on top to cover and put something heavy on top. Leave in a warm dark place until fully germinated, 3-5 days, then uncover, pop in a sunny place and water daily.
Snip off with scissors or a sharp knife when you are happy with the size & enjoy.
Radish will be ready to eat in less than a week, Pea Shoots in 2 weeks. Don’t forget to sow new trays regularly for a continuous supply.
You should replace the coconut coir each time you sow a fresh tray. Dispose of the old coir and micro green roots in your compost.
Twice-a-week microgreen rhythm (1-2 people household)
Below is a simple way to get started by only having to do something twice a week. With this system, you’ll have between 4 and 8 trays on the go at any given time, so if you don’t have room for that, simply do half the amount instead.
Pick any two consistent ‘visit’ days, for example:
Tuesday + Saturday
(Spacing them out gives you steadier growth and less “everything ready at once” pressure.)
What to do each ‘visit’
👉 TUESDAY (Sow day + light check)
Sow 1 radish tray (10–15 g)
Sow 1 broccoli tray (8–12 g)
Check all existing trays
Water as needed
Harvest anything that is clearly ready (optional)
👉 SATURDAY (Sow + harvest day)
Sow 1 pea tray (100–150 g)
Sow 1 sunflower OR mung bean tray (120–160 g) rotate weekly
Check all existing trays
Harvest anything ready for use that week
Good to know: tray lifespan (seeding to harvest)
Fast crops:
Radish
Germination: 2–4 days covered
Ready to harvest: 6–10 days from sowing
Tray active lifespan: about 1 week
Broccoli
Germination: 2–4 days covered
Ready: 7–12 days
Tray lifespan: 1 to 1.5 weeks
Medium crops:
Sunflower
Germination: 2–4 days
Ready: 8–12 days
Tray lifespan: 1.5 weeks
Mung bean
Ready: 7–10 days
Tray lifespan: about 1 week
Slower crop:
Pea shoots
Germination: 3–5 days
Ready: 10–16 days
Tray lifespan: 2 weeks
What this setup gives you
After 2–3 weeks of running:
Always 2 trays in early growth stage
Always 1–2 trays approaching harvest
Flexible harvesting (nothing urgent or time-sensitive)
Fresh greens available even if you skip a visit by a day or two
Missed a day? Nothing collapses
Resources:
Grow Wanaka holds a workshop on growing microgreens on 3 May
Harvest Homegrown holds workshops on quick winter greens on 17 May and 14 June
Harvest Homegrown has an awesome little guide on growing strawberries the lazy way
Kings Seeds sell a microgreen starter kit
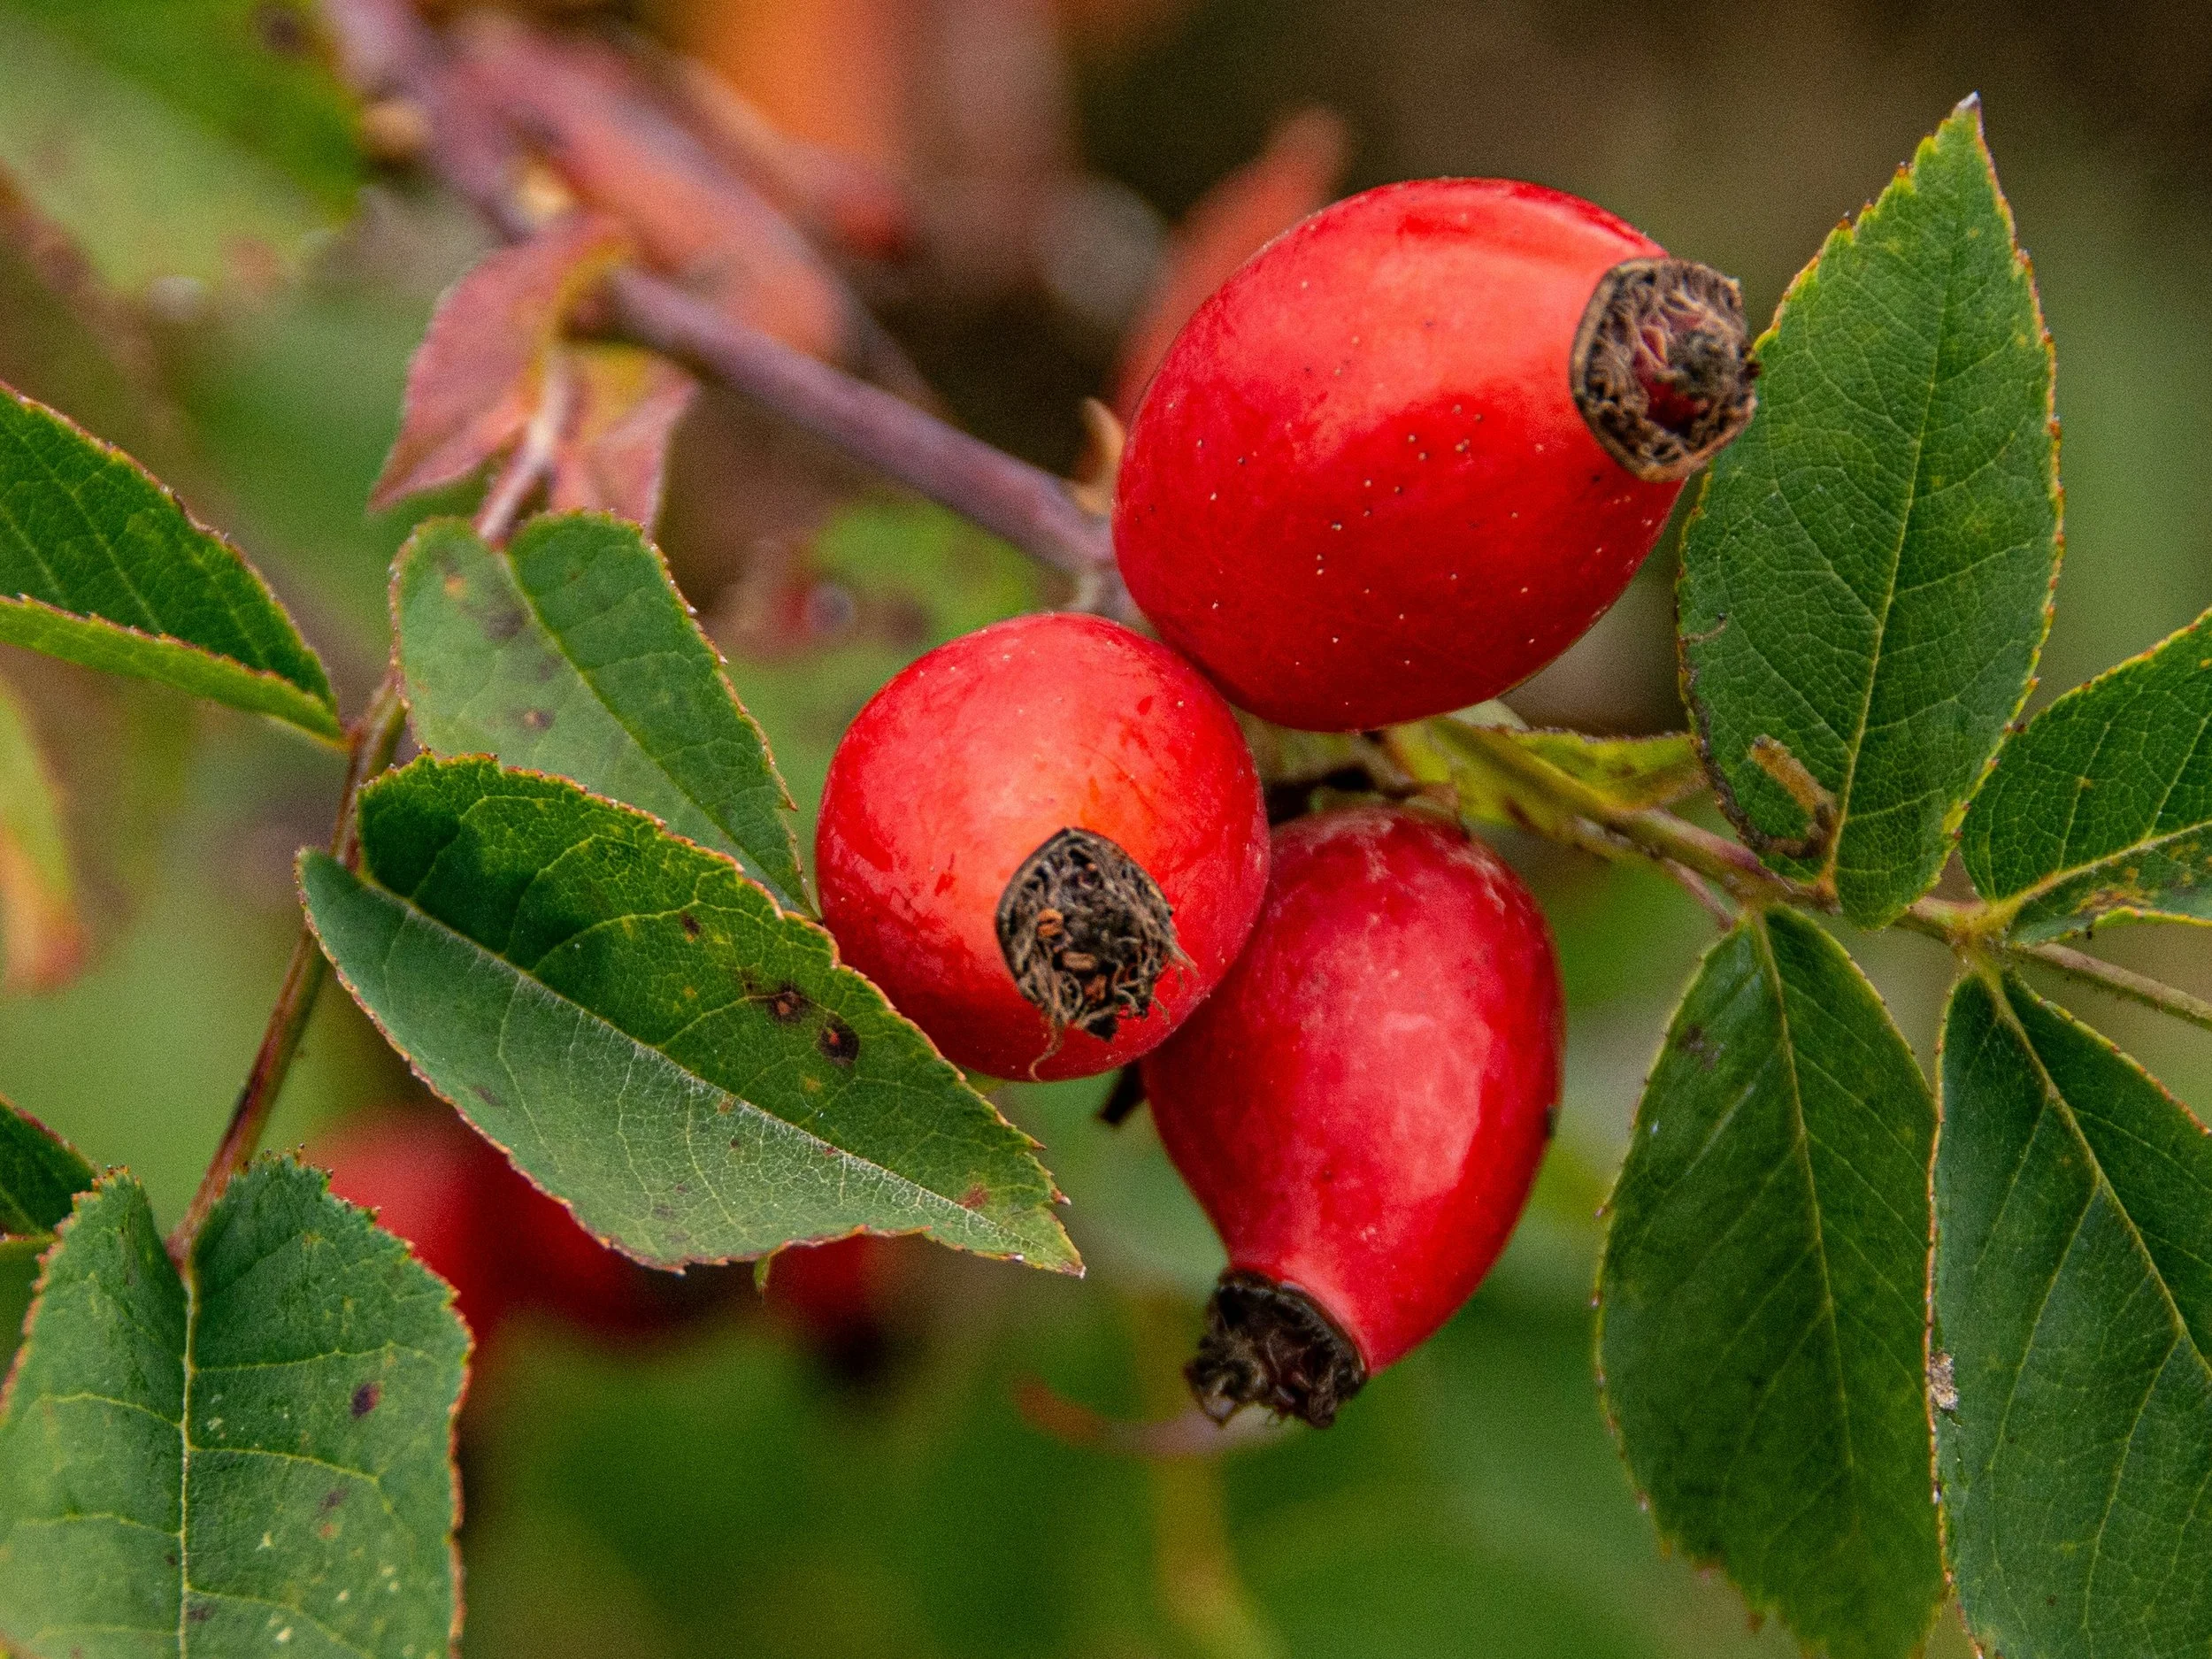
Rosehip glowing in the wild, a small fruit packed with goodness and a reminder of nature’s quiet resilience.
-
Seed saving starts now
It’s the end of season now, so there is not much left to collect. If you had food growing in your garden you may still find dry seed heads on beans, peas, and herbs such as coriander.
A simple timing rule: seed is ready when it is fully dry, brown, and rattles in its pod or head, and comes away easily without any green or soft parts remaining.
Collect mature seeds
Dry thoroughly
Store cool, dry, labelled
Seed saving builds resilience and local adaptation.
If you have no seed of your own, see if a friend, neighbour or local library can spare you some. Alternatively, purchase some seeds now (see below ‘Choose Seeds for Real Food’).
Booklet by the Koanga Institute Save Your Own Seeds
Choose seeds for real food
When choosing seeds, focus on foods your household already enjoys eating, aim for a mix of carbohydrates, protein, calorie crops and greens, and choose varieties you know you will actually use in regular meals, with some that you can store for later use (pumpkin).
A strong beginner baseline:
Kale or silverbeet
Courgettes (1 or 2 plants is usually sufficient)
Beans or peas
Potatoes
Carrots
Onions or garlic
Pumpkin
Herbs
If you cannot get seeds from friends or neighbours, Kings Seeds has a huge variety to choose from. Local garden centres are also a good option.
You could also reach out to local community gardens to see whether they sell seeds or seedlings in spring.
Excellent beginner growing information for New Zealand can be found HERE , including NZ’s 4 climate zones. We are in Zone 4.
Our biggest limiting factor in our local growing climate is low light levels over winter, this is where we differ from other Zone 4 growers, plants need sun to grow, so timing for an abundant winter garden is pretty crucial - Understand Our Local Growing Climate.
-
Low cost gardening tips
Swap seeds
Collect compost materials
Share tools
Join community gardens
Start neighbourhood growing groups
Reuse materials creatively (keep in mind that you want non-toxic materials near the food you grow!)
Use winter well
Use winter to:
Identify sunny areas in your garden
Note frost zones in your garden
Plan bed locations (if you are postponing the bed building, or plan to create more later in the year)
Think about what your household actually eats
Source seeds early
For existing gardens: use winter to fix any issues you had in your garden the previous season eg. create a barrier to stop creeping persistent weeds from getting back in every season. Reorganise any irrigation to be more effective & time efficient. Did you have any drainage issues during heavy rain events? Can you do anything to fix that? Cover/mulch any pathways to stop weeds and help with soil health. Do you need to build any trellising or new structures to help you grow more effectively? Can you set up heat sinks to help with early spring growing? Have you been thinking of getting a glass or tunnel house? Now is a great time to get them set up.
-
Food resilience is not only about what you grow or store. It is also about noticing what food already exists around you. Local foraging knowledge helps households identify seasonal wild foods, fruit trees, herbs, nuts, mushrooms and edible weeds in our landscape. Building this knowledge increases confidence, reduces waste, saves money and reconnects people with place.
Even learning a few safe, abundant species each season can meaningfully strengthen household food resilience.
Start small and safe:
Learn correct identification
Avoid sprayed or polluted areas
Take only what you need
Leave plenty for others and nature
Never eat wild plants or mushrooms unless identification is certain.
Forage now: rosehip & walnuts
Rosehips are one of the most useful free seasonal foods available in autumn around the district. Traditionally gathered for centuries as winter nutrition when fresh fruit was scarce, they are valued for their high vitamin C content, often far higher than many common fruits.
They are usually ready in late autumn when bright red and plump, and May is an ideal harvest time locally. Pick them with gloves, then dry for tea or simmer and strain into a ruby syrup for winter drinks and breakfasts. You can also make a nutrient rich rosehip decoction by adding a few handfuls of dried rosehips to a pot with one litre of water, bringing it to a gentle simmer with a lid on (do not boil hard) for around 20 minutes.
Walnuts are another abundant autumn food across the Upper Clutha, with mature trees in many public spaces and backyards, including Station Park. After windy days, fresh nuts are often found on the ground, making collection easy.
Collect only fallen nuts with husks split or removed. Dry in a single layer in a warm, airy place for 2 to 4 weeks until shells feel light and dry inside. Store in-shell in a cool, dry place for 6 - 12 months. Alternatively, you can also shell the nuts and freeze for longer storage (1 - 2 years).
Walnuts are rich in healthy fats, protein, and omega 3s, making them a useful winter pantry food and a nutritious addition to baking, breakfasts and everyday meals.
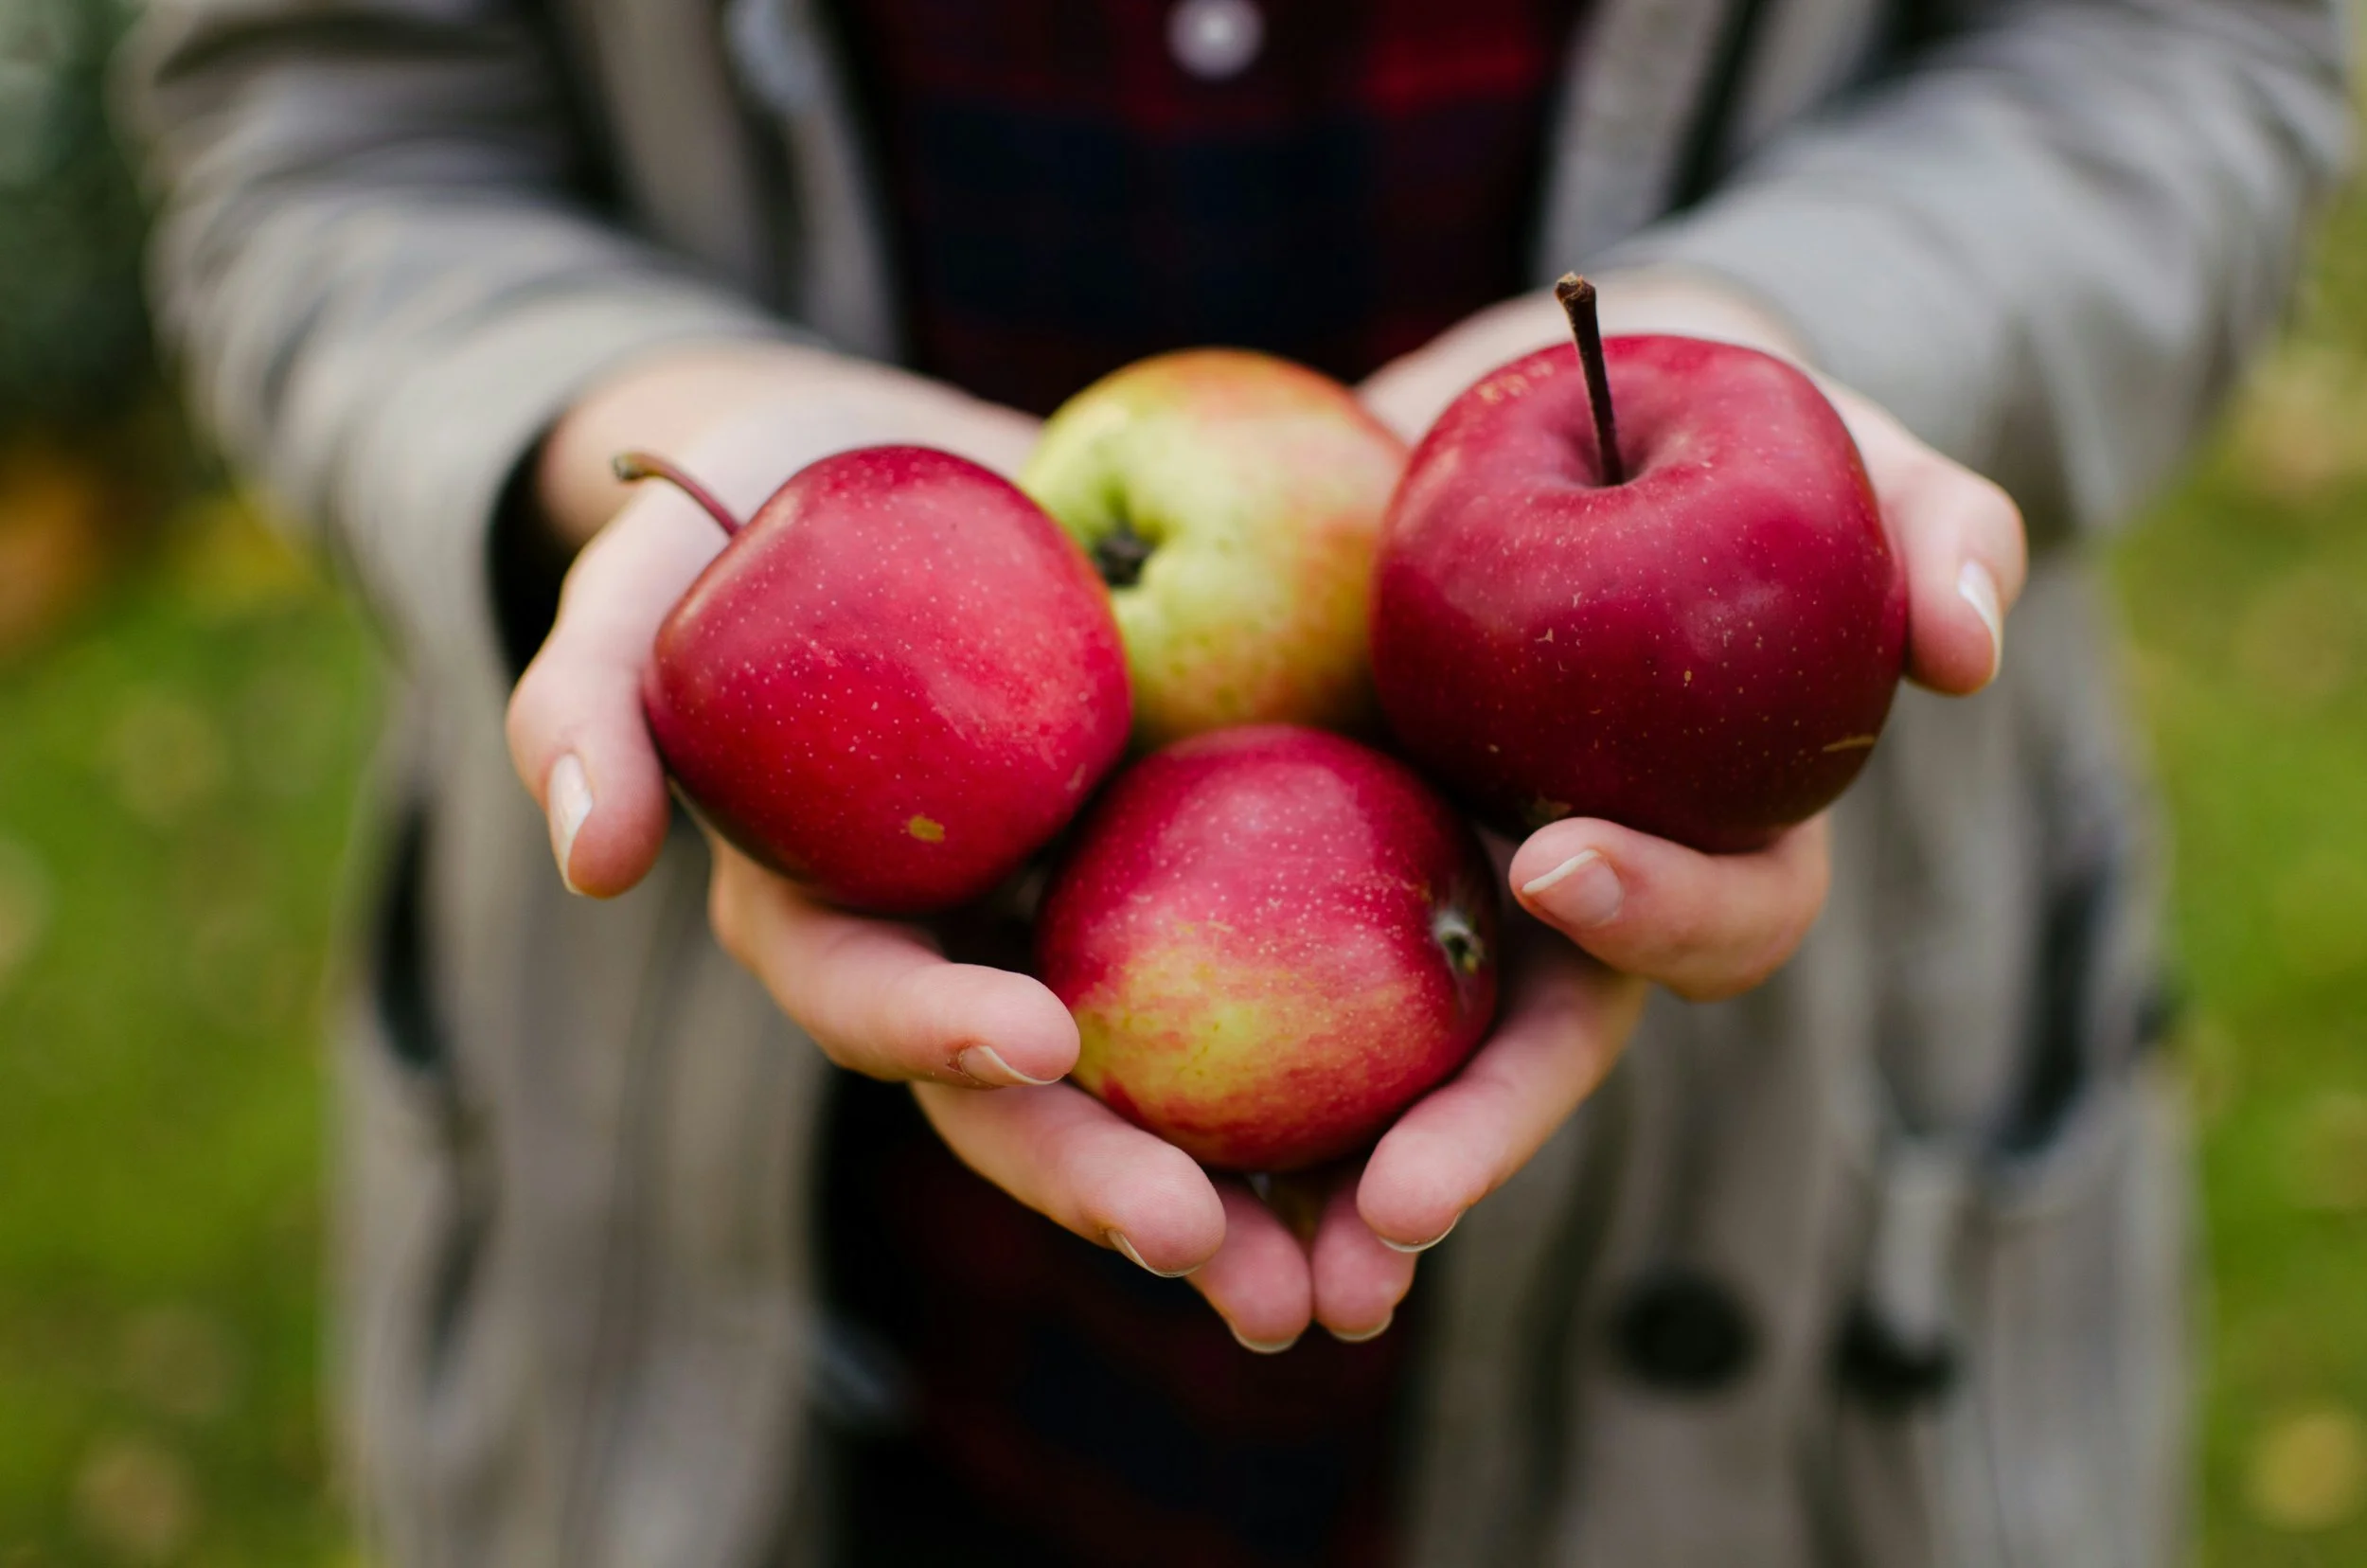
Apples are in abundance right now, dry them, sauce them, chutney them or freeze them and turn surplus into everyday resilience.
-
Food resilience is not only gardening, it includes your household pantry.
Start building staples for a few weeks:
Rice
Pasta
Flour (plain and wholemeal)
Salt
Tinned beans
Tinned tomatoes
Tinned fish (sardines, tuna, salmon) - these are a protein-rich pantry staple. Look for MSC-certified options where possible. Pams is generally a reliable and widely available choice in Southern Lakes supermarkets.
This helps when fresh food is scarce, prices rise or shops are inconvenient.
You’ll also want to learn how to store food properly to make it last longer. For example, onions and potatoes should be kept in a cool, dark place with good airflow. However, they should not be stored together. Onions release moisture and gases that can cause potatoes and other produce to spoil more quickly, so keep them in separate locations.
Look out for:
Food preservation workshops
Cooking skills events
Waste reduction programmes
Wao Food Resilience calendar of events is a good place to start
Resources:
Dishes with Del (pantry and waste reduction tips)
Every Bite initiative (food waste reduction programme. In 2026 it ran on 29 April in Queenstown and 30 April in Wanaka)
Community produce stands (Community Link: These public shelves allow people to share excess garden produce with others, helping ensure more households have regular access to healthy food while reducing unnecessary waste. Note some of these may be stored away for winter)
At the moment, many of the stands are regularly stocked with surplus apples. Surplus apples can be:
Dried
Made into sauce
Turned into spiced chutneys
Frozen for later use
Projects like the Community Produce Stands are a practical reminder that food resilience is not only about what you grow yourself, but also about sharing abundance within the community.
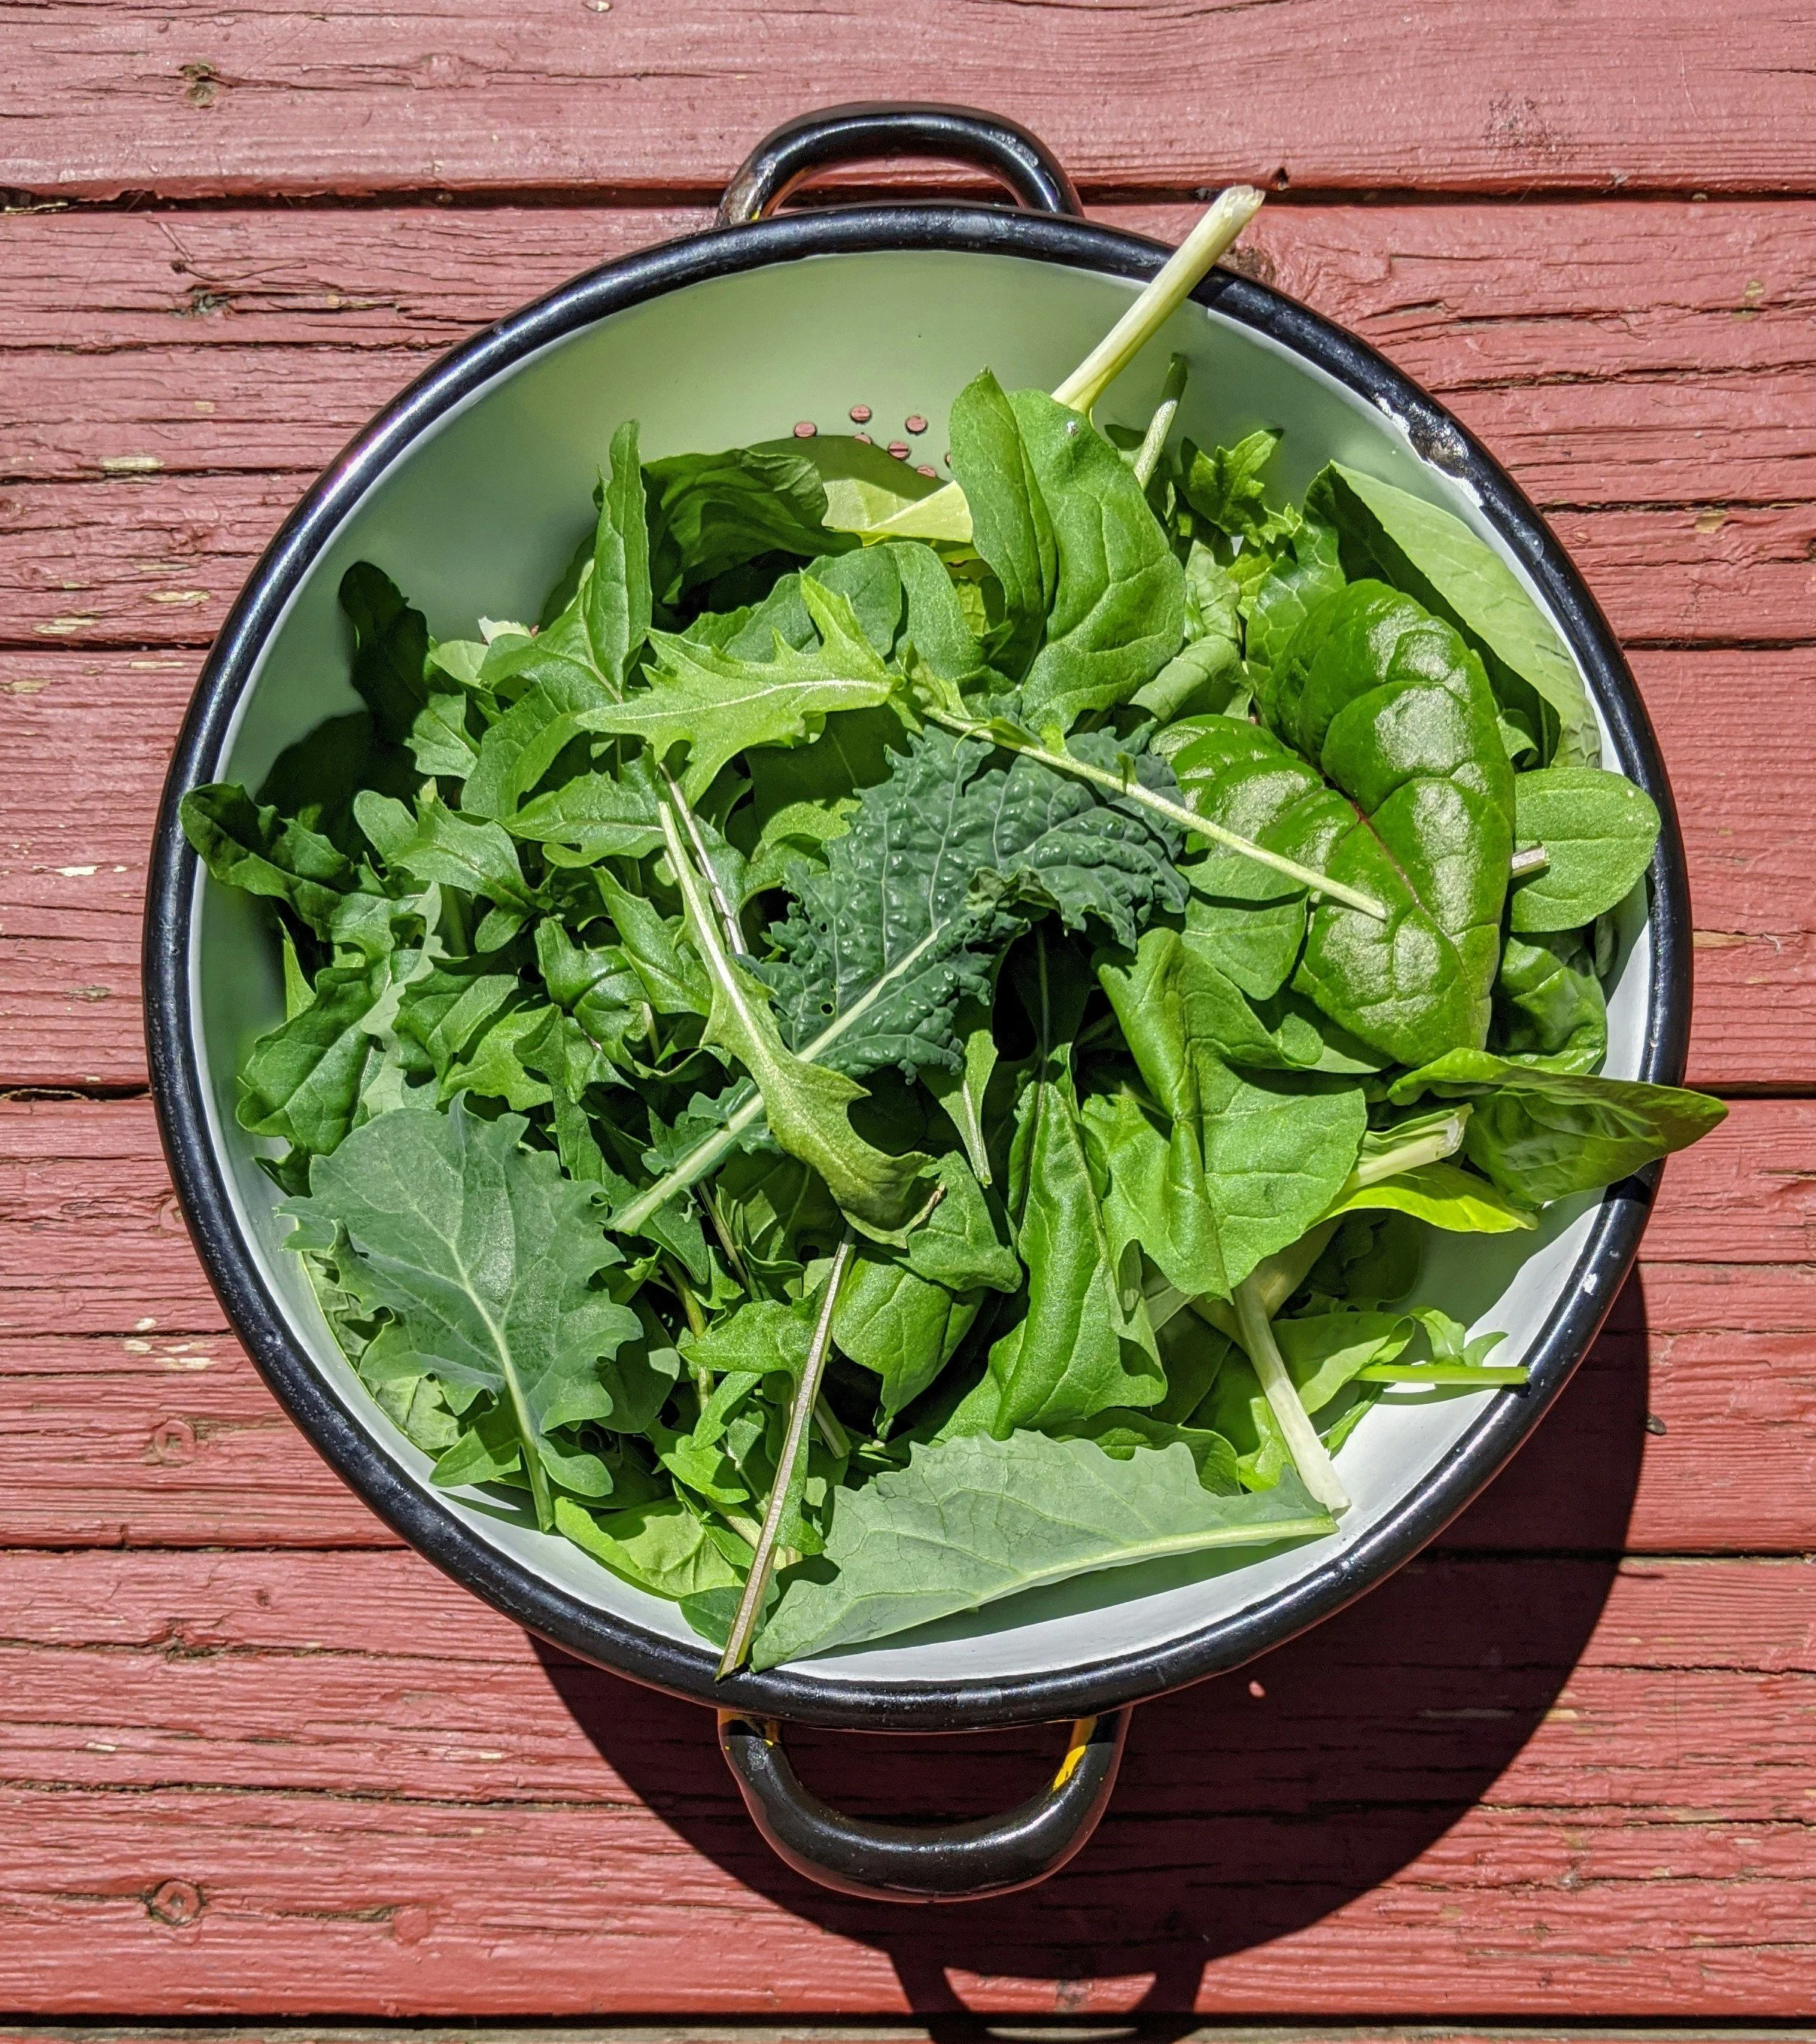
A colander full of winter greens, simple, nourishing and proof that the garden can keep giving even in the colder months.
-
We will focus on:
Compost systems: turning waste into fertility
Soil health in more depth
Garlic planting
-
Ali Soper: seasonal gardening advice via Your Garden Coach podcast and consultations
Erin Allison Harvest Homegrown: market garden, gardening guides and home veggie garden courses/workshops(Hawea Flat, Wanaka) (on Facebook)
Dr Compost: composting made easy as well as gardening education: online info and in-person workshops available in Upper Clutha and Whakatipu.
Community gardens: Grow Wanaka, Hawea Food Forest, The Templeton Park Community Orchard (Albert Town Wānaka),and Queenstown Harvest Community Gardenworking bees.
Pantry and food waste reduction tips: Dishes with Del
Foraging walks are offered on a regular basis by some of our talented local herbalists such as:
Loran Verpillot from Herbal Culture (Upper Clutha)
Rochana Moon from Wise Moon Wellness (Upper Clutha)
-
Home / small scale regenerative growing:
The Edible Backyard by Kath Irvine (NZ). Excellent for practical, year round home food production in New Zealand conditions, with a strong focus on seasonal growing, resilience, and low input systems. She takes a very holistic approach and the advice is applicable to a wide range of zones. It is focused on getting the foundations right, with simple explanations and practical, reader friendly guidance.
Square Food Gardening 4th Edition. This is a book that often resonates with new gardeners with small spaces to grow food. There is a metric version too (One Square Meter garden)
The Abundant Garden by Nova and Yotam Kay (NZ). Excellent for productive household food systems, abundance, seasonality, and low input methods.
NZ Gardener Magazine is a great resource too.
Our libraries have plenty of books and magazines about gardening!
Seed sovereignty / resilience:
Koanga Institute resources and publications (NZ): Save Your Own Seeds
Foraging:
Foraging New Zealand by Peter Langland
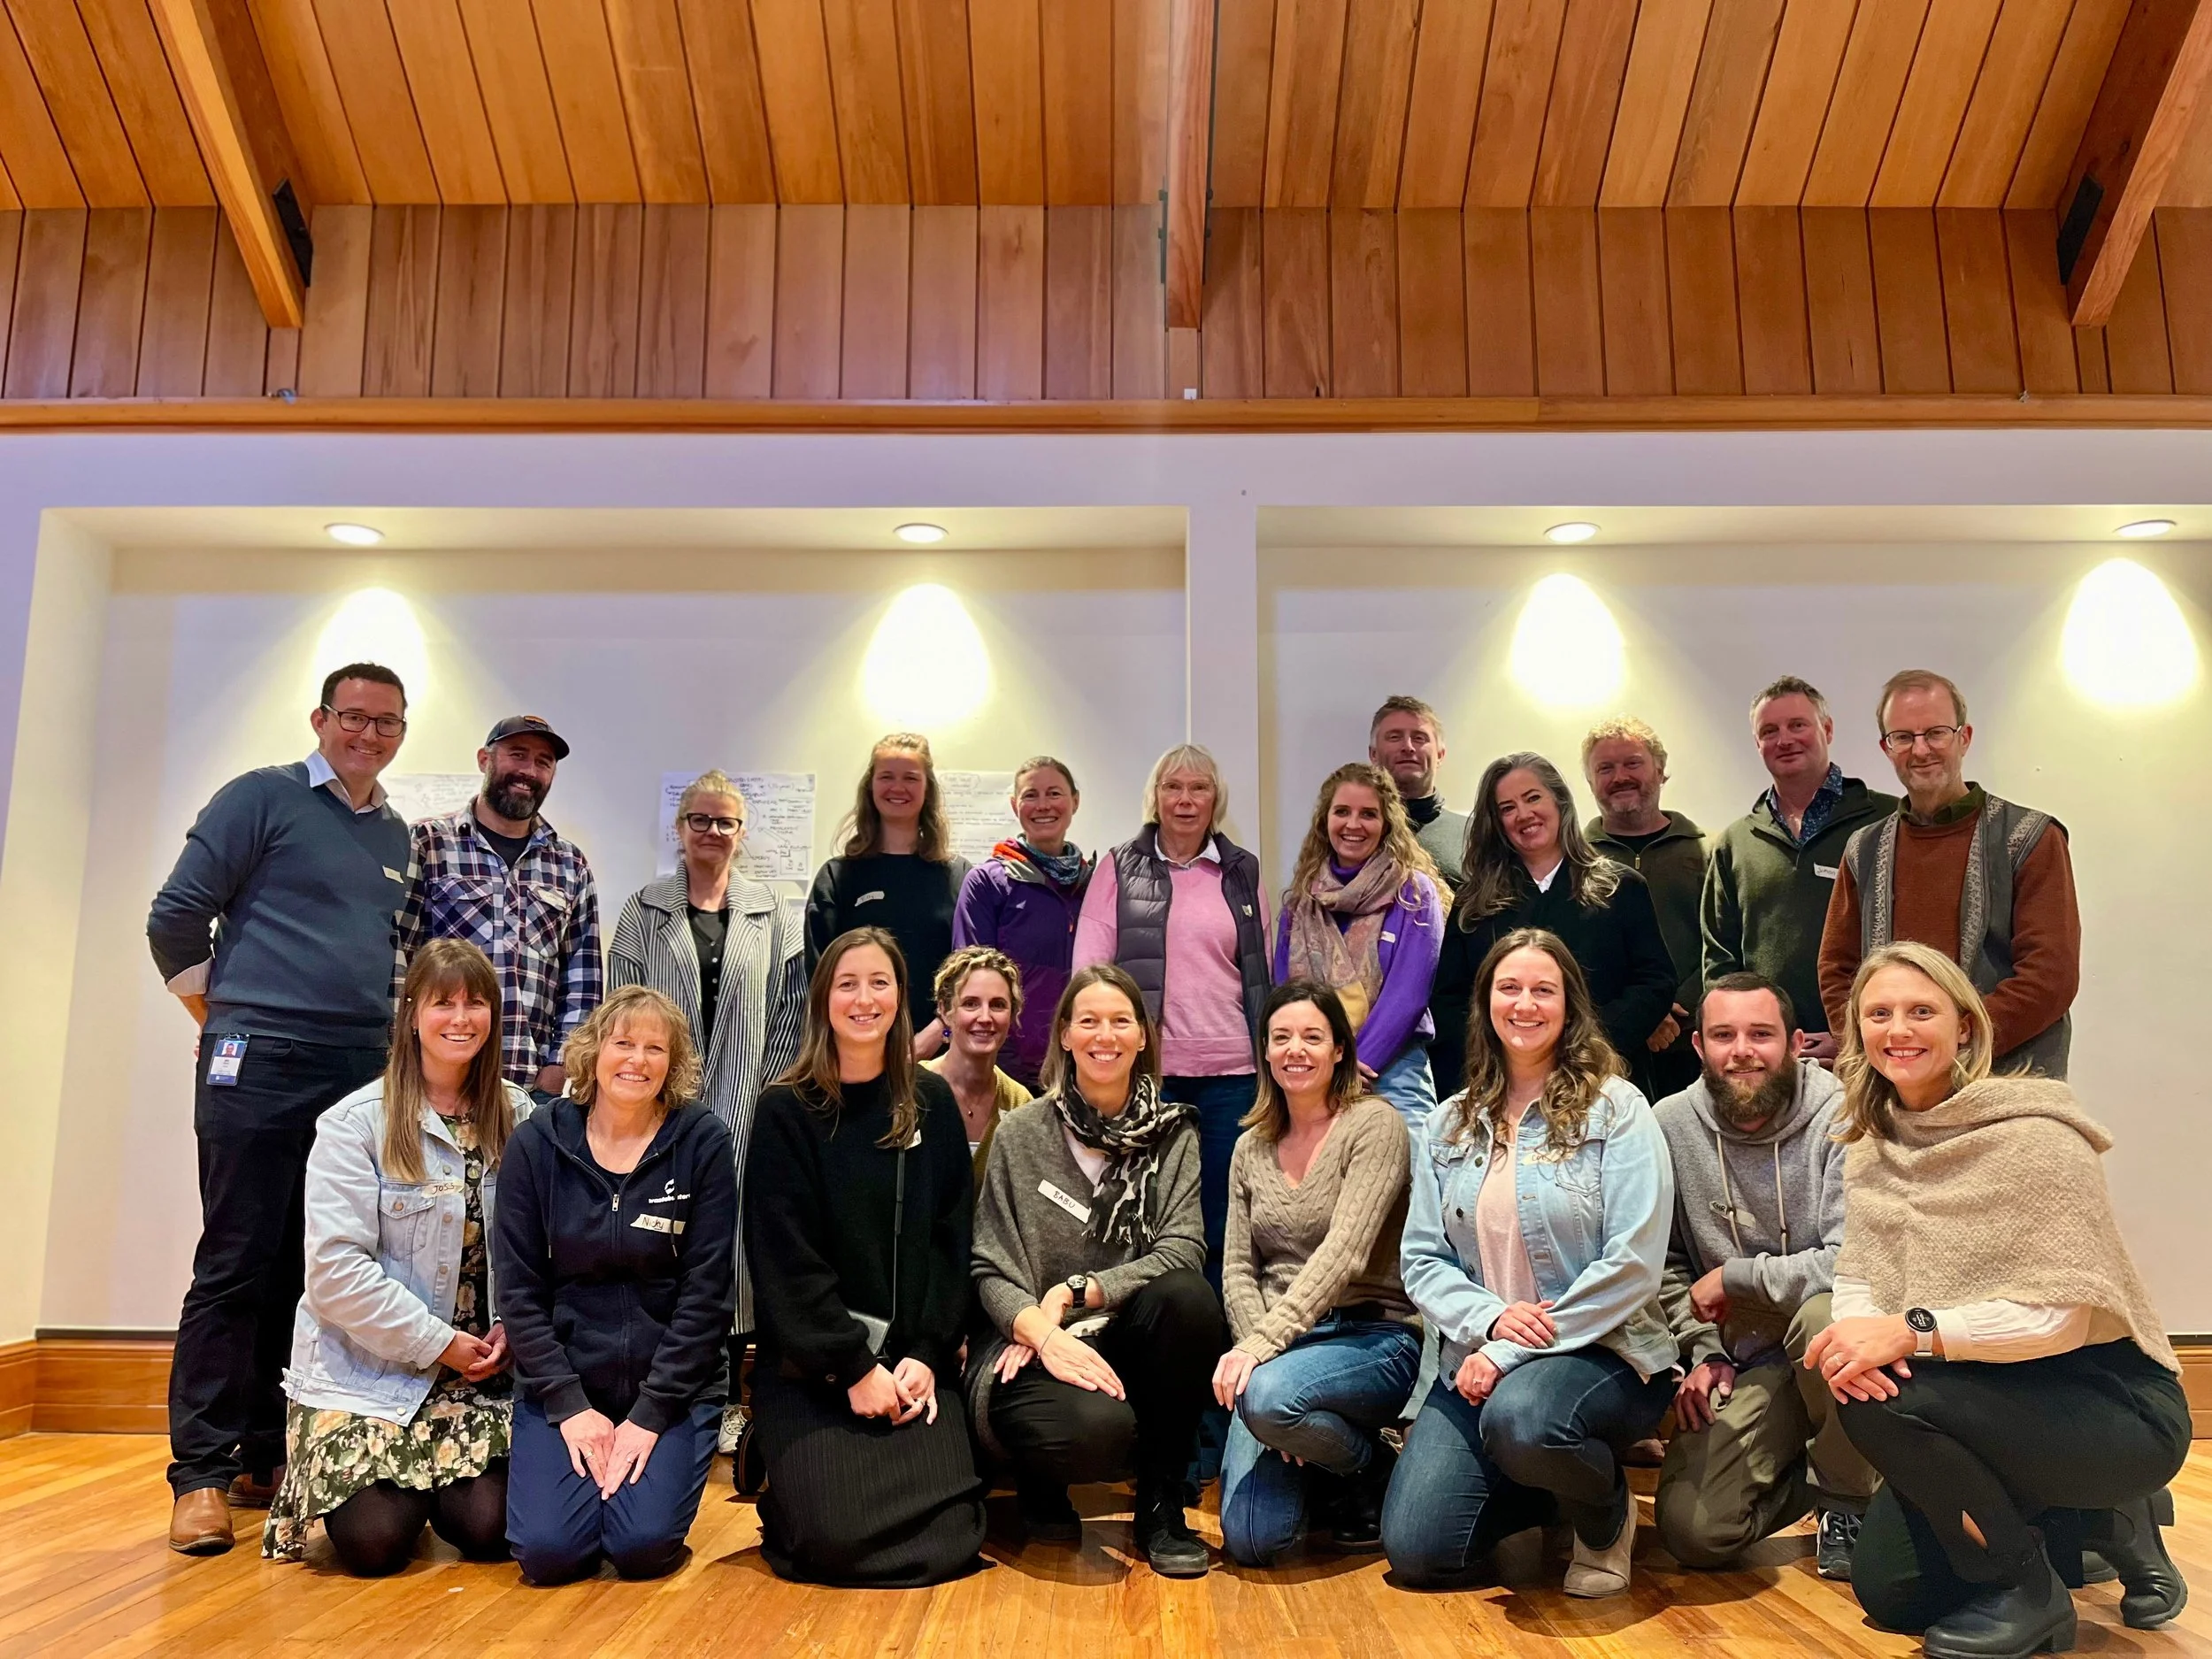
The Southern Lakes Kai Collective at its inception in September 2024. It has since grown to 45 members from across the district and the wider food ecosystem.
-
The Southern Lakes Kai Collective is a think tank focused on increasing the district’s food resilience. The food growers generously contributing their time and knowledge to this gardening blog are:
Adele (Del) Holland - Dishes with Del : recipes, food preserving, avoiding food waste
Ali Soper - Your Garden Coach : podcast & food garden consultations
Ben Elms - Dr.Compost (Wastebusters): compost systems, soil health, gardening workshops, etc.
Brendan Lopez - Welcome Rock Gardens (bio intensive market garden)
Bruce Thurlow - Otago Polytechnic
Diana Manson - Hawea Food Forest : Community Garden
Emberly Wetherall - Grow Wānaka : Community Garden
Erin Allison - harvesthomegrown.co.nz : Homegrown organic produce and seasonal Veggie Growing Workshops for home gardeners.
Louise Wilson - Forager & home gardener
Michael Sly - Waste to Wilderness: composting and microbial soil systems
Mickey Dahlstrom - Millbrook resort food garden
Neal McAloon - Queenstown Harvest Community Garden and Bee The Change
Sydney Telfer - Aspiring market gardener / regenerative agriculture
Theo Richard - The Sherwood restaurant food gardens
-
We welcome your feedback and invite you to use this form to share your thoughts, ideas, and suggestions
More about the Southern Lakes Kai Collective mahi here.