
Growing Food in the Southern Lakes - October: It's all on (but watch the frost)
Growing food in the Southern Lakes is a shared effort. Sixteen local growers, foragers, and food-lovers from SLKC are pooling what actually works in our climate, so beginners can start with confidence.
Whether you are renting, working with pots or planter boxes, or growing on a small patch of land, now is the time to begin.
This monthly blog brings together practical, seasonal knowledge from across the region to help households grow food, forage, and build up their pantry for the year ahead. Each edition is written for the beginner in mind, with guidance that's clear, practical, and easy to put into action.
This October edition covers the basics of succession sowing for a continuous harvest, seed potato planting, frost protection for tender seedlings through Central Otago's late spring frosts, a look at who's living in your garden - from helpful predators to pests worth watching - foraging the humble dandelion root to flower, and finally a weed pesto recipe.
Brought to you by the Southern Lakes Kai Collective
〰️
Brought to you by the Southern Lakes Kai Collective 〰️
Read the full blog below by clicking the + under each section, or download this October edition as a free PDF guide to read in your own time.
Your October challenge!
Choose one… or more!
Read up on Succession Sowing
Know what to do for late frosts
Plant out your frost resistant seedlings
Direct seed outdoors things like peas, carrots, beetroot, radish, coriander and spring greens (rocket, mustard greens, mizuna)
Sow a few hot-weather seeds in punnets/trays indoors
Forage for dandelion
Make your home made wild pesto
Attend one of the many gardening workshops and foraging walks happening this October (see our event calendar on this page)
Book your ticket for the Wao Food Resilience Day tour in Queenstown on October 30th and learn about our local food system
-
Contributed by Erin Allison at Harvest Homegrown
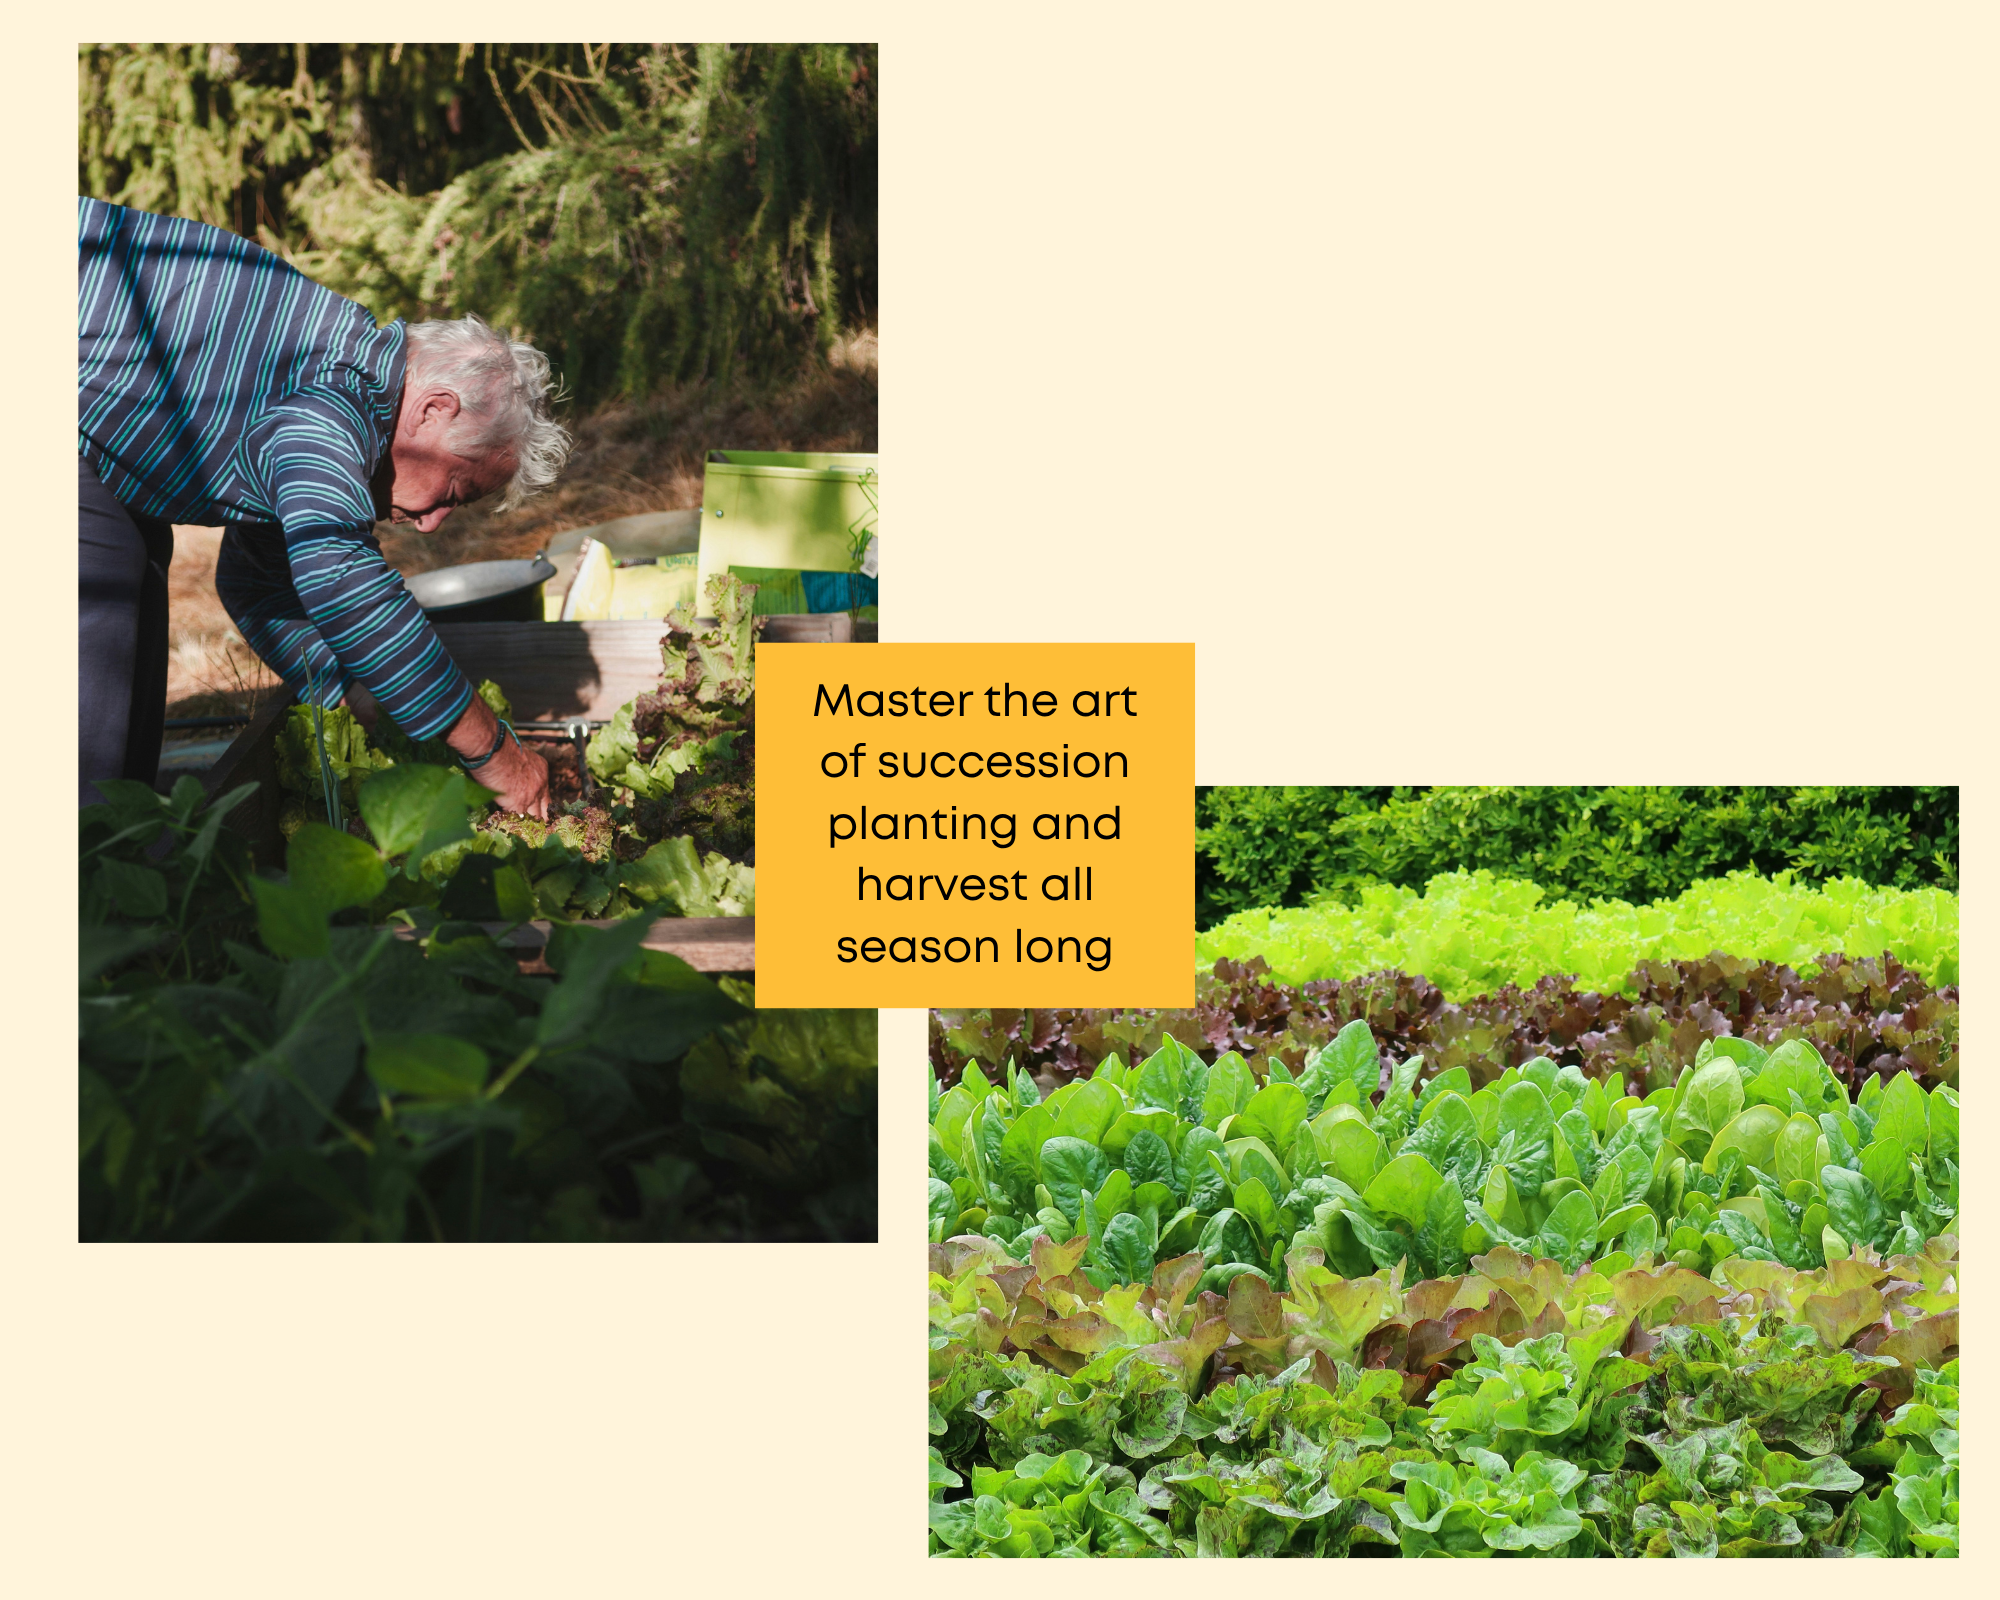
Succession Planting is the key to having an abundant harvest all season long. Often we get really excited and plant and seed with a bang in spring, and then things wane as we get further into the season. Instead we want to try and plant a crop so it becomes ready when the previous crop finishes. Bear in mind you may not want to eat certain crops all season long, the main aim is to be planting a little of a few things regularly, not planting your whole garden all at once and expecting it to last all season long, this will also help avoid waste so you don’t have gluts of produce.
A few key things to think about:
Generally if a vegetable has a short “Days to Harvest”, that is, it’s ready to eat quickly, then the harvest window will be short also. Eg Radishes and Rocket can be ready as quick as 20 days when our summer days are at their longest, but they will also go to seed and be past their best eating within a week.
Dwarf Peas, which take approximately 60 days to be ready to harvest, will crop abundantly for 1-2 weeks and then be finished, versus a Climbing Pea, which will take around 90 days to harvest, and will crop over 3-4 weeks.
Another example - a bush or container variety of Tomato will fruit quickly but over a shorter period of time, than an indeterminate Tomato that will take longer to fruit, but will continue until it gets frosted off some time in Autumn.
So keeping this general rule in mind, those veggies that have quick Days to Harvest, will need to be planted in succession more often.
Succession planting can be done using a mix of both sowing seed and planting seedlings, when done really well any gaps in your garden should be immediately filled with new seedlings or emerging seeds. An example I use often: you have some lettuce which you know is starting to head up and go to seed, you think you might get another week or 2 of harvest from it, the small amount of open soil between those lettuces is the prime spot to seed carrots or beetroot, it will be shaded and moist, making germination easier. As soon as those seeds have germinated they will need full sun, so cut out the lettuce at ground level (leaving the roots in the ground to feed the soil) and replace with seedlings of Pak Choi. Whilst the seeded carrots/beets are slowly getting bigger, the Pak Choi will grow quickly to fill the bare soil, and be ready to harvest. When ready, harvest by cutting it out at ground level, again leaving the roots in the ground, at which time the carrots/beets will be ready to take up all that space.
Have a favourite crop that you want available all the time? Don't wait until the current crop is finished to plant more. When a crop is approximately half-way through their growth cycle, it’s time to get the next succession planted, this will mean it’s ready when the previous crop finishes.
There will be some crops that, because they take so long to harvest, and require specific growing conditions, you can only plant once in a season. Eg: Garlic, Tomatoes, Pumpkins, Corn, Parsnips, Leeks. Many of these crops can be grown in abundance when the time is right, if you have space, and then preserved or stored for later eating.
Some suggested intervals for succession planting:
Quick Veggies/Greens (eg. Rocket, Spinach, Mesclun leaves, Asian greens, Radish, Lettuce) - Sow/plant every 2-3 weeks
Carrots/Beets - Sow once a month
Kale/Chard/Silverbeet - once for summer harvest, once for winter harvest
Broccoli, Cabbage - every 2 months
Dwarf Peas/Beans - every month, Climbing Peas/Beans - every 2 months
Melons - 2-3 times during summer
Full Summer crops - Indeterminate Tomatoes, Cucumbers, Chillies, Capsicum, Zucchini, Corn, Pumpkin, Eggplant - plant only once, after the last frost.
New Potatoes - plant a few every month for a continuous supply (and see Mikey’s tips to get new potatoes just in time for Christmas in the next section).
Resources:
Local workshops: Harvest Homegrown holds a range of veggie growing workshops throughout the growing season.
Harvest Homegrown also published PDF documents with all the details and tables of what to plant when and how in our climate! In particular, you’ll want to get your hands on the ‘Interplanting For High Yields & Healthy Soil’ PDF ($12)
Local podcast: The Your Garden Coach podcast also guides you month by month on what to do in your Southern Lakes garden! And if you sign up to their newsletter, you’ll receive seasonal tips right in your inbox.
Local videos: Dig in with Del - follow Del’s journey as she transforms her garden into her pantry. From building garden beds and filling them with soil and compost, to choosing seeds and getting everything planted, join her through a series of fun, practical videos as she grows her own food from the ground up.
Kings seeds microgreens and sprouts guide.
TIP: By the way, did you know that the Wānaka library has a seed library? They only ask you to bring some seeds back at the end of the season for other people to use.
-
Contributed by Mikey from Millbrook Resort garden
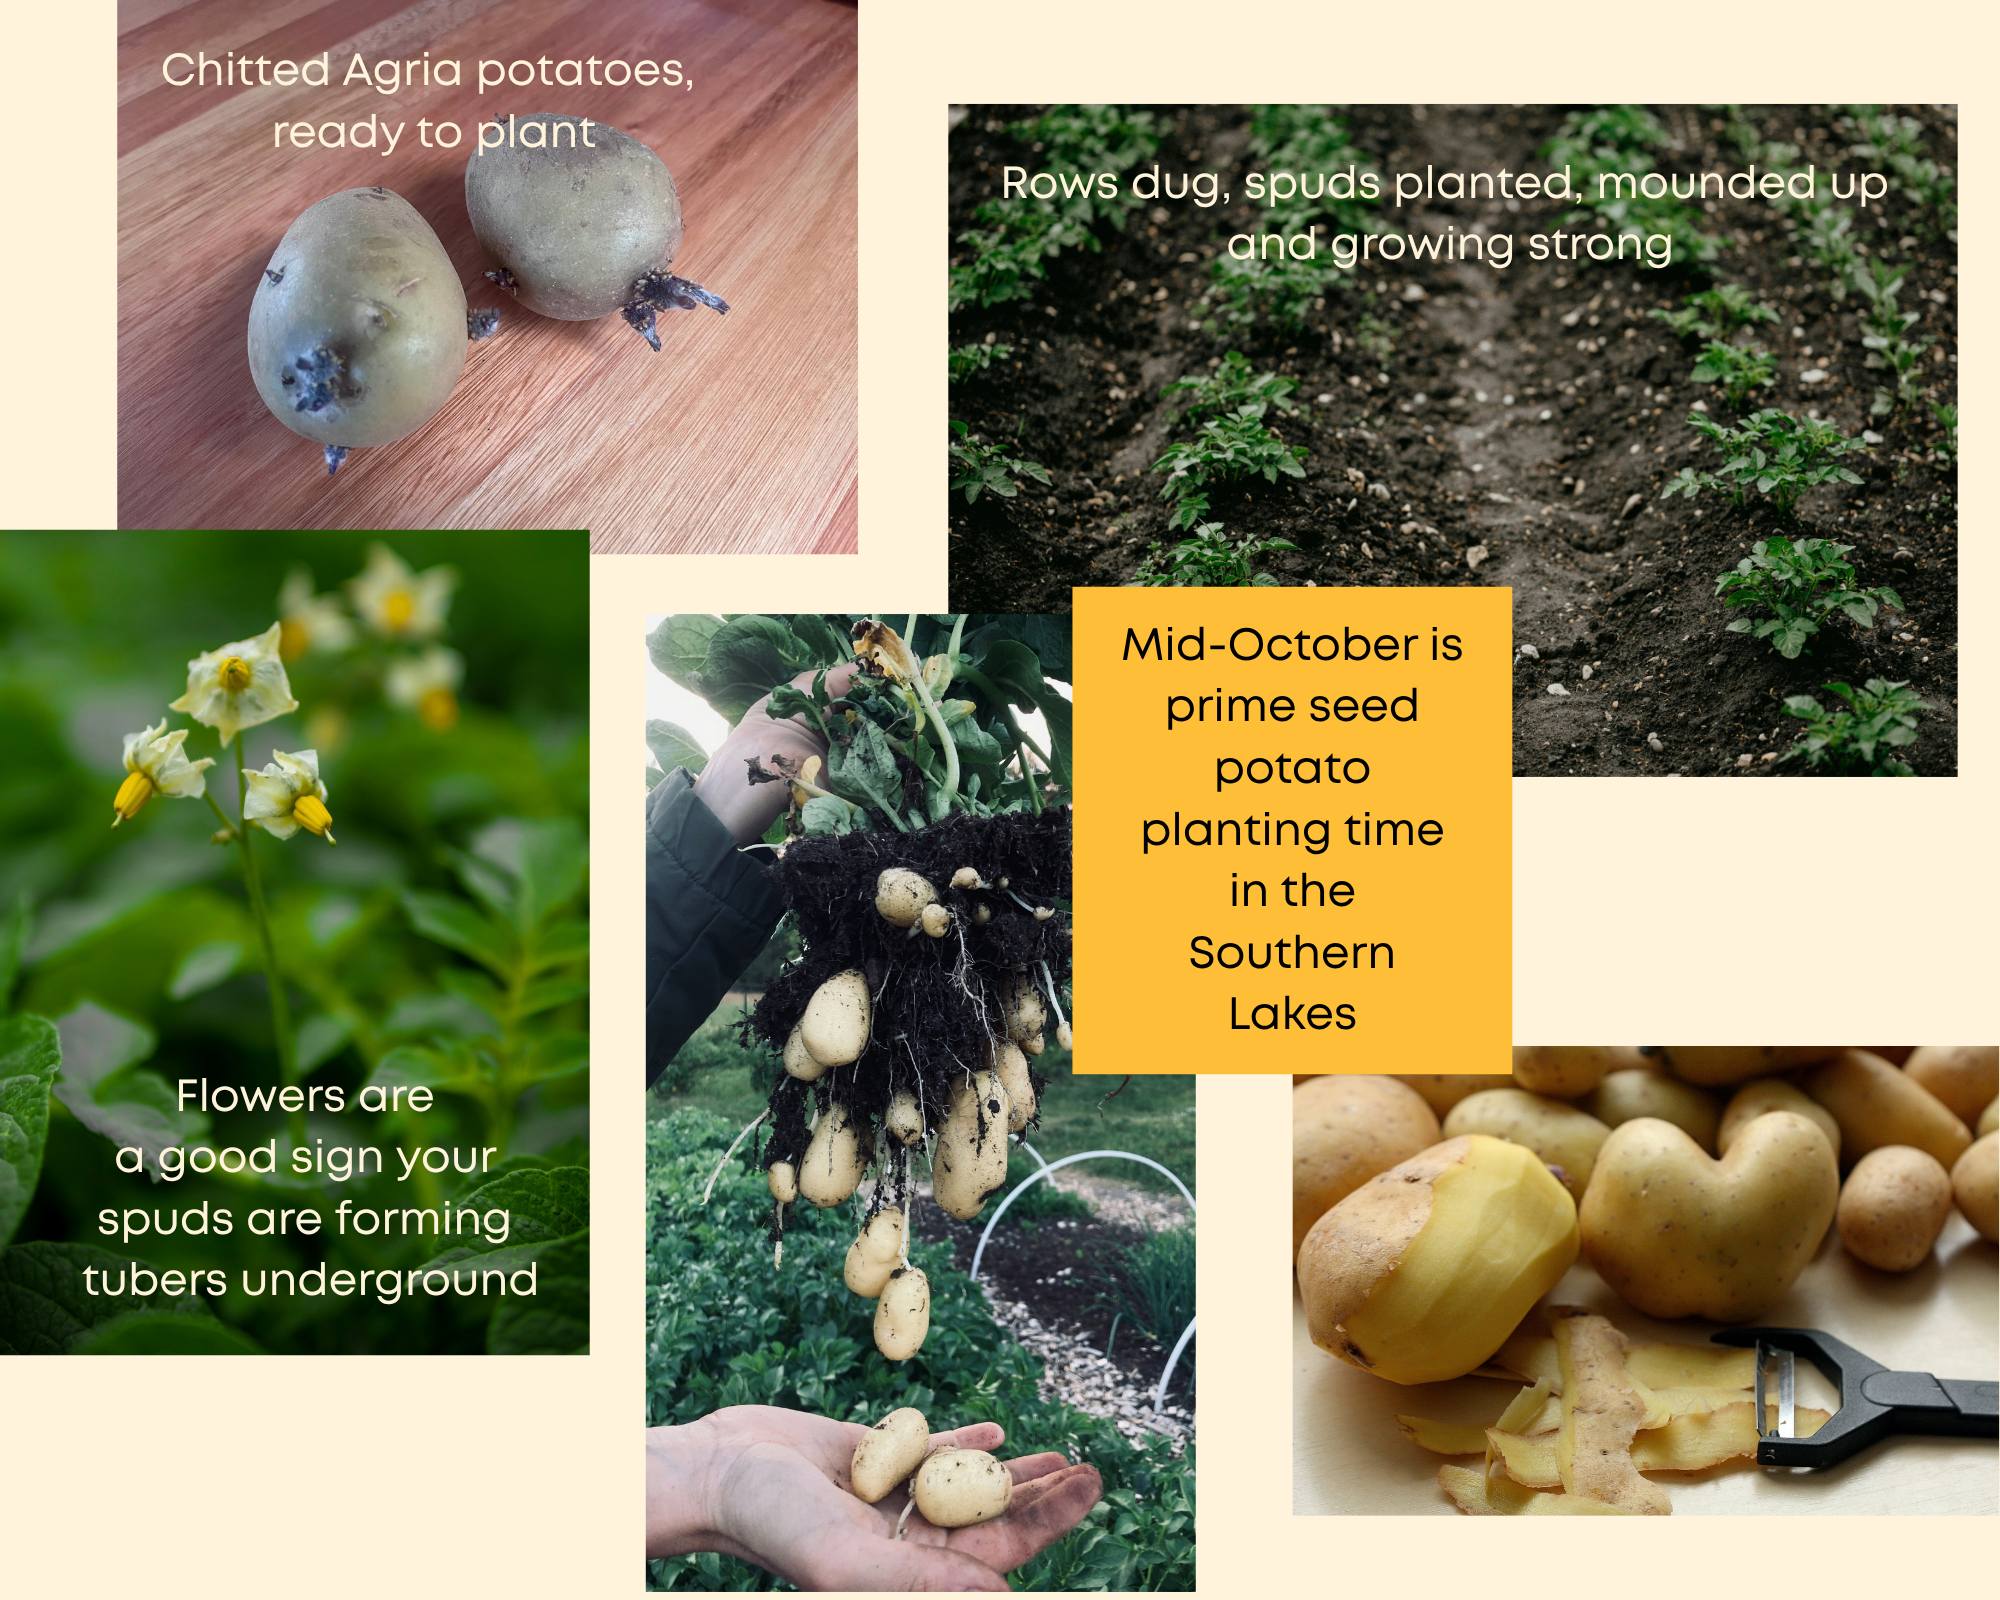
Spring has sprung and it’s time to get those seed potatoes in some soil! For most areas in our region anytime in mid-October is generally fine for potato planting, although the risk of frost still lingers during those late cold snaps. Here are some guidelines for planting and protecting your garden spuds this spring:
Where to Plant
Despite having wildly different growing traits, potatoes are actually in the Solanaceae family, which is the same as tomatoes and capsicums. As such, potatoes grow best in areas that receive full sun with well-draining soil. So pick a nice sunny spot that won’t get too soggy, as oversaturated seed potatoes can potentially rot in the ground.
How to Plant
Before you get them in the ground, give your seed potatoes a good once-over to ensure that they show no signs of damage and the chits have started to sprout. If you’re looking to stretch your dollars and have some larger seed potatoes, you can even cut them into smaller chunks that will grow just fine as long as they have 2-3 chits showing. Potatoes are an exceptionally resilient and low maintenance crop that can be grown in a few different ways, here are two that work the best in my experience:
Grow Bag/Container Method: If you want to save precious space in your garden beds, potatoes can be grown in their own separate container. Generally any container that has a minimum volume of 20 litres and has sufficient drainage will serve just fine as a vessel for your spuds, but the bigger the better. Grow bags sold at garden centres (or those leftover from nursery purchases), large pots, buckets, or even crates lined with mesh can work. To get started, you’ll want to get a good base layer of 15-25cm potting soil in your container. For smaller containers (around 20 litre), place 1-2 spuds on top of your base layer, and for larger containers (around 40-50 litres), 3-4 spuds can be used. Aim to space your potatoes at least 15-20cm apart. Then, simply cover your seed potatoes with an additional 15cm of soil and water well!
Trench Method: The traditional way to grow potatoes requires just a bit more space but is still quite simple. To start, dig a small trench about 15cm deep, making sure to keep your soil just to the side of the trench for easy access. It’s not a bad idea to add a small bit of compost in your trench to get those spuds on their way. Next, dig small potato-sized holes an additional 10-15cm deep and about 20-30cm apart depending on your preferred size; the closer together you plant them the smaller your spuds will be. Finally, pop your potatoes into their holes and cover them with soil up to the base level of your trench, leaving that additional 15cm of trench unfilled. As always, water them in!
Mounding, Mulching and Protecting.
As your potatoes start to sprout green foliage, you need to mound up the soil around the plant. This allows the vegetative part of the plant to put out additional tubers, meaning more spuds for you! Using the container method, simply add more soil to your container as the plant grows up, always leaving at least 10cm of foliage poking out above the soil line. If you’ve opted for the trench method, just backfill the trench with the soil you’ve put aside, again always leaving at least 10cm of foliage above the soil. This can be done every few weeks until harvest. Simple!
Potatoes love mulch! Adding a good few inches of garden mulch such as pea straw is a great way to keep both your soil and potato sprouts warm, lock in moisture, and smother out weeds. In springtime, it is always advised to protect your more sensitive plants with some sort of frost cloth or row cover. While they may withstand colder temperatures, the above-ground part of your potato plant is not frost hardy.
As with any new seedling, water as needed and feed the plant every few weeks!
BONUS Christmas Potatoes
If you’re looking to show off some of your hard mahi in the garden this holiday season, there’s no better way than serving up some fresh spuds for your Christmas Dinner. In order to make this happen, you’ll want to get your seed potatoes in the ground as soon as possible, but make sure to give your plants some extra love and protection if you’re feeling ambitious.
As we mentioned in our August edition, cultivars that have been selected for quick growth are known as “early” or “new” potatoes, although most potatoes can simply be harvested earlier for the same purpose. So, once you have settled on a cultivar of your choosing, you need only change a couple of minor planting details to ensure you get those delicious tender little spuds in time for silly season.
In short, you can simply plant your early potato seeds closer together, aiming for that 15cm spacing rather than 20-30cm for long season varieties. If you are going for the trench method, you need only skip the step of the additional holes deeper in your trench, and simply plant the potatoes 15cm deep and re-cover with soil. You may choose to do some additional mounding and mulching around the foliage if you’d like. For the containers, you can add one or two more seed potatoes per container to get an abundance of smaller spuds.
These early potatoes should take anywhere from 70-90 days depending on your cultivar. The best sign that your seed potatoes have begun producing tubers is a nice green foliar canopy filled with little flowers (although a select few varieties do not flower much). These spuds are best served boiled or steamed, as they haven’t yet developed the starches necessary for mashing or roasting. When it’s time to harvest, simply dig them up and enjoy!
-
What's on for October
As covered in Erin's last month's piece, it's time to plant frost-hardy seedlings (broccoli, cabbage, kale, silverbeet) into the ground, and sow warm-loving summer crops (tomatoes, courgettes and the like) indoors in trays - they'll stay there until mid-November, once most hard frosts are behind us. Keen to plant tender crops out earlier? You'll need solid frost protection on hand, because late frosts will happen.
Tip: if you aren’t successful growing your own tomato plants or herbs from seed, Frog Song Farm hosts a plant sale every year on Labour Weekend at their farm, 193 Pukerangi Rd near Luggate.
October's also good for direct seeding outdoors - peas, broad beans, carrots, turnip, beetroot, radish, and spring greens like spinach, rocket, mizuna, mibuna, mustard greens and coriander all handle an early sow well. Check soil temperature against what each seed needs, and keep the bed covered and moist - clear plastic or frost cloth may still be needed to protect emerging seedlings.
And don't forget your spuds - mid-October is prime seed potato planting time. See Mikey's guide above for the full how-to.
Don't forget to stay frost aware
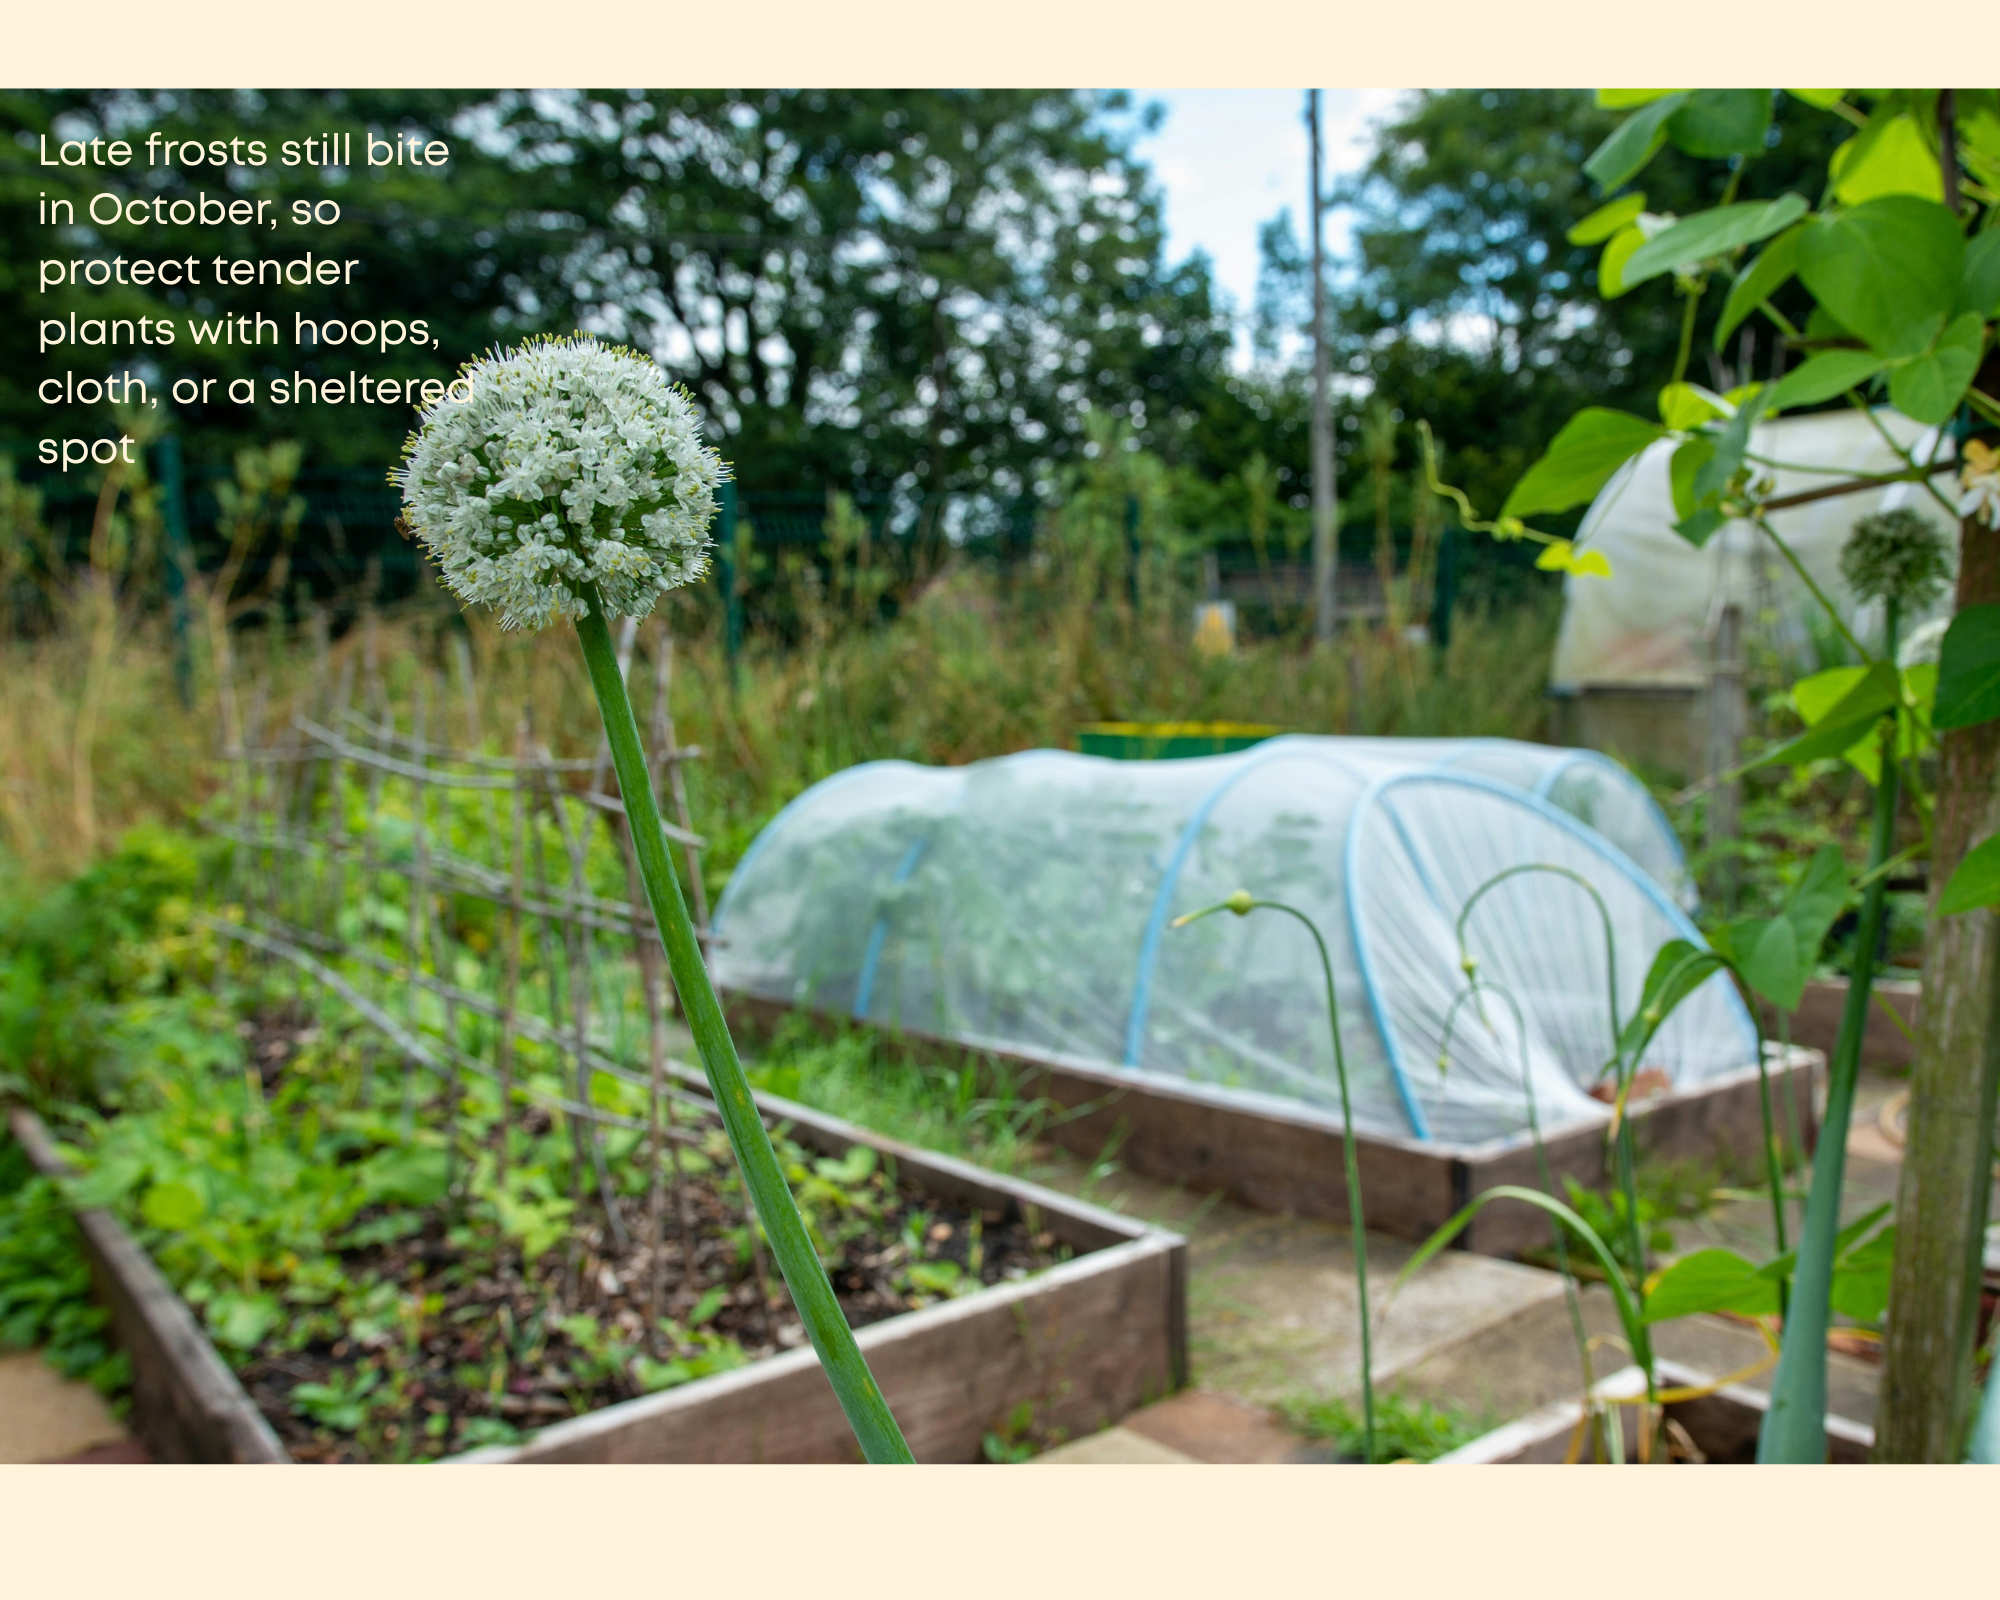
Frost is still very much part of the picture as we head toward planting tender seedlings out from mid-November. If you're growing outdoors without a tunnel or glasshouse, you need a frost plan: look for microclimates in your garden (north- and west-facing, out of the wind, some thermal mass nearby), and have frost cloth ready for at least the first month or two after planting. Cold frames and hoops are another good way to get tender crops started early and protected through November and December.
Even your spuds aren't off the hook - if you've got potatoes in already, keep an eye out for the first foliage poking through, and be ready to cover them too if it shows before frost risk has passed.
Get your frost cloth sorted now, before you need it - even an old sheet or two will do in a pinch if you haven't organised hoops or cloth. Check the forecast, and cover up on chilly nights.
Full gear recommendations are in Ben Elms’ Tunnel Houses article from last month - worth revisiting before you plant out.
-
Contributed by Sydney Telfer - Aspiring market gardener in Wānaka / regenerative agriculture.
About me: I have recently returned to Wānaka after completing a PgDip in Regenerative Agriculture and am learning to grow vegetables through the lens of a market gardener, with a soil- and ecosystem-health-focused approach. I am particularly interested in the connection between healthy soil and nutrient-dense food. A lot of my gardening is currently trial and error; I tend to try things ‘my way’ and refine from there. After working in corporate, I find a lot of hope and purpose in focusing on localising food systems and reconnecting with the knowledge my great-grandparents had in abundance.
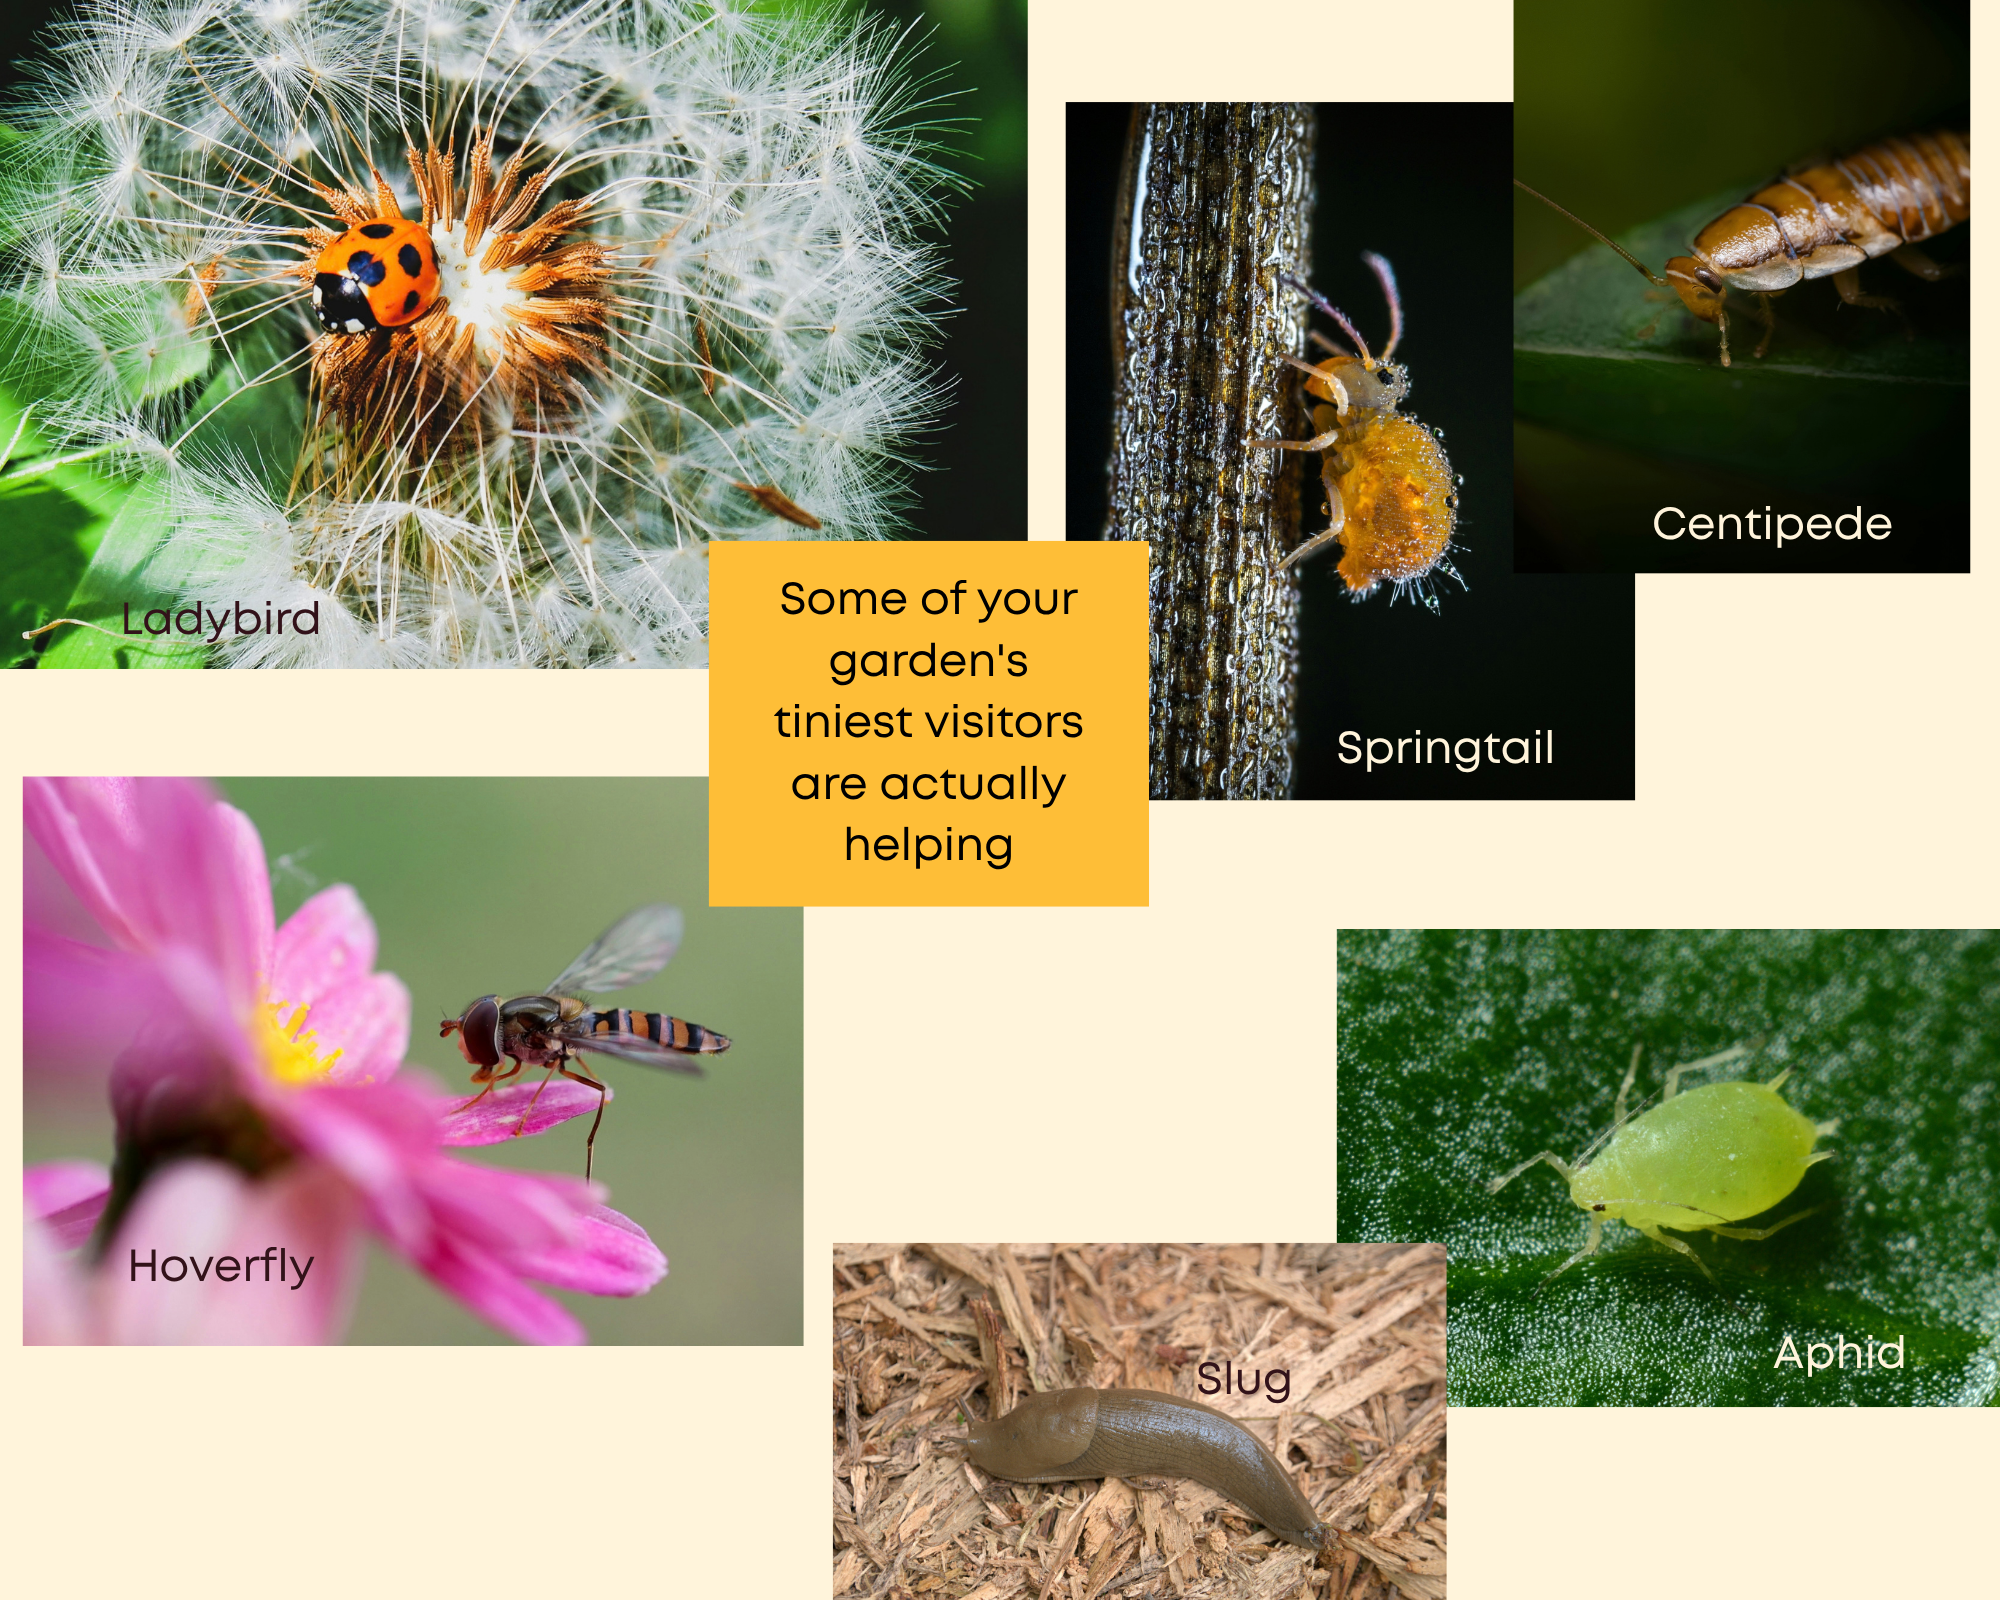
A healthy garden should have things crawling, jumping, flying, eating and being eaten in it. Not every creepy-crawly is a pest, and seeing something you don’t recognise isn’t necessarily a reason to squish it or reach for the spray.
As the garden wakes up for spring, take a closer look at who is living there – and what job they might be doing.
Springtails – soil chefs
Coming into warmer seasons, you’ve likely got organic matter around your garden – compost, leaves, manure or mulch. Underneath it is a whole community helping break that material down and cycle nutrients through the soil.
One tiny member of that crew is the springtail. At first glance they can look slightly alarming: little white things bouncing around your seedlings. Look closer and they’ve got tiny legs, antennae and, potentially, quite a cute face.
Springtails are common in damp soil, leaf litter and organic matter. I find them in my seedling trays and, if the plants look healthy, I leave them there or tip them into the garden when planting out. (View the large variety of springtails here).
The takeaway: lots of tiny creatures in your soil does not automatically mean a pest problem. Observe first.
Pests and predators – an inseparable dynamic
Predators help keep other populations in check, but they also need something to eat. A few aphids, caterpillars or slugs are not necessarily a disaster if your plants are coping and predators are around.
A pest becomes a problem when its numbers or feeding cause an unacceptable level of damage. Rather than reacting to the first hole in a leaf, watch what is happening.
Broad-spectrum insecticides can also kill predators and other beneficial insects along with the pest you’re targeting. If you can hand-pick, trap or tolerate a little damage instead, start there.
Centipedes – your ancient ground patrol
Centipedes are a perfect example of something that triggers a visceral “squish it” response but is actually useful.
They are generalist predators living in soil, mulch and leaf litter, hunting invertebrates including small slugs, fly larvae and other insect larvae.
I wouldn’t suggest picking them up – they can bite if seriously bothered – but if you uncover one, let it carry on with its day. Leaf litter, mulch, woodchips and rocks give ground predators somewhere to live.
Looking creepy isn’t a good enough reason to kill something before you know what it is.
Aphids – watch before you wage war
Aphids are tiny, soft-bodied insects that suck sap from plants. As the weather warms through spring, check fresh growing tips and the undersides of leaves, particularly on brassicas. They often gather in clusters and can be green, grey or black.
A few aphids aren’t necessarily bad news. They’re food for ladybirds, hoverfly larvae, lacewings and other predators. Before intervening, look closely and see who else has arrived for dinner.
If numbers are building or new growth is becoming distorted, start simple: squish small colonies or knock them off with a firm spray of water. Check again over the next few days and give your predators a chance to catch up.
Slugs – when something really does become a pest
Then there’s the notorious slug. They love damp conditions and soft young growth – usually the exact seedling you’ve carefully nursed for weeks. Mine seem particularly enthusiastic about brassicas.
Even slugs have a place in the system. They help process organic matter and provide food for centipedes, ground beetles and birds. The aim doesn’t need to be zero slugs; it’s stopping them from destroying vulnerable plants.
My first strategy is getting seedlings reasonably large before planting out. Then control numbers where needed. Dusk hunting works. Beer or yeast traps can work if sunk roughly to soil level, and a board or piece of pipe can encourage slugs to shelter underneath during the day so you can remove them. Once plants are robust enough, opening them up to blackbirds can help too.
A few holes in a leaf are fine by me. A whole seedling disappearing overnight is when I intervene.
Pollinators – and a little crossover
Bees are the obvious pollinators, but keep an eye out for native solitary bees, hoverflies and tiny flower-visiting flies that are easy to overlook.
Hoverflies are particularly cool. Adults visit flowers for nectar and pollen, while the larvae of some species hunt aphids and small caterpillars. So that little “fly” around your flowers may be doing more than you think.
One of the simplest things you can do is keep something flowering for as much of the year as possible. I’ve had alyssum flowering through winter despite the frosts, and Kings Wildflower mix is awesome. I let some flowers self-seed and leave old stems standing for habitat.
Nectar is essentially an energy source, while pollen provides a range of nutrients. A succession of flowering plants means both are available for longer.
Think of it as Powerade and protein for your garden pals.
What can you actually do?
Give beneficial species somewhere to live. Mulch, leaf litter, rocks, groundcovers, hollow stems and a few slightly messy corners all create habitat.
Grow a diversity of flowers. Aim for different plants flowering at different times.
Accept a little imperfection. A healthy garden does not need perfectly untouched leaves.
Use the least disruptive control that works. Observe first, then hand-pick, squish, trap or use barriers before reaching for a broad treatment.
And most importantly: identify before you squish.
Gardens are complicated systems and I still find all the information overwhelming at times. You don’t need to know every insect you see. A few simple questions are enough:
Is it actually causing damage?
Could it be helping me?
What happens if I leave it alone?
Can I manage the problem without wiping everything else out?
The goal isn’t a bug-free garden. It’s a garden with enough diversity and balance that no one species gets to take over.
-
Low cost gardening tips
Save and swap seeds
Buy and share seeds (for example if you only need a handful of seed potatoes, share a whole bag with your friends/neighbours)
Grab a few seeds from your library! The Wānaka Library for example has a seed library - they only ask you to bring some seeds back at the end of the season for other people to use.
Ask your neighbours and friends to share perennial offcuts / clumps with you.
Collect free compost materials
Borrow gardening books from your local library
Share tools
Join community gardens
Join gardening clubs
Reuse materials creatively (keep in mind that ideally, you want non-toxic materials near the food you grow!): For example, look for pallets stamped HT (heat-treated) rather than MB (methyl bromide fumigated) - HT pallets are great for building raised garden beds. Many wineries and orchards regularly get rid of their old fruit nets - get in touch with them to see if they could give you some bits to re-use. Wastebusters has a 'garden' section where you can find treasures to reuse, plus secondhand pots, trays and tools worth a look.
Keep an eye on Facebook marketplace for deals or giveaways - cloche hoops, 100% wool carpet with a natural backing to suppress grass, seedling propagation equipment, irrigation material etc.
Use flattened cardboard as a free weed-suppressing layer under new garden beds
Learn about growing food successfully in our climate on Your Garden Coach podcast
Use Spring well!
In October:
Continue to observe the daylight hours your garden is now getting
Keep note of those late frost dates and zones in your garden
Have your frost cloth or cloches ready for when seedlings go outside
Start your warm crop seedlings indoors (tomatoes, capsicum, courgette and the like) ready to plant out once frost risk has passed - approx mid-Nov.
Read up on gardening (read our previous blogs or see our book tips below)
Take part in one of the many workshops offered by the local community gardens (check our event calendar here)
Join one of Erin's gardening workshops in Hawea Flat
Listen to Your Garden Coach older & new episodes, in preparation for the coming months
-
Contributed by Loran Verpillot of Herbal Culture
Forage now: Dandelion, Tawao, Taraxacum officinale
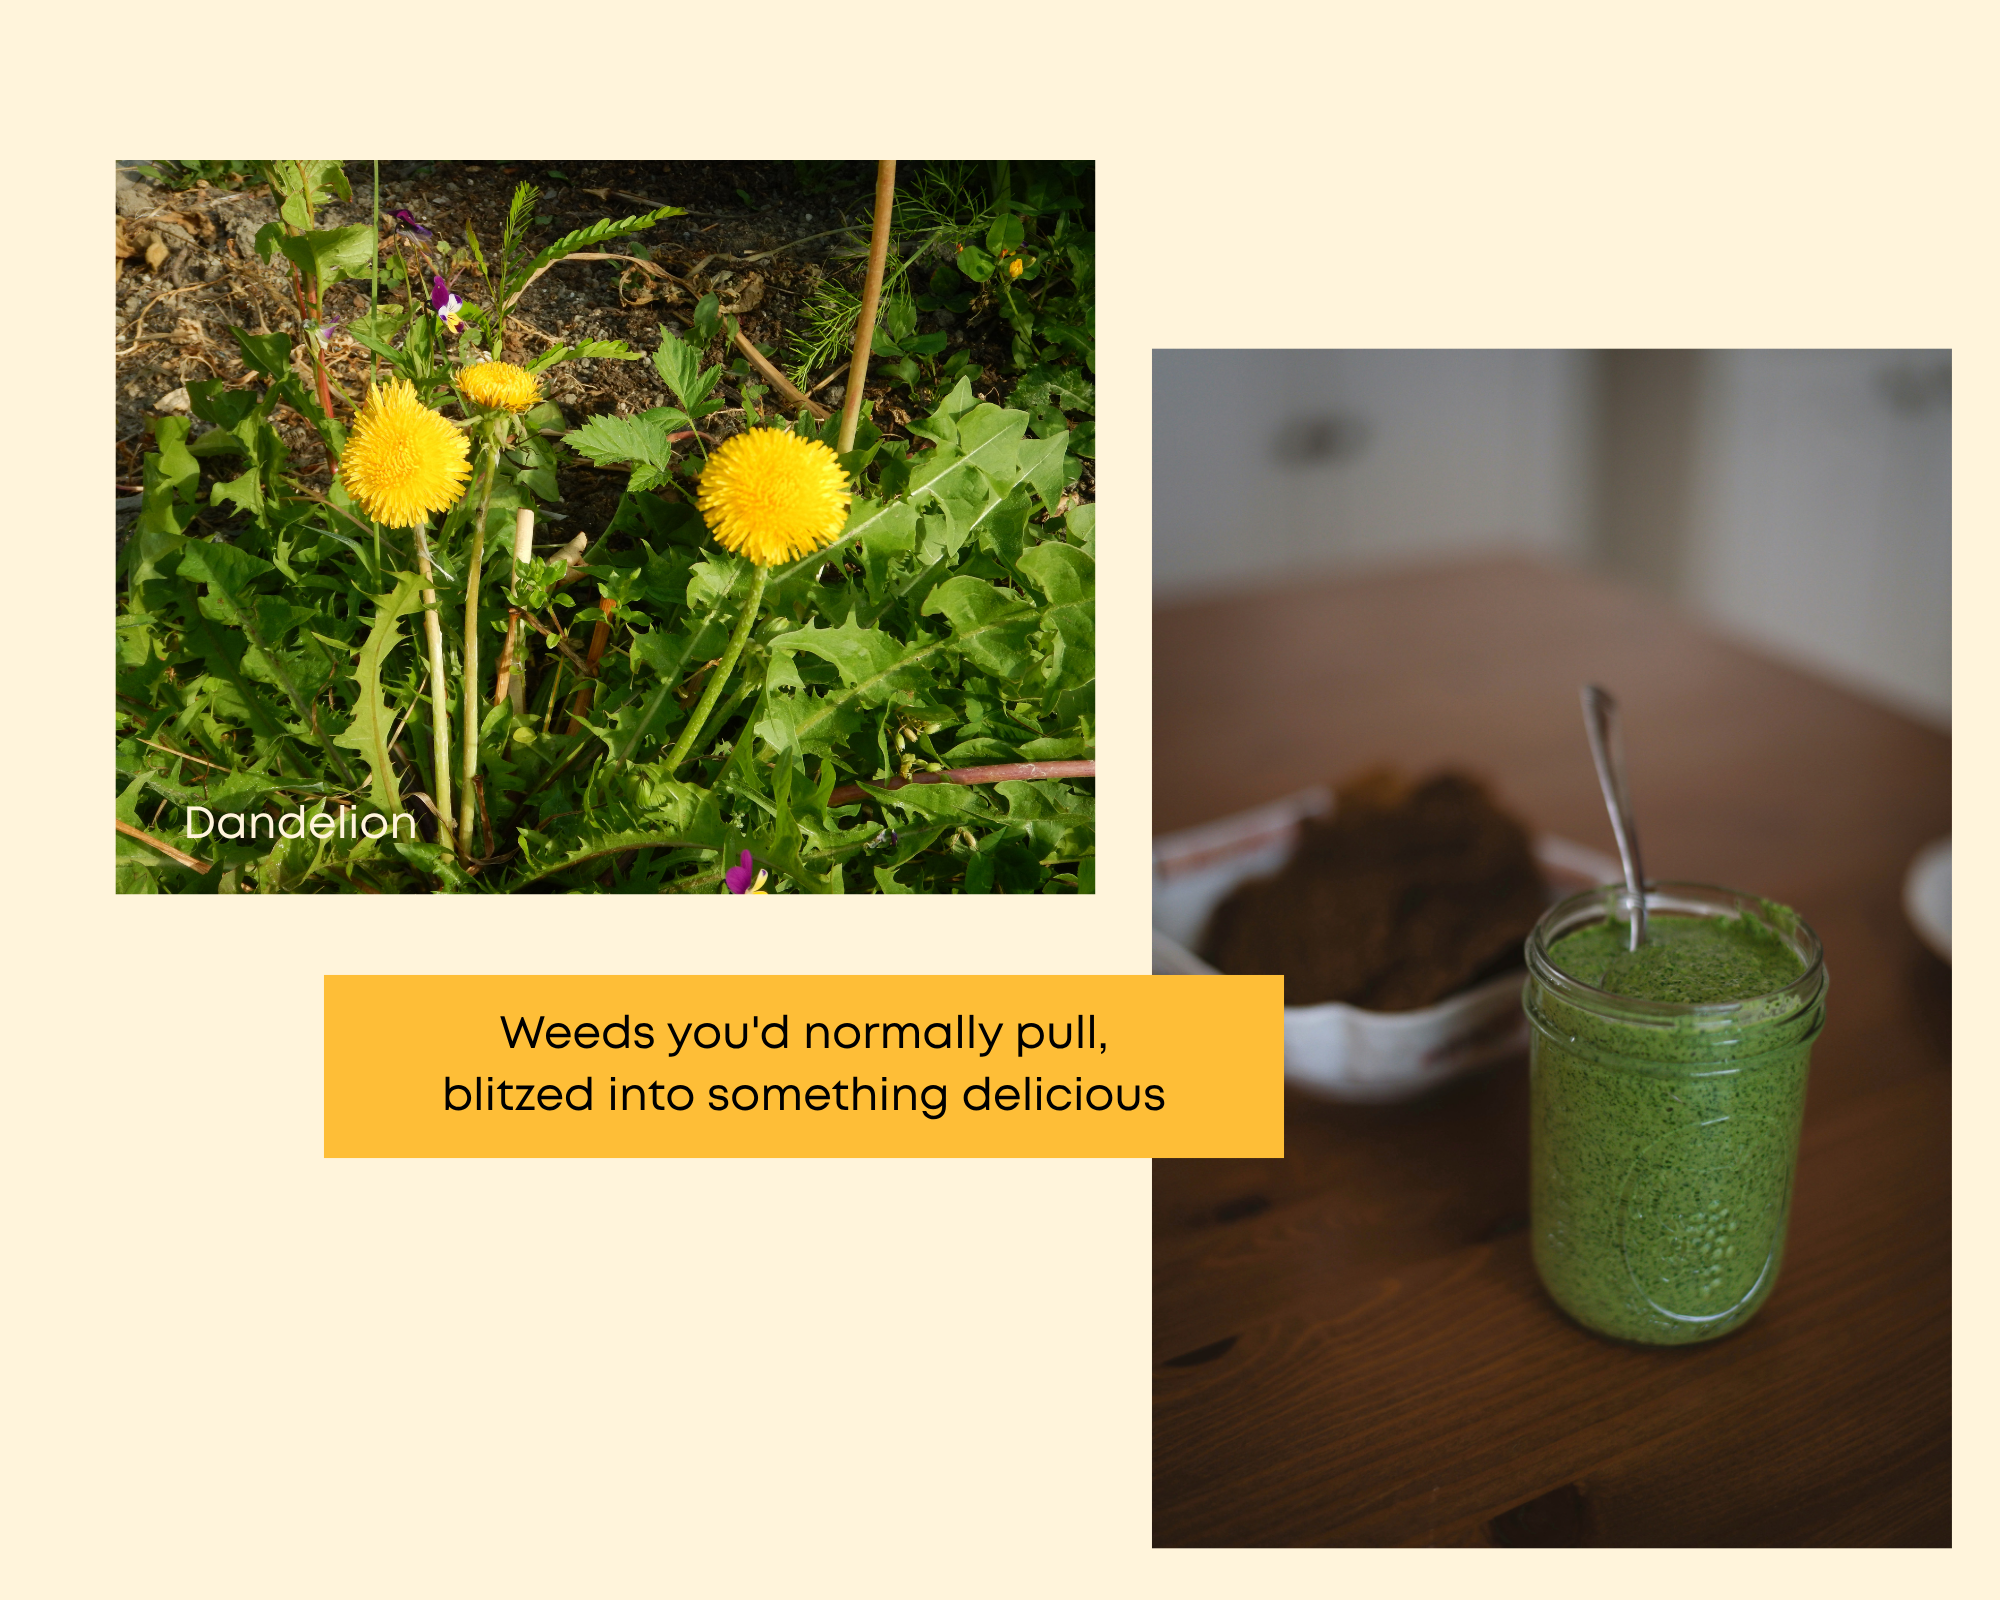
If you had to keep just one weed in your garden or lawn, it should be dandelion. It's a wonderful plant for bees, soil, and people alike. A staple food in Europe, it arrived in Aotearoa with the first European settlers and is now found throughout the country. In te reo Māori it's known as tawao. There is a native dandelion called tohetaka, tohetake, or tohetea.
Dandelion's deep taproot helps break up compacted soil and draws nutrients up from below; as its mineral-rich foliage dies back and decomposes, it enriches the topsoil around it. Its early flowers are also a valuable food source for bees and other pollinators in spring, when little else is blooming.
Not every yellow flower is a dandelion. There are several lookalikes - most commonly catsear, hawkbit and hawksbeard. Fortunately, none of these common lookalikes are toxic in Aotearoa New Zealand, and several are edible themselves. Still, precise identification matters when foraging.
Dandelion belongs to the daisy family (Asteraceae) - the same family as lettuces. The bitterness increases as the plant matures, especially after flowering and in hot, dry weather. The leaves are high in minerals and vitamins, which makes the bitterness worth embracing!
Key identification features
Dandelion always has a single yellow flowerhead on an unbranched, hollow, leafless stem. The stem exudes a milky white sap when broken. The leaves form a basal rosette rising straight from the root crown, and are smooth (hairless) with jagged, tooth-like lobes - hence dent de lion, "lion's tooth". When you cut the leaf, the core is always hollow.
Other plants with similar flowerheads usually have branched, wiry stems often carrying several flowers, and hairy leaves.
Ways to use the leaves
Chopped finely into salads (mixed with other ingredients, the bitterness mellows out), blitzed into pesto with other herbs (see recipe in the next section), added to stir fries, or simmered in broths. Young leaves are the mildest, pick them in spring before flowering.
Ways to use the flower stems
As a straw, as a whistle, or boiled in water for about 5 minutes for tender "dandelion noodles"!
Ways to use the roots (washed thoroughly)
Lightly roasted and ground to make a caffeine-free coffee substitute - dandelion "coffee" or chai has long been a favourite. Try mixing roasted dandelion root with roasted chicory root for a richer brew.
—————
Food resilience is not only about what you grow or store. It is also about noticing what food already exists around you. Local foraging knowledge helps households identify seasonal wild foods, fruit trees, herbs, nuts, mushrooms and edible weeds in our landscape. Building this knowledge increases confidence, reduces waste, saves money and reconnects people with place.
Even learning a few safe, abundant species each season can meaningfully strengthen household food resilience.
Start small and safe:
Learn correct identification
Avoid sprayed or polluted areas
Take only what you need
Leave plenty for others and nature
Never eat wild plants or mushrooms unless identification is certain.
Resources:
If you are new to foraging, it is important to learn identification from trusted sources and local guides before eating any wild plant.
iNaturalist NZ (best overall for accuracy + community verification)
https://inaturalist.nz - Global platform with a strong NZ community of botanists and ecologists. You upload photos and get community-verified identifications.
Seek by iNaturalist (best beginner app)
https://www.inaturalist.org/pages/seek_app - Simple, camera-based ID app that works offline and is designed for quick identification in the field.
New Zealand foraging books:
Foraging New Zealand by Peter Langlands
Edible Weeds Handbook by Andrew Crowe
The Forager’s Treasury by Johanna Knox
Central Otago Foraging Facebook page
Foraging walks are offered on a regular basis by some of our talented local herbalists such as:
Loran Verpillot from Herbal Culture (Upper Clutha)
Rochana Moon from Wise Moon Wellness (Upper Clutha)
Agnes from from A Taste Of the Wild (Whakatipu)
-
Contributed by Loran Verpillot of Herbal Culture
Medical herbalist Loran shares her recipe for a delicious pesto made with edible weeds.
Ingredients:
1/2 cup chickweed, chopped (for identification, check the August blog)
1/2 cup miner's lettuce, chopped (for identification, check the June blog)
1/2 cup parsley, chopped
1/4 cup plantain leaves, chopped (for identification, check the Sep blog)
1/4 cup dandelion, blanched (for identification, check the earlier section above)
juice of 1/2 lemon,
1/2 cup olive oil,
2 cloves of garlic finely chopped,
salt & pepper to taste
1/2 cup of roasted seeds or nuts of your choice, coarsely ground
1–2 tbsp grated hard cheese (optional)
Method
Wash the greens thoroughly and dry them. A reminder to not harvest wild greens near roadside, or walking paths.
Bring a pot of water to the boil. Blanch the dandelion for 30 seconds, then plunge into cold water and squeeze out excess moisture. Skip this step only if you enjoy bold bitterness.
Toast the seeds or nuts in a dry pan over medium heat for 3–5 minutes until fragrant, stirring often. Cool, then coarsely grind.
Pulse the greens, garlic, half the lemon juice, and the oil in a food processor until finely chopped, scraping down the sides once or twice. You want it textured.
Add the ground seeds/nuts, cheese (if using), remaining lemon juice to taste, and season with salt and pepper. Pulse a few more times to combine, then check the flavour - wild greens vary, so trust your tongue over the recipe.
Loosen with an extra drizzle of oil if it's thicker than you like.
Keep in the fridge for 4–5 days with a thin layer of olive oil on top to prevent browning, or freeze well for up to 3 months (ice-cube trays work nicely for portioning).
—————Want to be more kitchen-savvy? You’ll love Del’s FREE classes with Central REAP!
If you are in the Upper Clutha, come and cook with Del. She is running three classes with the incredible humans who organise all the courses through Central REAP, and she’ll be covering all her favourite things: budget cooking, pantry staples, and how to get the very most out of your shopping.
Three Tuesdays: 6th, 13th and 20th October, 10am until midday, at the Lake Hāwea Community Centre. And it is completely free!
So, if you are nearby and fancy learning a few things with Del, make sure you sign up:
—————Food resilience is not only gardening, it includes your household pantry.
We ongoingly recommended you start building staples for a few weeks and suggest you keep adding to it until you have about 2-3 weeks worth of food for your household, including rice, pasta, salt, tinned beans and tinned tomatoes. This helps when fresh food is scarce, prices rise or shops are inconvenient.
Making your own pantry staples is also an easy way to save on money and become more resilient, especially when you have a productive garden!
Look out for:
Food preservation workshops
Cooking skills events
Waste reduction programmes
Wao Food Resilience calendar of events is a good place to start
Resources:
Dishes with Del (pantry and waste reduction tips)
Dig in with Del - follow Del’s journey as she transforms her garden into her pantry. From building garden beds and filling them with soil and compost, to choosing seeds and getting everything planted, join her through a series of fun, practical videos as she grows her own food from the ground up.
WānaKai Community Cooking Group - community kitchen session, every second Friday, 11:30am-1:30pm, Wānaka Community Hub. Free, booking essential: learn new cooking skills, make new friends!
-
November brings warm season crops like tomatoes, beans, courgettes and pumpkins in the ground, irrigation and water conservation as the heat builds, mulching before it properly arrives, a deep dive into growing structures and trellising for your summer crops, and the basics of harvesting and preserving herbs.
-
Ali Soper: seasonal gardening advice for our region: get seasonal gardening tips through Ali’s Your Garden Coach podcastand consultations. Sign up to her newsletter to receive practical advice delivered straight to your inbox.If you’d like to join one of Ali’s monthly Garden Conversations groups, email her at coach@yourgardencoach.nz. Ali runs three different groups, with koha appreciated.
Erin Allison Harvest Homegrown: market garden, gardening guides and home veggie garden courses/workshops(Hawea Flat, Wanaka) (on Facebook)
Local workshops: Harvest Homegrown holds a range of veggie growing workshops throughout the growing season.
Erin from Harvest Homegrown also offers these localised growing PDF guides for a small fee ($9 to $12 each):
Interplanting for high yields and healthy soil, including planting plans: https://stan.store/harvesthomegrown/p/interplanting-for-high-yields--healthy-soil (this PDF guide briefly mentions how much to grow of each plan for household sizes also).
Growing from Seed: https://stan.store/harvesthomegrown/p/growing-from-seed
Planning an efficient garden: https://stan.store/harvesthomegrown/p/planning-an-efficient-garden
Printable Veggie Garden Journal: https://stan.store/harvesthomegrown/p/printable-veggie-garden-journal
Dr Compost: composting made easy as well as gardening education: online info and in-person workshops available in Upper Clutha and Whakatipu.
Community gardens: Grow Wanaka, Hawea Food Forest, The Templeton Park Community Orchard (Albert Town Wānaka),and Queenstown Community Gardenworking bees.
The Wanaka Vegetable Growers Club meets the first Wednesday of the month (apart from June and July) at St John's Rooms Linkway Wanaka at 7pm.
The Hāwea Garden Group is an informal gathering for people interested in all aspects of gardening.
Activities include garden visits, guest speakers, and hands-on workshops.
Free to join, and you’re welcome to attend whenever it suits.
Meets every second Thursday from 20 August (starting with a seed swap and seed raising session) through to 19 November.
For more information, contact Diana at mansondiana@gmail.com
Foraging walks are offered on a regular basis by some of our talented local herbalists such as:
Loran Verpillot from Herbal Culture (Upper Clutha)
Agnes from from A Taste Of the Wild (Whakatipu)
Rochana Moon from Wise Moon Wellness (Upper Clutha)
-
Most of the following books are available at the Libraries and can be borrowed for free :)
Home / small scale regenerative growing:
The Edible Backyard by Kath Irvine (NZ). Excellent for practical, year round home food production in New Zealand conditions, with a strong focus on seasonal growing, resilience, and low input systems. She takes a very holistic approach and the advice is applicable to a wide range of zones. It is focused on getting the foundations right, with simple explanations and practical, reader friendly guidance.
Square Foot Gardening 4th Edition. This is a book that often resonates with new gardeners with small spaces to grow food. There is a metric version too (One Square Meter garden)
The Abundant Garden by Nova and Yotam Kay (NZ). Excellent for productive household food systems, abundance, seasonality, and low input methods.
NZ Gardener Magazine is a great resource too.
For hyper-localised resources, we recommend:
Harvest Homegrown’s localised growing PDF guides (from $9 to $12 each):
Interplanting for high yields and healthy soil, including planting plans:https://stan.store/harvesthomegrown/p/interplanting-for-high-yields--healthy-soil (this PDF guide briefly mentions how much to grow of each plan for household sizes also).
Growing from Seed: https://stan.store/harvesthomegrown/p/growing-from-seed
Planning an efficient garden: https://stan.store/harvesthomegrown/p/planning-an-efficient-garden
Printable Veggie Garden Journal: https://stan.store/harvesthomegrown/p/printable-veggie-garden-journal
Seed sovereignty / resilience:
Koanga Institute resources and publications (NZ): Save Your Own Seeds
Foraging:
Foraging New Zealand by Peter Langlands
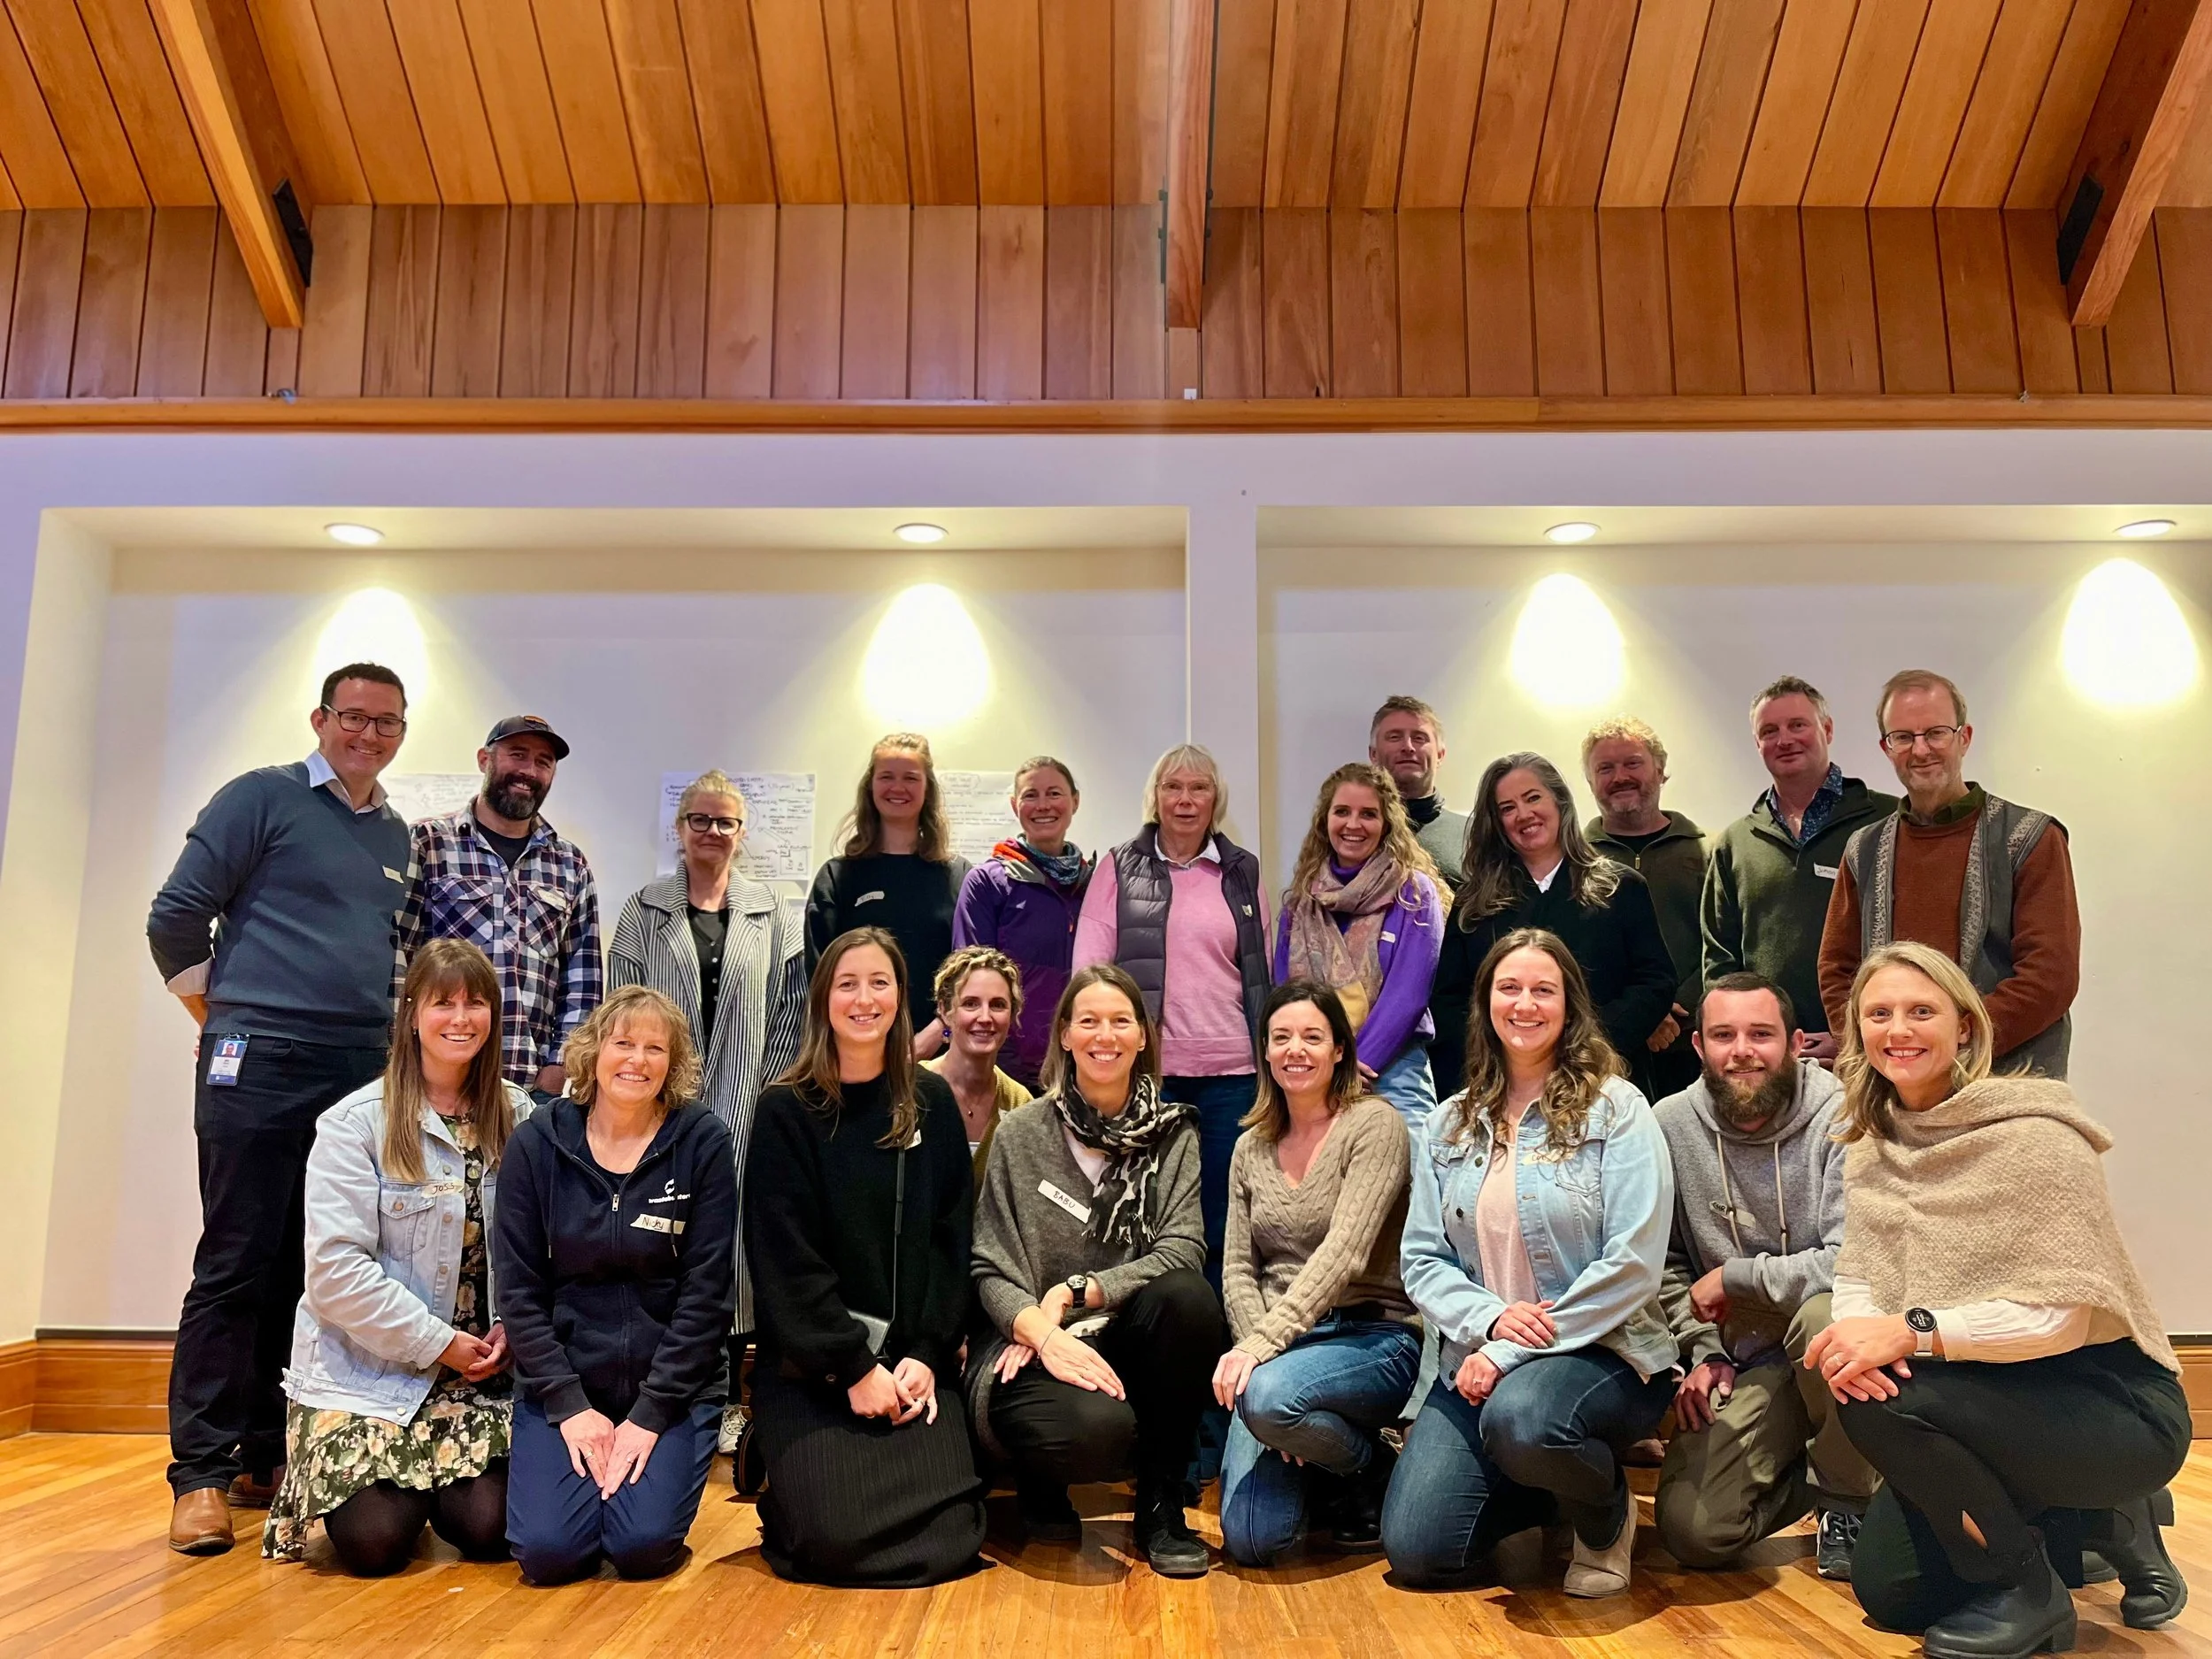
The Southern Lakes Kai Collective at its inception in September 2024. It has since grown to 49 members from across the district and the wider food ecosystem.
-
The Southern Lakes Kai Collective is a think tank focused on increasing the district’s food resilience. The food growers generously contributing their time and knowledge to this gardening blog are:
Adele (Del) Holland - Dishes with Del : recipes, food preserving, avoiding food waste
Ali Soper - Your Garden Coach : podcast & food garden consultations
Ben Elms - Dr.Compost (Wastebusters): compost systems, soil health, gardening workshops, etc.
Brendan Lopez - Welcome Rock Gardens (bio intensive market garden)
Bruce Thurlow - Otago Polytechnic
Diana Manson - Hawea Food Forest : Community Garden
Emberly Wetherall - Grow Wānaka : Community Garden
Erin Allison -harvesthomegrown.co.nz : Homegrown organic produce and seasonal Veggie Growing Workshops for home gardeners.
Louise Wilson - Forager & home gardener
Loran Verpillot - Herbal Culture: Medical Herbalist, forager & home gardener / orchardist
Michael Sly - Waste to Wilderness: composting and microbial soil systems
Mikey Dahlstrom - Millbrook resort food garden
Neal McAloon - Queenstown Harvest Community Garden and Bee The Change
Nicola (Nik) Woolford - Natured Living
Sydney Telfer - Aspiring market gardener / regenerative agriculture
Theo Richard - The Sherwood restaurant food gardens
-
We welcome your feedback and invite you to use this form to share your thoughts, ideas, and suggestions
More about the Southern Lakes Kai Collective mahi here.