
Growing Food in the Southern Lakes - September Edition: Digging in for Spring
Growing food in the Southern Lakes is a shared effort. Sixteen local growers, foragers, and food-lovers from SLKC are pooling what actually works in our climate, so beginners can start with confidence.
Whether you are renting, working with pots or planter boxes, or growing on a small patch of land, now is the time to begin.
This monthly blog brings together practical, seasonal knowledge from across the region to help households grow food, forage, and build up their pantry for the year ahead. Each edition is written for the beginner in mind, with guidance that's clear, practical, and easy to put into action.
For September, the focus is spring garden prep, planting out your seedlings, caring for fruit trees and berries, and deciding whether a tunnel house is right for you. We'll also cover which spring weeds to pull (and which to eat), plus a foraging feature on plantain and simple pantry condiments from kitchen scraps.
Brought to you by the Southern Lakes Kai Collective
〰️
Brought to you by the Southern Lakes Kai Collective 〰️
Read the full blog below by clicking the + under each section, or download this edition as a free PDF guide to read in your own time.
Your September challenge!
Choose one… or more!
Read up on Spring Soil Prep
Know your weeds!
Plant out your frost resistant seedlings
Sow a few hot-weather seeds in punnets/trays indoors
Consider planting a fruit tree, or give your existing trees some care
Decide if a tunnel house, cold frame, or hoops are right for your garden
Forage for plantain and try it in a salad or pesto
Make at least one home-condiment
Attend one of the many gardening workshops happening this September (see our event calendar on this page)
-
We built the foundations of good soil back in May, and dug deeper into compost and soil basics in June. This month, as the days grow longer, it's time to put that groundwork to use and get your garden ready for spring planting.
Contributed by Mikey from Millbrook Resort garden
September is the month of many moods here in Otago - one day we’ll be basking in beautiful spring sunlight, and the next we’ll be scraping the frost off our windscreens, battling gale-force southerlies, and bracing for a snowstorm that should have hit last month. While it may still be a bit too early to plant out many of our tender little summer seedlings, there is still plenty of important work to be done to ensure your garden is ready to go when planting season arrives! Here are a few tricks and tips for prepping your garden as the days grow longer and the grass gets greener.
Weeding Your Garden Beds
Before we can get into adding amendments, aerating, and warming our soils, it is generally a good idea to give your garden a good weeding at this time. While many weeds may have been mostly dormant over the winter, this is the time of year when they like to pop up quickly and unannounced and grow like, well, weeds! I would suggest doing a swift hand weed or knocking them down with a hoe (or whichever tool you prefer), as leaving them to go to seed can make weed pressure worse.
→ Read Loran’s special section on Spring weeds below!
Adding Compost and Amendments
Now is the perfect time to start adding some good ol’ organic material to our gardens to help activate our soil biology, which in turn helps to warm the soil as our soil food web wakes up and gets to work. It is important (and totally awesome!) to remember that while we are feeding our plants, we are also feeding the vast living soil ecosystem that makes any sort of vegetative growth possible in the first place.
While you may choose to go down the ever-gripping rabbit hole of soil nutrients with high-tech lab soil tests that can pinpoint your soil’s particular needs, most of us just require a balanced N-P-K fertiliser, some compost, and perhaps a bit of garden lime. Blood and Bone, available at most garden centres, is a great option for boosting nutrient density. Then, a couple centimetres of compost does wonders to add organic matter that will improve overall soil structure and activate biology. And finally, a few sprinkles of garden lime may help to balance your soil pH and penetrate into any heavy clay soils. If you want a DIY way to test pH and soil type in your garden, most garden centres will sell home test kits that can be fun to experiment with.
Aerating and Warming
Aeration is a crucial step in getting your garden prepped; it will help to mix in your amendments, break up compacted soils, and add vital air for the soil food web. As mentioned in the May edition, forking is part of preparing your garden, but it's best kept to a rare occasion, as repeated forking can damage soil structure and make compaction worse over time. So if you haven't already loosened this bed earlier in the year, go ahead and use a garden fork to penetrate the ground and gently lift the soil, taking care not to turn it over completely. Doing this every 20cm or so allows air to filter down into the soil without completely burying your amendments and disrupting the soil structure itself. Then, you can mix in your compost/amendments by simply raking the area flat with a bit of up and down motion (imagine you are a mini roto-tiller aiming to mix just the top few centimetres of soil).
Even though we’ve taken care to activate our soil biology, seedlings may still get shocked trying to transition from a cosy greenhouse or garden centre to freezing cold and soggy soil, so it may be wise to look at ways to warm your soil if you’re keen to get a headstart on the season. Here are a few methods that work well:
Organic Mulching: using materials such as pea straw, wool, or extra compost spread over your beds a few centimetres thick will help to keep frost off the surface.
Inorganic Mulching: using any spare frost cloth, shade cloth, weedmat etc. as cover can also help to keep that surface level of soil just a bit warmer.
Tarping: using tarps as a groundcover until you are ready to plant is a great way to heat up your soil. This is a popular method with market gardeners, who often use black silage tarps to lock in moisture, heat up the soil, and smother weeds. It should be noted that this must only be done with high-grade, UV-stabilised tarps, as many cheap tarps will quickly degrade and possibly leach plastics. As an alternative, any old tarp you may have around the house would help as a temporary solution for a couple of weeks.
Discussion
It should be noted that these steps should be taken within about 3 to 4 weeks of when you plan to get your plants outside. If you jump on these steps too early, you may see that compaction can recur, weeds may grow back, and amendments may wash away if you are not mulching the beds.
For now, stay patient, prep those garden beds, and get stoked for a banger season of home-grown fruit and vege! Happy Gardening!
-
Contributed by Loran Verpillot of Herbal Culture
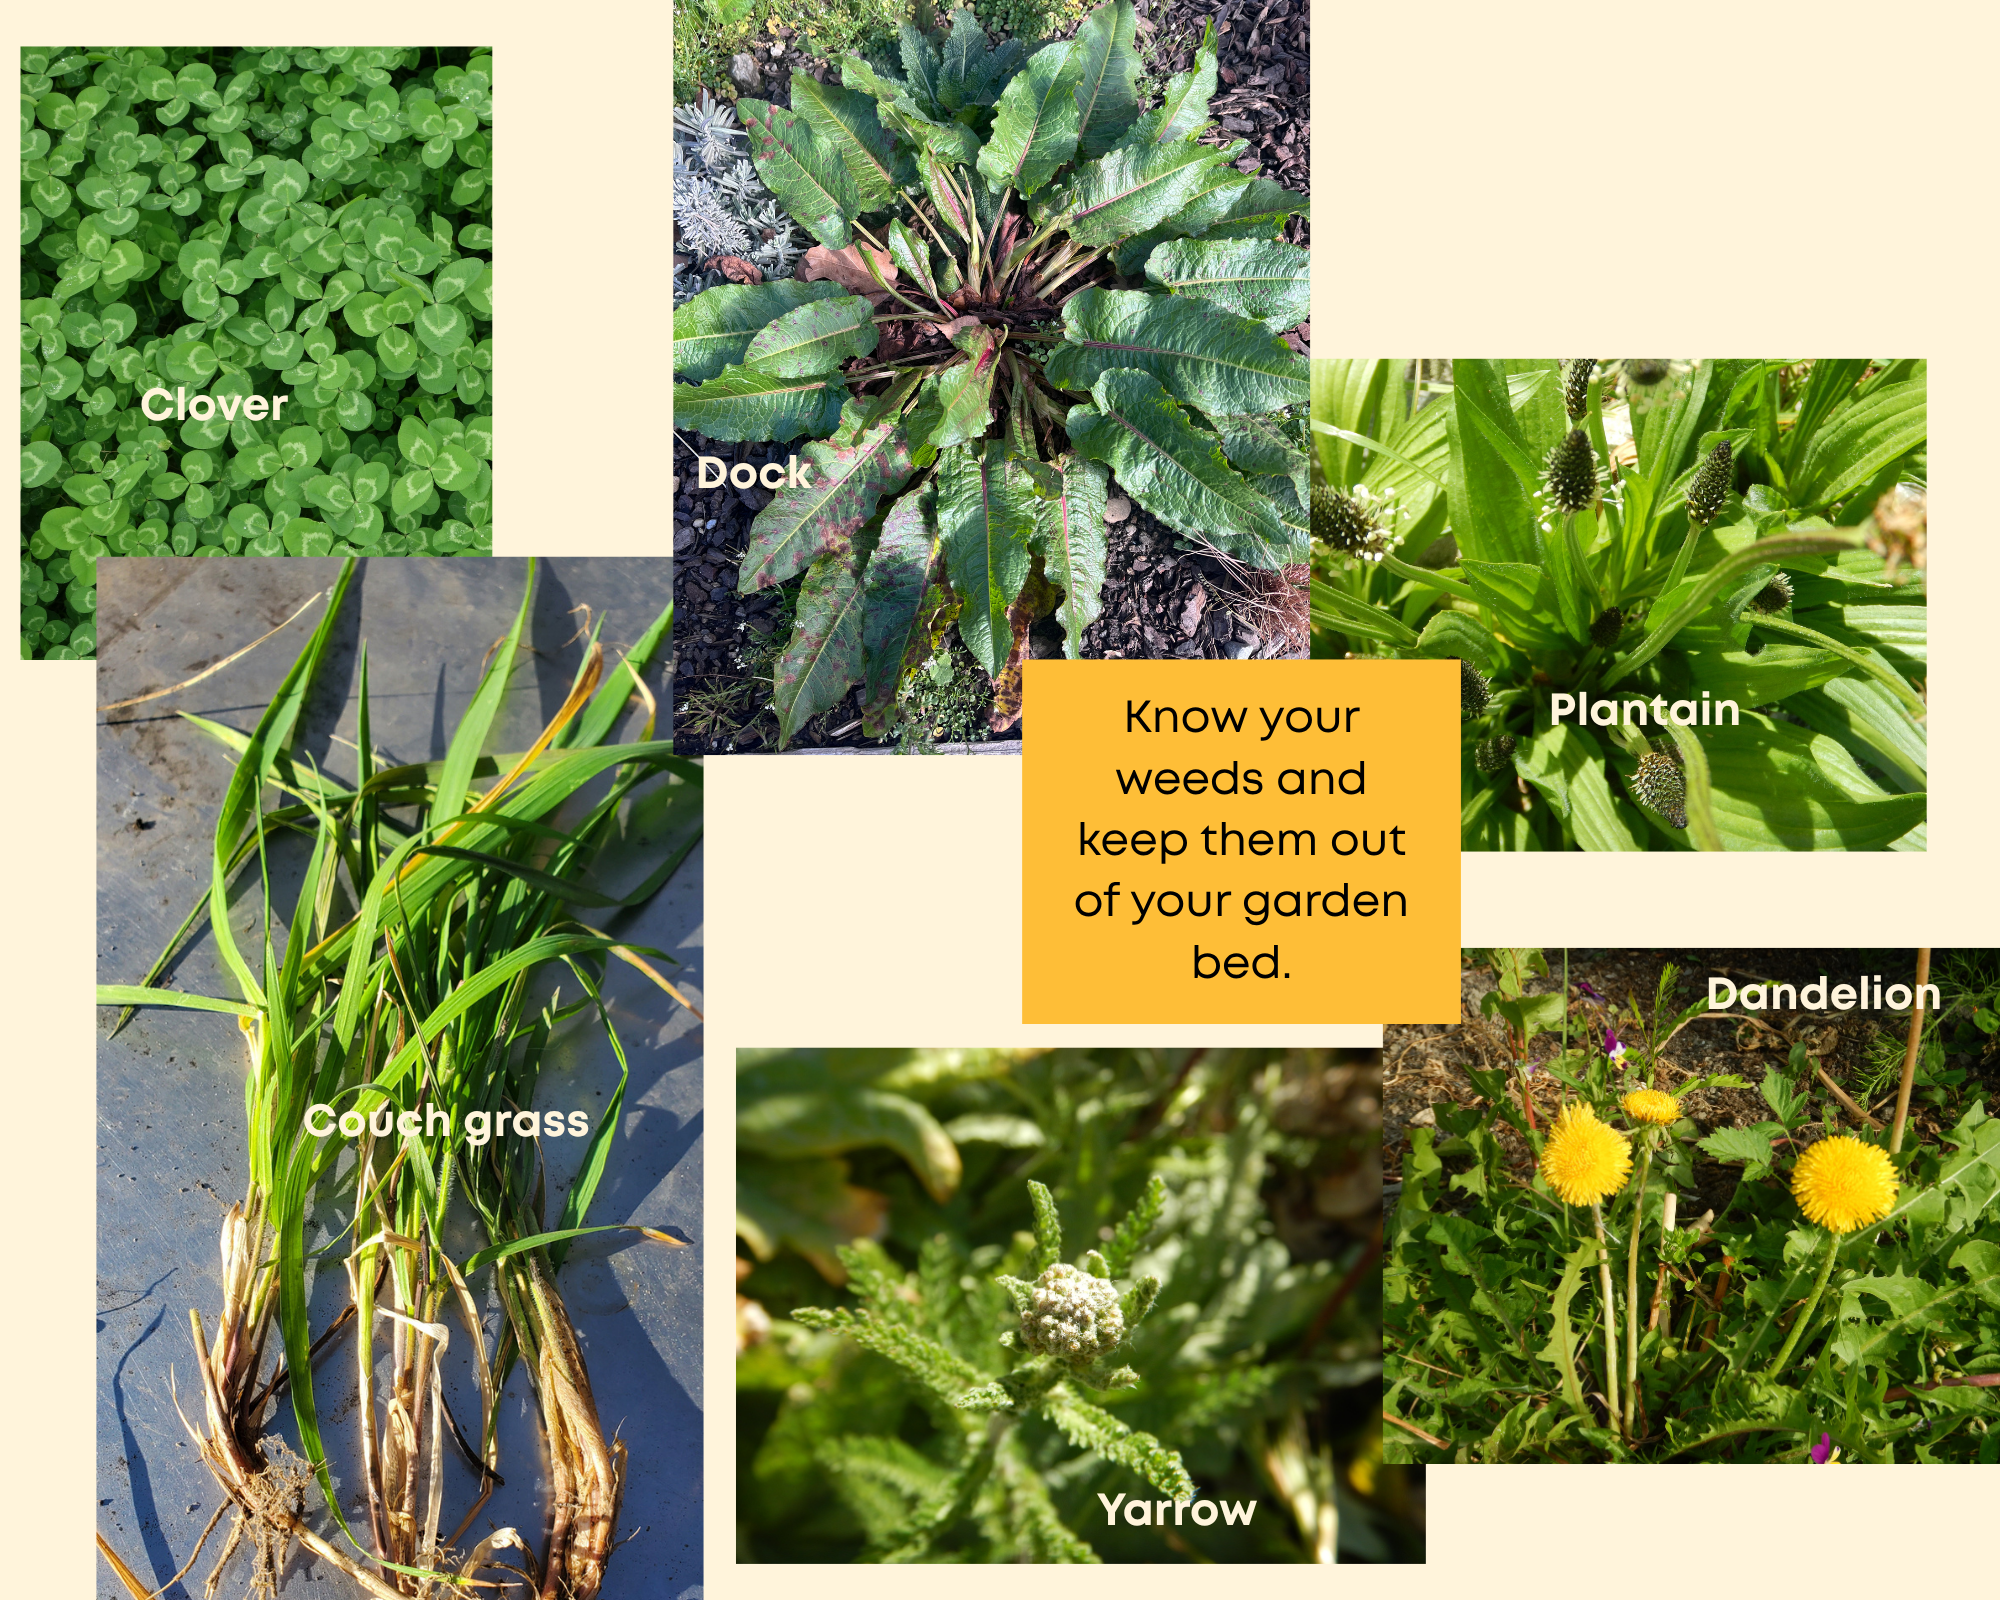
As a gardener, forager and medical herbalist I see “weeds” as medicinal plants and generally foods. I’m actually grateful to have weeds in my garden over the winter months and early spring when lettuces are not growing or not growing fast enough to keep up with my salad needs. However, some unwanted plants in the garden get annoying, and get in the way of growing veges, so we recommend you remove them from your vege patch:
Couch grass is very persistent and resilient. It sends rhizomes out, and only needs a very small piece of rhizome to grow from. Pulling it out when the soil is wet and soft is the best way to remove it from the garden. Do not compost it, but you can use it to make a “weed tea” (see below).
Yarrow is also persistent and resilient. It also sends rhizome but not as far as couch grass. The rhizome can form a very thick mat. Use a fork to pull the whole plant out. You could grow it in a pot instead and use the flowers and leaves for herbal teas. It is very medicinal and beneficial for cold and flu amongst other things.
Chickweed (refer to August blog) has shallow roots but many seeds. If you don’t want it to spread, dig it out before it flowers.
Dock has a very slippery and long taproot. It is very hard to pull out so use a spade or fork to pull it out. If you don’t want it to spread, don’t let it go to seed.
Sheep sorrel loves to grow in poorly fed soil (it indicates that your soil needs some compost!). It has very thin roots that can travel a long way.
Dandelion is the best weed you can have in your garden as all its parts are edible and it feeds the plants growing around it by enriching the soil with nutrients. If you don’t want it to spread, don’t let it go to seed. The bees love the flowers (and you want to attract pollinators to your garden!). Dandelion has a tap root which is easily removed with a fork.
Clover is a nitrogen fixing plant. This means that, in the right conditions, it can convert the nitrogen from the atmosphere into nutrients it can use. The roots can create a thick mat making it harder for other plants to establish. Pull it out with a fork.
Plantain is perennial. It spreads through its seeds, so cut the seed head if you want to keep the plant but don't want it to spread. It has a tap root, so use a fork to pull it out.
Plantain is the star of our Foraging section this month, read more under ‘Foraging & wild food knowledge: plantain (Plantago Lanceolata)’.
—-
Soil doesn't like to be bare so make sure to cover with mulch, cardboard, or straw any recently cleared patch, until you are ready to plant with a new crop.
Weeds I would put on my compost heap if they are not flowering: plantain, chickweed, dock, dandelion. All the other weeds can be taken to the green waste (next to Wastebusters in Wanaka).
—-
Weed tea
With all the weeds you pull out from your garden, you can make a “weed tea” to feed your soil.
Fill 1/3 of a bucket with weeds, fill the bucket with water, put some stones to keep the weeds under water. Leave for 1-4 weeks. Use the tea around your seedlings.
-
Learn when and how to plant seedlings outdoors, direct sow your spring crops, and get next summer's tomatoes, courgettes and other heat-lovers started indoors now.
Outdoors
Following on from last month’s blog, where Erin shared how seed germination works, the two sowing methods (trays and direct sowing), this month you’ll learn how to plant out your seedlings.
Contributed by Erin at Harvest Homegrown
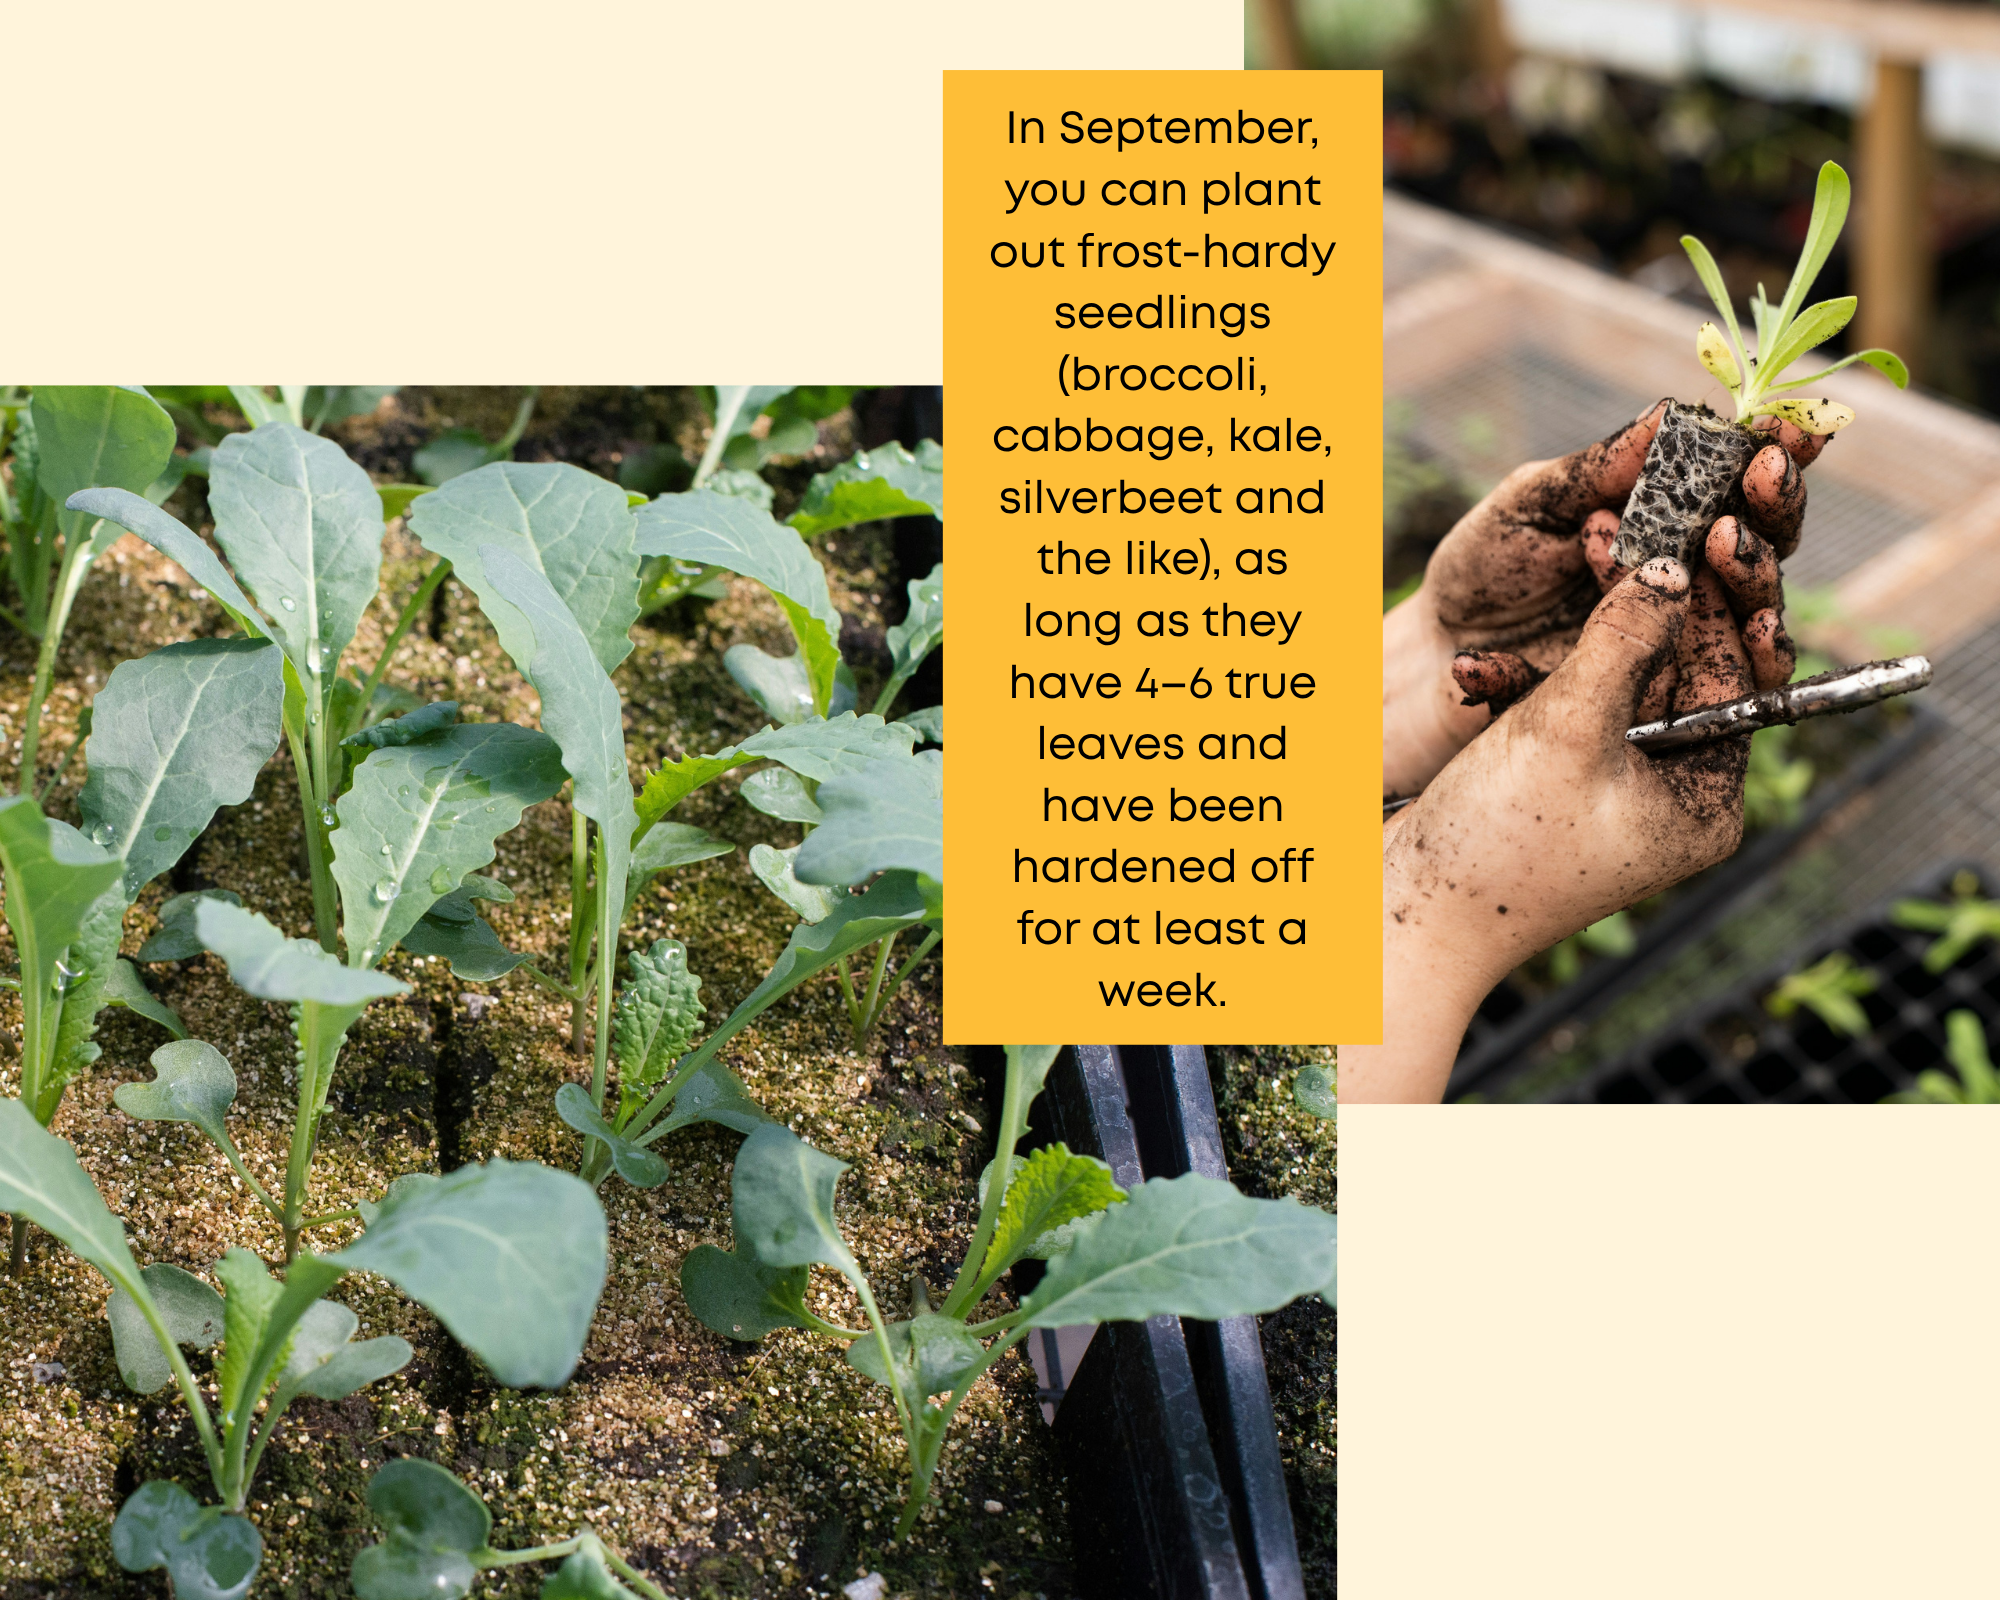
Ready to get some plants in the garden? Remember, this is only for frost-hardy seedlings (broccoli, cabbage, kale, silverbeet and the like). Frost-tender summer crops like tomatoes and courgettes still need to wait until the risk of frost has passed, usually mid-November in our region — see the Indoors section below for getting those started now.
Before you transplant seedlings outdoors, you need to check a few things first. Seedlings should have 4-6 true leaves, have formed a good root system that holds onto soil but should not be root bound.
As mentioned in our August Blog, seedlings should be hardened off for at least a week to the temperature at which they will be planted into, to minimise transplant shock. It's required for all seedlings, including bought ones. Remember to continue watering seedlings well and often throughout this process.
By now you should have already prepped your beds more broadly, as covered in this month's spring prep section (see above); this final check is about the specific bed and plants you're about to put in the ground. The soil where the seedlings are being planted should be prepared before planting, soil should be well loosened and have been amended with fertiliser/compost as required for the specific plants. Heavy feeders (often with long days to harvest) need more heavily fertilised soil versus light feeders (quick crops and carrots). Never dig/stand on wet soil, it will only compact it. If you are desperate to plant and can't wait for it to dry out, add a layer of compost over top and plant into that instead.
Think about plant spacing before you plant. Do you need to set up trellis or stakes for your plants? It’s best to do this before planting so you don't damage or disturb growing plants later.
Seedlings should be watered well before planting, so you are planting out with moist soil around the roots.
Squeeze/push/tip seedlings gently out of containers. Handle plants with care at root level only. Do not squeeze the stems. Your aim is for the least disturbance to the roots and plants as possible. Plant in the ground at the correct level, this varies by plant, but the basic rule is woody stem (think broccoli, kale, cabbage), plant deep up to first leaves, soft leafy base (where all leaf growth comes from one place, think lettuce, Asian Greens) plant just above soil.
Once planted, water in well to settle soil around the roots, and then protect seedlings while they settle in - from wind, frost, heavy rain, harsh sun, birds - using shade or frost cover over hoops if needed. If planting into a tunnel, protect from sun with shade/frost cloth for the first week or so. Until the roots spread and grow down deeper you must water plants regularly.
Don’t plant seedlings in the heat of the day or on a super windy day where they will dry out quickly. These are baby plants and require extra care to get a good start to keep them as healthy and robust as possible, which will mean fewer pest and disease issues later on, so it is worth taking extra care now.
Direct seeding
As covered by Erin in the Sowing Methods chapter in August, direct seeding means sowing straight into the ground rather than raising seedlings in trays. The method stays the same this month: check your soil temperature against what your seeds need to germinate, prepare the bed by loosening and adding fertiliser or compost, sow at twice the seed's depth, and keep the seedbed covered and consistently moist until you see germination.
The same crops that suited direct seeding in August remain good choices this month, plus a few additions: peas, broad beans, carrots, turnip, beetroot and radish, and spring greens like spinach, rocket, lettuce, mizuna, mibuna, mustard greens and coriander. These are all relatively cool-tolerant crops that can be sown in early spring, although some, such as coriander, beetroot and lettuce, will germinate more quickly as soil temperatures rise. Depending on the weather, you may still need to cover with clear plastic or frost cloth to keep soil temperatures up and protect emerging seedlings from frost. Don't be discouraged if growth feels slow to get going this month: early spring is often the quietest stretch in the garden here, and things will pick up noticeably as daylight and soil temperatures build through October.
————-
Indoors
Starting Your Summer Seedlings Indoors
Good news! From September you can start almost anything indoors provided you can give them the germination temperature they need, and they will be protected from frost.
So get your heat-loving summer crops started indoors, ready to plant out once the frost risk has passed in November. These are all frost-tender and need a head start of several weeks before they can go outside, so sowing now gives them time to build a strong root system while it's still too cold to plant outdoors.
Sow seeds into trays or pots filled with seed-raising mix, keep warm and consistently moist, and give them as much light as possible once they germinate to avoid leggy, weak seedlings.
A word of caution if you're new to growing: without a tunnel house or glasshouse, any of these plants can be killed outright by a single frost if left unprotected once planted out. If this is your first summer garden, it's worth starting small — one tomato and one courgette plant is plenty to learn with, and much easier to protect on a cold night than a full bed of seedlings.
For a household of two with some growing experience or good frost protection, here's a rough guide to how many plants to aim for:
Tomatoes: 3 to 4 plants (mix of a couple of cherry and a couple of larger varieties for a steady, varied harvest)
Capsicum: 2 to 3 plants
Eggplant: 1 to 2 plants
Chilli: 1 to 2 plants (a little goes a long way)
Courgette: 1 to 2 plants (one healthy plant is often plenty for two people - also note that a healthy courgette plant easily takes up one square meter of your garden)
Pumpkin: 1 to 2 plants (they take up a lot of space, so plan for room to sprawl or climb)
Cucumber: 2 plants
Corn: at least 8 to 10 plants, since corn is wind-pollinated and needs a block rather than a single row to pollinate well
Basil: 3 to 4 plants, both as a companion for your tomatoes and for the kitchen
Marigolds: a handful of marigolds planted alongside tomatoes and other crops helps with pest deterrence
Sow a few extra seeds of each to allow for any that don't germinate, so you're not short when it comes time to plant out.
If using tunnel/glasshouses - a word of caution:
It will now be getting pretty warm during the day inside tunnels and glasshouses if the sun is out, but remember that if there is a hard frost (which is still highly likely) then it can still freeze inside a tunnel and even glass house. These indoor growing spaces now need some ventilation and consistent watering because of those warmer days.
——
Microgreens & Sprouts (indoors year-round)
Microgreens and sprouts are especially good for beginners: fast, easy, reliable and nutritious.
For simple instructions, check our Month of May gardening blog or check out King’s Seeds guides.
——
A few terms
Pricking out – separating crowded seedlings from a tray into individual pots.
Thinning – removing excess seedlings so the rest have room.
Potting on – moving a plant into a larger pot once it outgrows the first.
Hardening off – gradually getting seedlings used to outdoor conditions before planting out.
——
Resources:
Local workshops: Harvest Homegrown holds a range of veggie growing workshops throughout the growing season.
Harvest Homegrown also published PDF documents with all the details and tables of what to plant when and how in our climate! In particular, you’ll want to get your hands on the ‘Interplanting For High Yields & Healthy Soil’ PDF ($12)
Local podcast: The Your Garden Coach podcast also guides you month by month on what to do in your Southern Lakes garden! And if you sign up to their newsletter, you’ll receive seasonal tips right in your inbox.
Local videos: Dig in with Del- follow Del’s journey as she transforms her garden into her pantry. From building garden beds and filling them with soil and compost, to choosing seeds and getting everything planted, join her through a series of fun, practical videos as she grows her own food from the ground up.
Kings seeds migrogreens and sprouts guide.
——
TIP: By the way, did you know that the Wānaka library has a seed library? They only ask you to bring some seeds back at the end of the season for other people to use.
-
Contributed by Nicola Woolford of Natured Living
September is the official calendar arrival of spring, Daffodils will be in full bloom soon and lots of flower buds on our fruit trees will be getting ready to burst.
At this time of the year you should be focussing on the following:
Setting up your new fruit trees and berry bushes
Fruit tree and berry bush care
Feeding and managing disease
1) Setting up your new fruit trees and berry bushes
Fruit trees
If you haven’t already planted your new fruit tree it’s not too late as you are best to plant new bare-root fruit trees now while the soil is cool and wet. Choose your spot wisely - Full sun, some wind protection and room to grow.
The most important step is to prepare the area before you plant. Sounds obvious but this attention to detail will make or break your future success. Fruit trees like well drained soil. This is something you need to sort before your trees get near any holes.
If you have heavy or compacted clay soil, improve drainage before planting. Rather than digging a deep hole, build the planting area up slightly and create a wide, shallow planting hole. Avoid creating a hole that is much deeper than the root ball, as it can collect water.
If the soil is poor, incorporate some good quality, well matured compost into the wider planting area rather than concentrating it in the planting hole. After planting, spread a layer of compost or other well matured organic matter beneath the tree canopy, then add a woody mulch to help retain moisture and support healthy soil biology. Planting a diversity of companion plants can also provide habitat for beneficial insects and contribute to a healthy, living soil. (See section 3.)
We have a great selection of pip fruit and stone fruit trees to choose from, and many varieties grow very well in our cold climate. Figs and citrus can grow here if well protected but avocados will suffer.
Berry Bushes
Berries also grow very well in our region. These include blueberries, raspberries, boysenberries, blackberries, gooseberries, cranberries and currants, which can all still be planted in September.
Blueberries thrive in acidic soil, ideally around pH 4.5–5.5. If your soil is not naturally acidic, use an appropriate acidic growing medium or soil amendment and check the pH before planting. Raspberries, boysenberries, blackberries and blackcurrants generally prefer slightly acidic to neutral soil.
Plant bare root or potted berry bushes and canes during the cooler autumn or early spring months, so the roots have time to establish. If you are starting with an existing garden bed, incorporate well matured organic matter such as compost into the soil. Cover the soil with pine needles, bark or pea straw to help retain moisture and suppress weeds.
Most berries prefer a position with good sunlight, although some, such as currants, can tolerate a little more shade. Choose a site with protection from strong winds and enough space for plants to reach their mature size.
Dig a hole twice as wide as the root ball, but no deeper than the plant was growing in its pot. After planting, water well and keep the soil consistently moist while the plants establish, but avoid waterlogged conditions.
Blueberries and currants can generally be planted around 1.5–2 metres apart, depending on the variety and its eventual size. Taller, more vigorous berries such as raspberries, boysenberries and blackberries need room to spread and will benefit from support and regular training.
Cranberries are a little different: they need strongly acidic soil and consistently moist conditions, so they are best grown separately from the other berries rather than treated as a typical dry garden berry.
The better the soil and the more appropriate the growing conditions, the better your berries will grow.
2. Fruit tree and berry bush care
Fruit Trees
Before performing any brave pruning cuts, take a moment to look at your tree. Also invest some time to check out any books or online guides or talk to that ‘garden friend’ so you do actually know what you are doing. Looking after fruit trees can be a life long passion and a useful skill but it pays to try and get it right from the start.
The marvellous Kath Irvine aka ‘Edible backyard’, has developed a fantastic book called “Pruning fruit trees, a beginners guide.” It is well worth the read. Be sure to bring it into your orchard with you. Not all trees are created equal so it’s good to read before you cut!
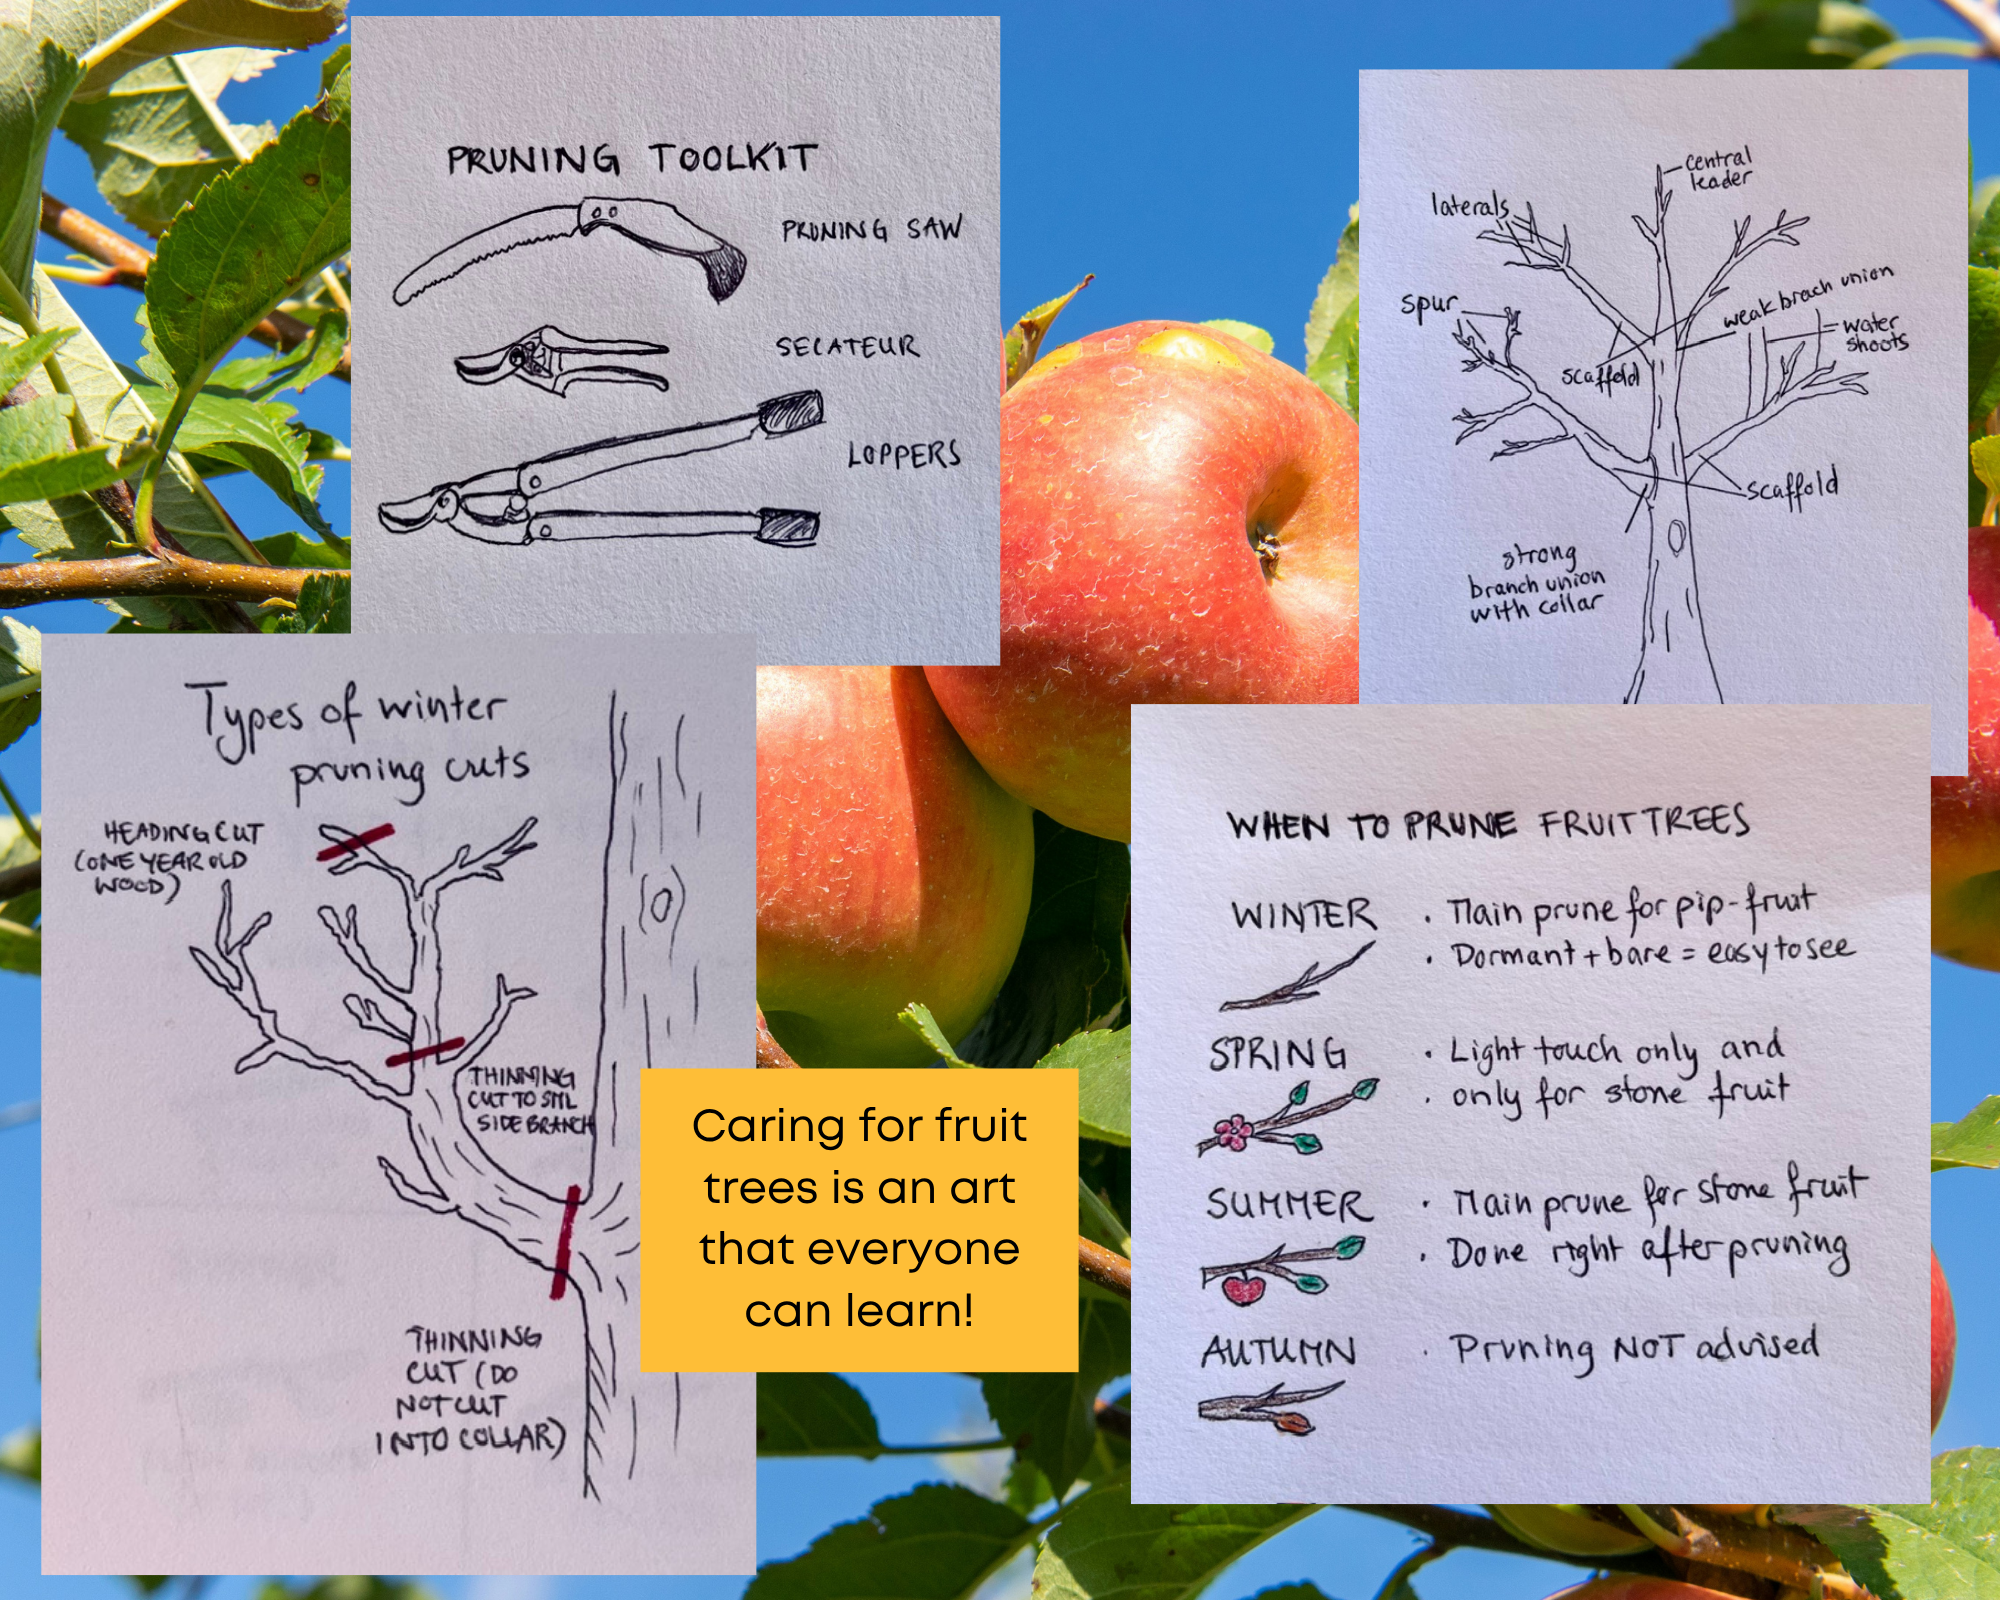
With all your pruning cuts be sure to do them on a dry sunny day.When you do start pruning, it’s important to identify the leader(the main upright stem that forms the central axis of the tree), the scaffold branches(the main structural branches growing from the trunk or central leader), lateral branches(side branches growing from the main framework) and a fruiting spur(a short, specialised shoot that bears flower and fruit buds, particularly on pip fruit such as apples and pears).
Also the types of cuts – a thinning cut removes a shoot or branch at its point of origin. A heading cut shortens growth back to a bud or suitable side branch. Both may have a role, but their effects vary with species, season, vigour and cut placement. Use them to serve the selected framework – not simply to make the tree shorter.These are pretty important skills for the future success of your tree and will make you feel like a wiz in the orchard.
Not all fruit trees have the same needs however.
With the Pip fruits such as Apples and Pears you can finish pruning these now before the buds open up fully. However, Stone fruit such as Nectarines, Peaches, Plums, Cherries and Apricots, will only want a light prune as wet spring weather can spread fungal diseases like silver leaf. Save their main prune right after they finish fruiting in summer.The other golden rule is ‘less is more’. Well at least aim to remove no more than 1/3 of the tree at once. Stack them up next to the tree as you go so you can actually gauge what you have removed. Keep in mind that pruning is done over Winter, Spring and Summer, so doesn’t have to all happen at once.
Your tools for the job all need to be clean and sharp and may include, secateurs, loppers, pruning saw and /or a small chainsaw.
Ok so ready?
Start with the big wood, (remove dead diseased or damaged),
head back any leaders or decide which leader to keep (most branches like to grow, especially on apples and pears. So being clear about which one is the central leader helps the tree in the long run).
Then thin the scaffold branches, being sure to give them equal space and
finally shape the tree to improve light and airflow, which encourages productive wood and helps prevent disease.
And then there is the Espalier, the technique of training a fruit tree flat against a wall, fence, or wire framework, pruning it into a two-dimensional shape (like a fan or horizontal tiers) rather than letting it grow as a free-standing tree) - this will need its own special segment.
Two great web resources are;
https://extension.oregonstate.edu/catalog/pnw-400-training-pruning-your-home-orchard
https://orchardpeople.com/when-to-prune-fruit-trees/
Berry Bushes
To prune berry plants, cut out old, dead wood (can also be done after harvest) and thin new shoots during winter dormancy. Use clean, sharp tools on a dry day to prevent disease.
Blueberries: Prune in summer right after harvest or in winter dormancy. Remove a third of the oldest, woody branches and any crossing or inward-facing stems
Currants & Gooseberries: Prune in winter while the plants are dormant. Remove dead, damaged and crossing wood first, then thin out older, less productive branches to keep the centre of the bush open and airy. Blackcurrants fruit best on younger wood, so remove some of the oldest branches at ground level each year to encourage new growth. Red and white currants and gooseberries can retain productive older branches, so focus on maintaining a balanced mix of young and older wood rather than removing everything over three years old.
3) Feeding and managing disease
You may read in some gardening books that removing leaf litter beneath fruit trees can help reduce disease. While removing diseased leaves can be useful in some situations, healthy leaf litter also contributes organic matter and provides habitat for soil organisms and beneficial insects. Rather than removing everything, focus on creating a healthy and diverse environment around your fruit trees.
Soil life plays an important role in nutrient cycling and plant health. Compost and organic mulches can provide food for soil organisms, while a diversity of plants can provide habitat and food for beneficial insects that help with pest management.
Plant a diverse range of herbs, flowers and other companion plants beneath and around fruit trees. Plants such as comfrey, chicory, parsley and dandelion can contribute organic matter and provide habitat, while clovers and other legumes can contribute to soil health through their relationship with nitrogen fixing bacteria. The aim is not to fill every space, but to create a diverse, living garden system.
So it’s about getting the right conditions to create balance in your garden. However, there are many fertilisers on the market that all promise to make big yields. Getting the soil health right with composts, mulch and plants is a better long term solution
If you do use a commercial fertiliser then don’t add too much. Overfed trees are pest and disease magnets. Established fruit trees and berries don't necessarily need regular applications of compost if the soil is healthy and fertile, but a mulch of suitable organic matter can help maintain soil structure, moisture and biological activity.
And then there’s Leaf Curl! Peaches and nectarines are particularly susceptible to leaf curl, a fungal disease that distorts young spring leaves, causing them to become thick, puckered and often red or pink before eventually turning yellow and dropping off. It reduces the tree’s ability to photosynthesise and can weaken the tree if the problem is severe.
Prevention is the key because once leaves show symptoms, they cannot be cured. If treatment is needed, an appropriately registered copper-based fungicide can be applied at the recommended dormant or bud swell stage. Always follow the product label for the particular fruit tree and timing. In areas where leaf curl has been a problem, an autumn application after leaf fall may also be recommended.
Removing and disposing of heavily diseased fallen leaves can help with garden hygiene, but correctly timed preventative treatment is the most important measure.
Codling moth is a major pest of apples and pears. A codlin in Middle English referred to a small, immature apple, and this is thought to be where the name codling moth comes from.
The adult codling moth is a small greyish brown moth with a wingspan of around 20 mm. It has a distinctive darker, coppery marking near the wing tip. Eggs are laid during spring, usually on leaves or near developing fruit.
The larvae, or grubs, tunnel into the developing fruit, often entering from the side or near the stem or calyx. They feed inside the fruit for several weeks before tunnelling out and leaving the fruit. The larvae then find a sheltered place, such as a crevice in the tree bark, leaf litter or other debris, where they spin a cocoon and pupate. Adult moths then emerge and the cycle begins again.
Spring flowers are the trigger for implementing codling moth control measures. As soon as the petals start to fall, it’s time to act to prevent infestation.
If you'd rather start with a non-chemical approach, wrapping corrugated cardboard bands around the trunk gives larvae a sheltered spot to pupate as they leave the fruit - check the bands regularly through summer and destroy anything you find inside. This works best alongside good orchard hygiene, picking up fallen and damaged fruit regularly so larvae can't complete their life cycle in the ground.
You can also use pheromone traps to monitor adult male moth activity. These traps are only partly effective as a control method on their own, but they are excellent for indicating when adult moths are flying and helping you time control measures.
If you want extra protection, or find bands and hygiene alone aren't keeping numbers down, Yates has a product called Success Ultra Insect Control Concentrate, which is derived from naturally occurring soil bacteria and can be effective against codling moth larvae. If using it, start spraying apple and pear trees from petal fall and continue at the intervals specified on the product label.
—————
Resources
Books (both are available at our libraries):
Kath Irvine Pruning Fruit Trees: A Beginners Guide
Kath Irvine and Jason Ross Homegrown Fruit: A Practical Guide
Web resources:
https://extension.oregonstate.edu/catalog/pnw-400-training-pruning-your-home-orchard
Podcast episode on Fruit tree pruning (with Jason Ross interview) on Your Garden Coach Podcast
Podcast episode on Blueberries and Raspberries (June) on Your Garden Coach Podcast
Blog Post by Dr.Compost It’s Time to Plant a Fruit Tree
-
Contributed by Ben Elms AKA Dr Compost
As we move into spring and the soil starts awakening from its slumber and we get excited for the coming growing season, we can start thinking about what gets planted in our veggie gardens this year. What glorious crops do you have in mind?
Living in the Southern Lakes, a subalpine Mediterranean blur of weather that can give us a frost in ‘any’ month of the year, means we have to think more carefully about what we plant and where we plant it.
So in these few hundred words or so we're going to talk about Tunnel/glass house or no glass/tunnel house. That is the question?
We are also including ‘corflute’ grow houses in this mix.
We use these buildings to even out our daily highs and lows; they make the highs higher and lows higher, protecting our plants against the low temperatures is the most important, be it unseasonal frosts or our cool spring summer autumn nights.
Traditionally they're a space where we grow warm-loving crops like tomatoes, cucumbers, eggplants, capsicums, chillies and maybe a sneaky lemon tree in the corner or in my case a sneaky pomegranate. (1 fruit in 10 years, it's definitely not carrying its weight in real estate.)
It's not just about those summer crops; we can grow amazing crops in the spring, autumn and winter seasons: leafy greens, spring onions, broccoli, kale, radishes, spinach, early potatoes, you name it, and there can be space in these structures to grow veggies faster, beating the cold seasonal doldrums we're susceptible to.
We really are adding resilience to our food-growing arsenal.
Sure, we're not levelling up to Victorian garden levels of food-growing infrastructure. With a team of workers growing us grapefruits on hot compost beds. I mean that would be fun.
We do need some garden infrastructure to help us grow here.
So I believe all gardeners should aspire to some kind of tunnel house/glass house type of structure to grow food in. Once built, they can last decades. My tunnel house is well over 20 years old and I'm looking to replace the plastic cover this year for the first time. It would have lasted longer if not for small kids and a knife. In that period, it has grown so much bountiful food.
Our climate is harsh, with wild swings in daily temperatures; plants don't know if they're coming or going. It's the swings in temperature that lead to plants bolting to seed early or getting a case of the chills. I've had tomatoes hit by the chilly weather, they don't die, they just stop growing. These structures bring amazing long-lasting heat into the beds. Plants grow faster when there's good, even heat. They allow us to grow exotic tomatoes; when you put a store-bought tomato next to a home-grown heritage one, there's an easy winner.
There's just one problem with my dream of a tunnel/glass house in every back yard. The barriers to entry. Owning a piece of dirt and The Mulah!! These tunnel houses/glass houses are an expensive outlay. New sections are getting smaller and smaller too.
Allotments and community gardens are one pathway to food growing when you're lacking options; check out what's available in your local area (see our section on Local Resources below).
We can make some amazing glass houses out of upcycled windows and doors; there's plenty in the district. On my own gardening wish list exists a bespoke double-glazed glass house all with upcycled windows. One day.
So what to do with no tunnel/glass house? Can we still grow these warm-loving vegetables? The answer is yes. We just have to be a little bit clever about it.
Option 1.
We can grow these vegetables outside in spots that have amazing microclimates. Look for spots that are north- and west-facing. We need thermal mass in the form of concrete and rock walls. The spot needs to be out of the wind. We will also plant a little later than we would in a tunnel house. Depending on the kind of spring we're having, the beginning of November is a good time. It's starting to warm up. We will need to use frost cloth to cover our plants on those cooler nights for at least the first month, possibly 2.
Option 2.
We use some clever tools like cold frames and hoops* to imitate tunnel/glass house conditions.
A cold frame is a great way of starting these vegetables earlier. And then, as they outgrow the space, they're open to the elements. I remember my grandparents growing courgettes like this in a basic cold frame with an upcycled window.
Using hoops like the Kerilea 1m x 1m hoop with a tunnel house plastic cover. (You can go bigger with a 1.5m x 1.5m hoop. Needs support at the ends. For eg see here).
Really, the hoops are to get you through November and December to the heat of growing in January and February. Where your plants outgrow their protective covers.
You can also use these tools to grow leafy greens and larger cabbages, cauliflowers, etc. in spring, autumn and even winter.
So yes, it is possible to grow without a tunnel/glass house, but it would be nice to have one eventually.
*Check out Ben’s video on Facebook demonstrating the use of hoops
*You can usually find hoops at Mitre10 (but they don’t list them on their website at the moment), and they’re usually cheaper at Redpath (get together with a bunch of people and order 25 hoops/frames!)
————-
The Dr Compost home-composting project is funded by Queenstown Lakes District Council and delivered by Wastebusters to reduce organic waste in landfills. Got a question? Check out @drcompost on Facebook or email drcompost@wastebusters.co.nz
Also check out this blog post on Tunnel House prep by Your Garden Coach.
And if you're curious where the idea of the modern glasshouse and tunnel house really came from, Ali Soper's potted history of the Wardian case traces it back to a Victorian doctor's accidental discovery — including a surprising New Zealand connection.
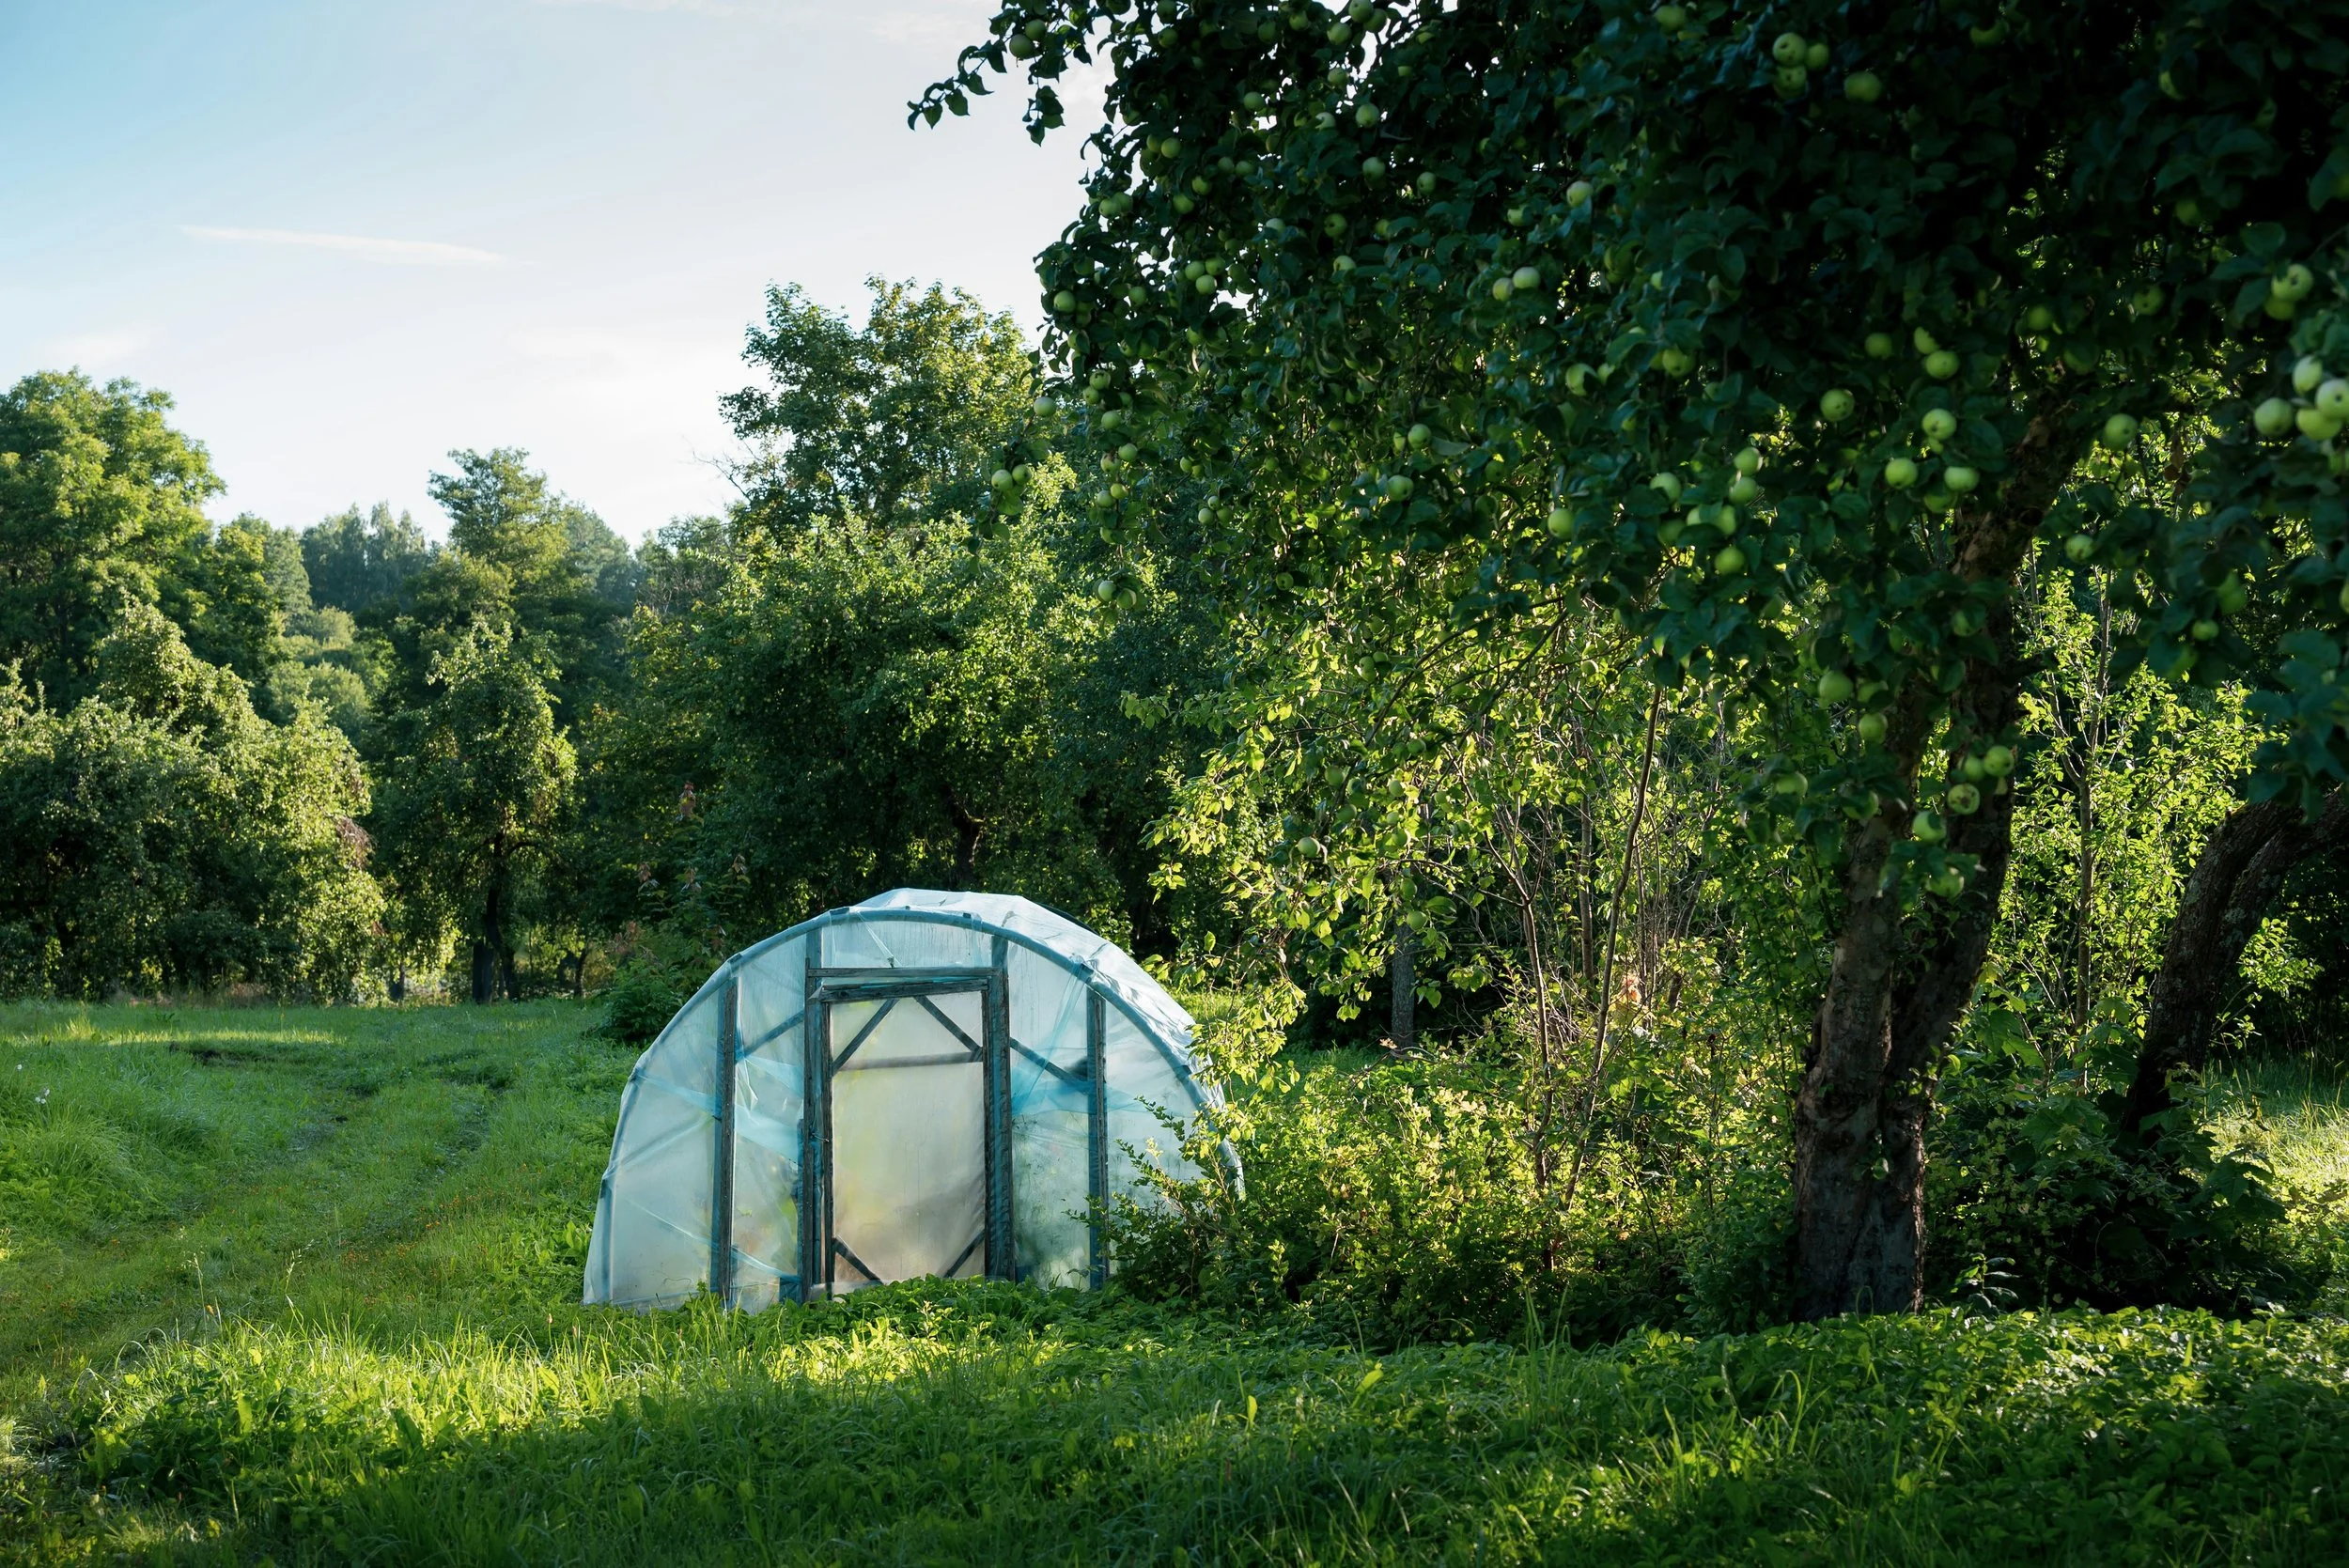
So, what if you don’t have a tunnel house or glasshouse?
Can you still grow these warm-loving vegetables? Absolutely! You just have to be a little bit clever about it.
Read Ben Elm’s tips and tricks for growing food without a tunnel house.
-
Contributed by Loran Verpillot of Herbal Culture
Forage now: Narrow-leaved plantain or ribwort – Kopakopa – Plantago lanceolata
Plantain often grows in lawns, on roadsides or where the soil has been disturbed and is compacted.
It is perennial and very hardy.
It is called a “weed”, but has commonly been used as food in Europe, and is a wonderful medicinal plant. Traditionally, it is used for upper respiratory conditions (like asthma, hay fever, sinusitis, etc.).
The leaves can be added fresh to salads (chopped finely) and pesto, or can be cooked and added to stir fries, soups, broth, etc.
Its taste is mild, a little salty and slightly bitter. Make sure you chop it finely to avoid long strings of plantain in your salad or soup. Older leaves will definitely feel a bit chewy so it is better to use the young thinner and smaller leaves.
Key identification features: The leaves grow in a rosette and have several marked veins (ribs) running the length of the leaves. They are a little hairy. There is only one flower head on a stem. The stem has marked ridges. Each flower head has multiple little white flowers.
Tips: If you get stung by a bee or by some nettle, chew a plantain leaf and apply it directly on the sting, it will help to soothe the sting almost immediately.
—
Food resilience is not only about what you grow or store. It is also about noticing what food already exists around you. Local foraging knowledge helps households identify seasonal wild foods, fruit trees, herbs, nuts, mushrooms and edible weeds in our landscape. Building this knowledge increases confidence, reduces waste, saves money and reconnects people with place.
Even learning a few safe, abundant species each season can meaningfully strengthen household food resilience.
Start small and safe:
Learn correct identification
Avoid sprayed or polluted areas
Take only what you need
Leave plenty for others and nature
Never eat wild plants or mushrooms unless identification is certain.
Resources:
If you are new to foraging, it is important to learn identification from trusted sources and local guides before eating any wild plant.
iNaturalist NZ (best overall for accuracy + community verification)
https://inaturalist.nz - Global platform with a strong NZ community of botanists and ecologists. You upload photos and get community-verified identifications.
Seek by iNaturalist (best beginner app)
https://www.inaturalist.org/pages/seek_app - Simple, camera-based ID app that works offline and is designed for quick identification in the field.
New Zealand foraging books:
Foraging New Zealand by Peter Langland
Edible weeds handbook by Andrew Crowe
The Forager’s Treasury by Johanna Knox
Central Otago ForagingFacebook page
Foraging walks are offered on a regular basis by some of our talented local herbalists such as:
Loran Verpillot from Herbal Culture (Upper Clutha)
Rochana Moon from Wise Moon Wellness (Upper Clutha)
-
Low cost gardening tips
Swap seeds
Share seeds (for example if you only need a handful of seed potatoes, share a whole bag with your friends/neighbours)
Grab a few seeds from your library! The Wānaka Library for example has a seed library - they only ask you to bring some seeds back at the end of the season for other people to use.
Ask your neighbours and friends to share perennial offcuts / clumps with you.
Collect compost materials
Borrow gardening books from your local library
Share tools
Join community gardens
Join gardening clubs
Reuse materials creatively (keep in mind that you want non-toxic materials near the food you grow!): For example, look for pallets stamped HT (heat-treated) rather than MB (methyl bromide fumigated) - HT pallets are great for building raised garden beds. Many wineries and orchards regularly get rid of their old fruit nets - get in touch with them to see if they could give you some bits to re-use. Wastebusters has a 'garden' section where you can find treasures to reuse, plus secondhand pots, trays and tools worth a look.
Keep an eye on Facebook marketplace for deals or giveaways - cloche hoops, 100% wool carpet with a natural backing to suppress grass, seedling propagation equipment, irrigation material etc.
Use flattened cardboard as a free weed-suppressing layer under new garden beds
Learn about growing food successfully in our climate on Your Garden Coach podcast
Use Spring well!
In September:
Observe the daylight hours your garden is now getting
Note frost zones in your garden
Firm up a clear idea of what you plan to grow this year
Source your seeds, or know where to source seedlings
Get your garden beds prepped while there's still time before planting
Check your rabbit fencing and protection is ready before seedlings go outside
Have your frost cloth or cloches ready for when seedlings go outside
Start your warm crop seedlings indoors (tomatoes, capsicum, courgette and the like) ready to plant out once frost risk has passed - approx mid-Nov.
Read up on gardening (read our previous blogs or see our book tips below)
Take part in one of the many workshops offered by the local community gardens (check our event calendar here)
Join one of Erin's gardening workshops in Hawea Flat
Listen to Your Garden Coach older & new episodes, in preparation for the coming months
-
Contributed by Del from Dishes with Del
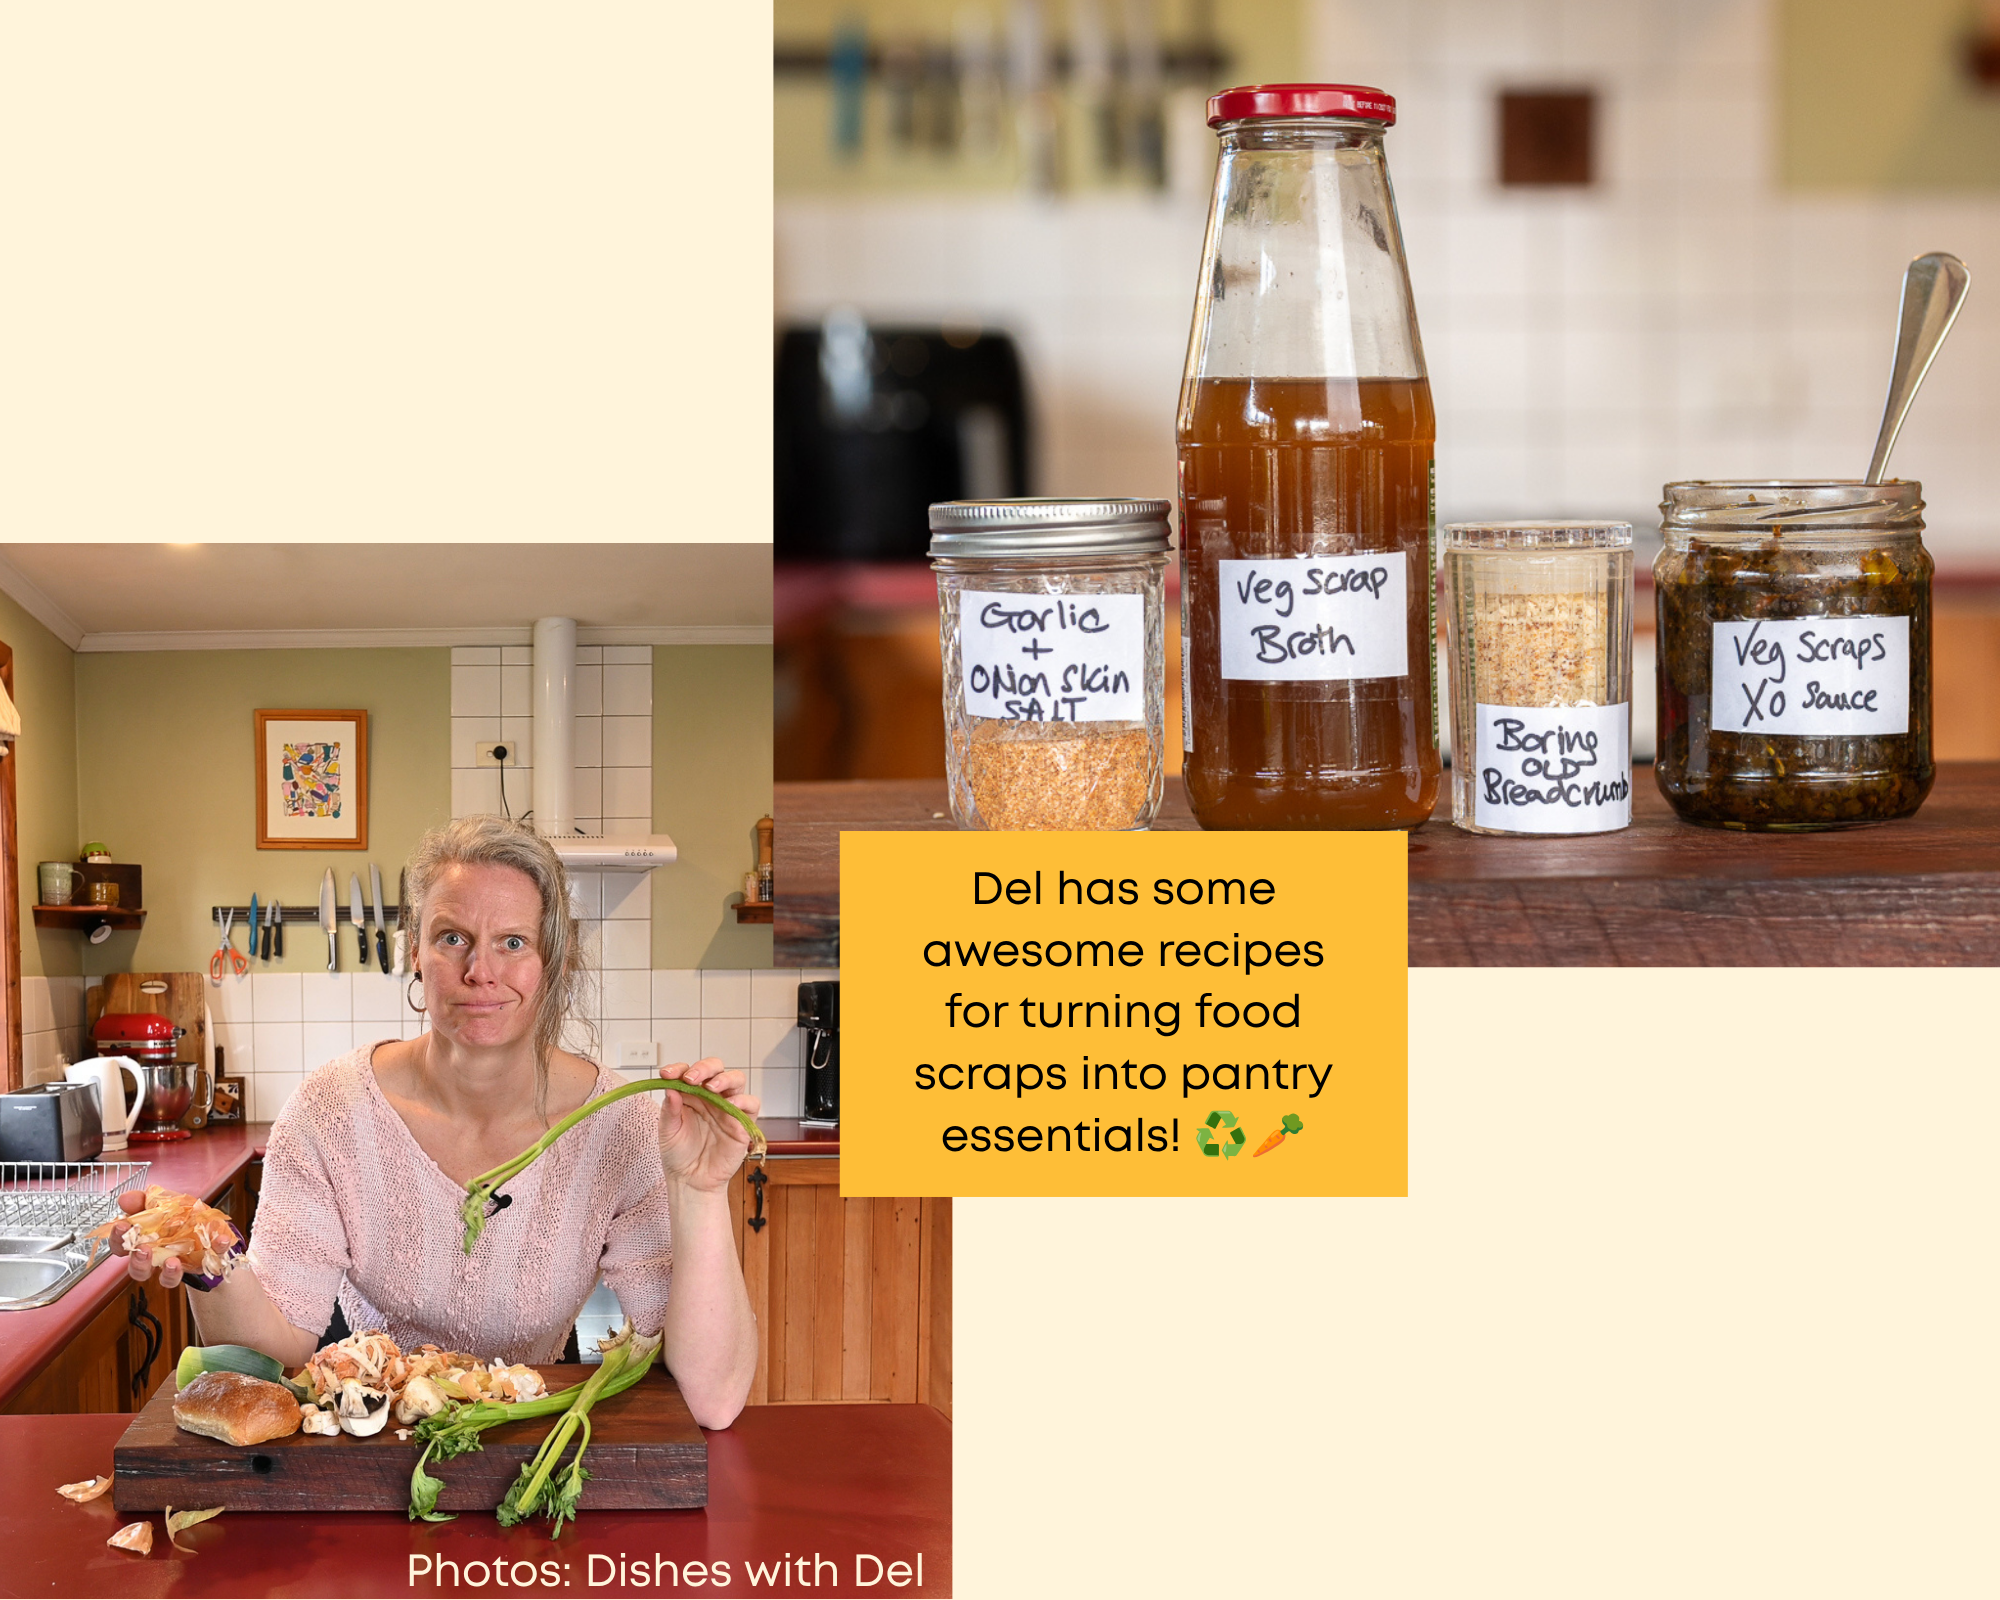
I have put together this video showing four ways to turn scraps and leftovers into pantry staples:
dried old bread into breadcrumbs,
vegetable peels and odd bits into stock,
onion and garlic skins into seasoning salt, and
vegetable scraps and ginger ends into a homemade XO sauce.
Making your own condiments from what's on hand cuts food waste and grocery spend at the same time, since the ingredients are things that would otherwise go in the compost or bin. It also reduces dependence on shop-bought products with long ingredient lists you can't always pronounce, and builds a habit of looking at scraps as raw material rather than rubbish. For a resilient pantry, knowing how to turn leftovers into stock, seasoning or sauce means fewer trips to the shop and less waste generated by every meal.
Enjoy Del’s videos? You’ll love her FREE classes with Central REAP!
If you are in the Upper Clutha, come and cook with Del. She is running three classes with the incredible humans who organise all the courses through Central REAP, and she’ll be covering all her favourite things: budget cooking, pantry staples, and how to get the very most out of your shopping.
Three Tuesdays, the 6th, 13th and 20th of October, 10am until midday, at the Lake Hāwea Community Centre. And it is completely free!
So, if you are nearby and fancy learning a few things with Del, make sure you sign up: Sign up for the classes here.
Food resilience is not only gardening, it includes your household pantry.
In previous editions, we recommended you start building up pantry staples, and we suggest you keep adding to them until you have about 2-3 weeks' worth of food for your household, including rice, pasta, salt, tinned beans and tinned tomatoes. This helps when fresh food is scarce, prices rise or shops are inconvenient.
Making your own pantry staples is also an easy way to save on money and become more resilient, especially when you have a productive garden!
Look out for:
Food preservation workshops
Waste reduction programmes
Wao Food Resilience calendar of events is a good place to start
Resources:
Dishes with Del (pantry and waste reduction tips)
Dig in with Del- follow Del’s journey as she transforms her garden into her pantry. From building garden beds and filling them with soil and compost, to choosing seeds and getting everything planted, join her through a series of fun, practical videos as she grows her own food from the ground up.
WānaKai Community Cooking Group - community kitchen session, every second Friday, 11:30am-1:30pm, Wānaka Community Hub. Free, booking essential: learn new cooking skills, make new friends!
-
October brings the basics of succession sowing for a continuous harvest, frost protection for tender seedlings through Central Otago's late spring frosts, potato planting, and a look at the humble dandelion - root to flower, and a weed pesto recipe.
-
Ali Soper: seasonal gardening advice for our region: get seasonal gardening tips through Ali’s Your Garden Coach podcastand consultations. Sign up to her newsletter to receive practical advice delivered straight to your inbox.If you’d like to join one of Ali’s monthly Garden Conversations groups, email her at coach@yourgardencoach.nz. Ali runs three different groups, with koha appreciated.
Erin Allison Harvest Homegrown: market garden, gardening guides and home veggie garden courses/workshops(Hawea Flat, Wanaka) (on Facebook)
Local workshops: Harvest Homegrown holds a range of veggie growing workshops throughout the growing season.
Erin from Harvest Homegrown also offers these localised growing PDF guides for a small fee ($9 to $12 each):
Interplanting for high yields and healthy soil, including planting plans: https://stan.store/harvesthomegrown/p/interplanting-for-high-yields--healthy-soil (this PDF guide briefly mentions how much to grow of each plan for household sizes also).
Growing from Seed: https://stan.store/harvesthomegrown/p/growing-from-seed
Planning an efficient garden: https://stan.store/harvesthomegrown/p/planning-an-efficient-garden
Printable Veggie Garden Journal: https://stan.store/harvesthomegrown/p/printable-veggie-garden-journal
Dr Compost: composting made easy as well as gardening education: online info and in-person workshops available in Upper Clutha and Whakatipu.
Community gardens: Grow Wanaka, Hawea Food Forest, The Templeton Park Community Orchard (Albert Town Wānaka),and Queenstown Community Gardenworking bees.
The Wanaka Vegetable Growers Club meets the first Wednesday of the month (apart from June and July) at St John's Rooms Linkway Wanaka at 7pm.
The Hāwea Garden Group is an informal gathering for people interested in all aspects of gardening.
Activities include garden visits, guest speakers, and hands-on workshops.
Free to join, and you’re welcome to attend whenever it suits.
Meets every second Thursday from 20 August (starting with a seed swap and seed raising session) through to 19 November.
For more information, contact Diana at mansondiana@gmail.com
Foraging walks are offered on a regular basis by some of our talented local herbalists such as:
Loran Verpillot from Herbal Culture (Upper Clutha)
Rochana Moon from Wise Moon Wellness (Upper Clutha)
-
Most of the following books are available at the Libraries and can be borrowed for free :)Home / small scale regenerative growing:
The Edible Backyard by Kath Irvine (NZ). Excellent for practical, year round home food production in New Zealand conditions, with a strong focus on seasonal growing, resilience, and low input systems. She takes a very holistic approach and the advice is applicable to a wide range of zones. It is focused on getting the foundations right, with simple explanations and practical, reader friendly guidance.
Square Foot Gardening 4th Edition. This is a book that often resonates with new gardeners with small spaces to grow food. There is a metric version too (One Square Meter garden)
The Abundant Garden by Nova and Yotam Kay (NZ). Excellent for productive household food systems, abundance, seasonality, and low input methods.
NZ Gardener Magazine is a great resource too.
Our libraries have plenty of books and magazines about gardening!
For hyper-localised resources, we recommend:
Harvest Homegrown’s localised growing PDF guides (from $9 to $12 each):
Interplanting for high yields and healthy soil, including planting plans:https://stan.store/harvesthomegrown/p/interplanting-for-high-yields--healthy-soil(this PDF guide briefly mentions how much to grow of each plan for household sizes also).
Growing from Seed: https://stan.store/harvesthomegrown/p/growing-from-seed
Planning an efficient garden: https://stan.store/harvesthomegrown/p/planning-an-efficient-garden
Printable Veggie Garden Journal: https://stan.store/harvesthomegrown/p/printable-veggie-garden-journal
Seed sovereignty / resilience:
Koanga Institute resources and publications (NZ): Save Your Own Seeds
Foraging:
Foraging New Zealand by Peter Langland
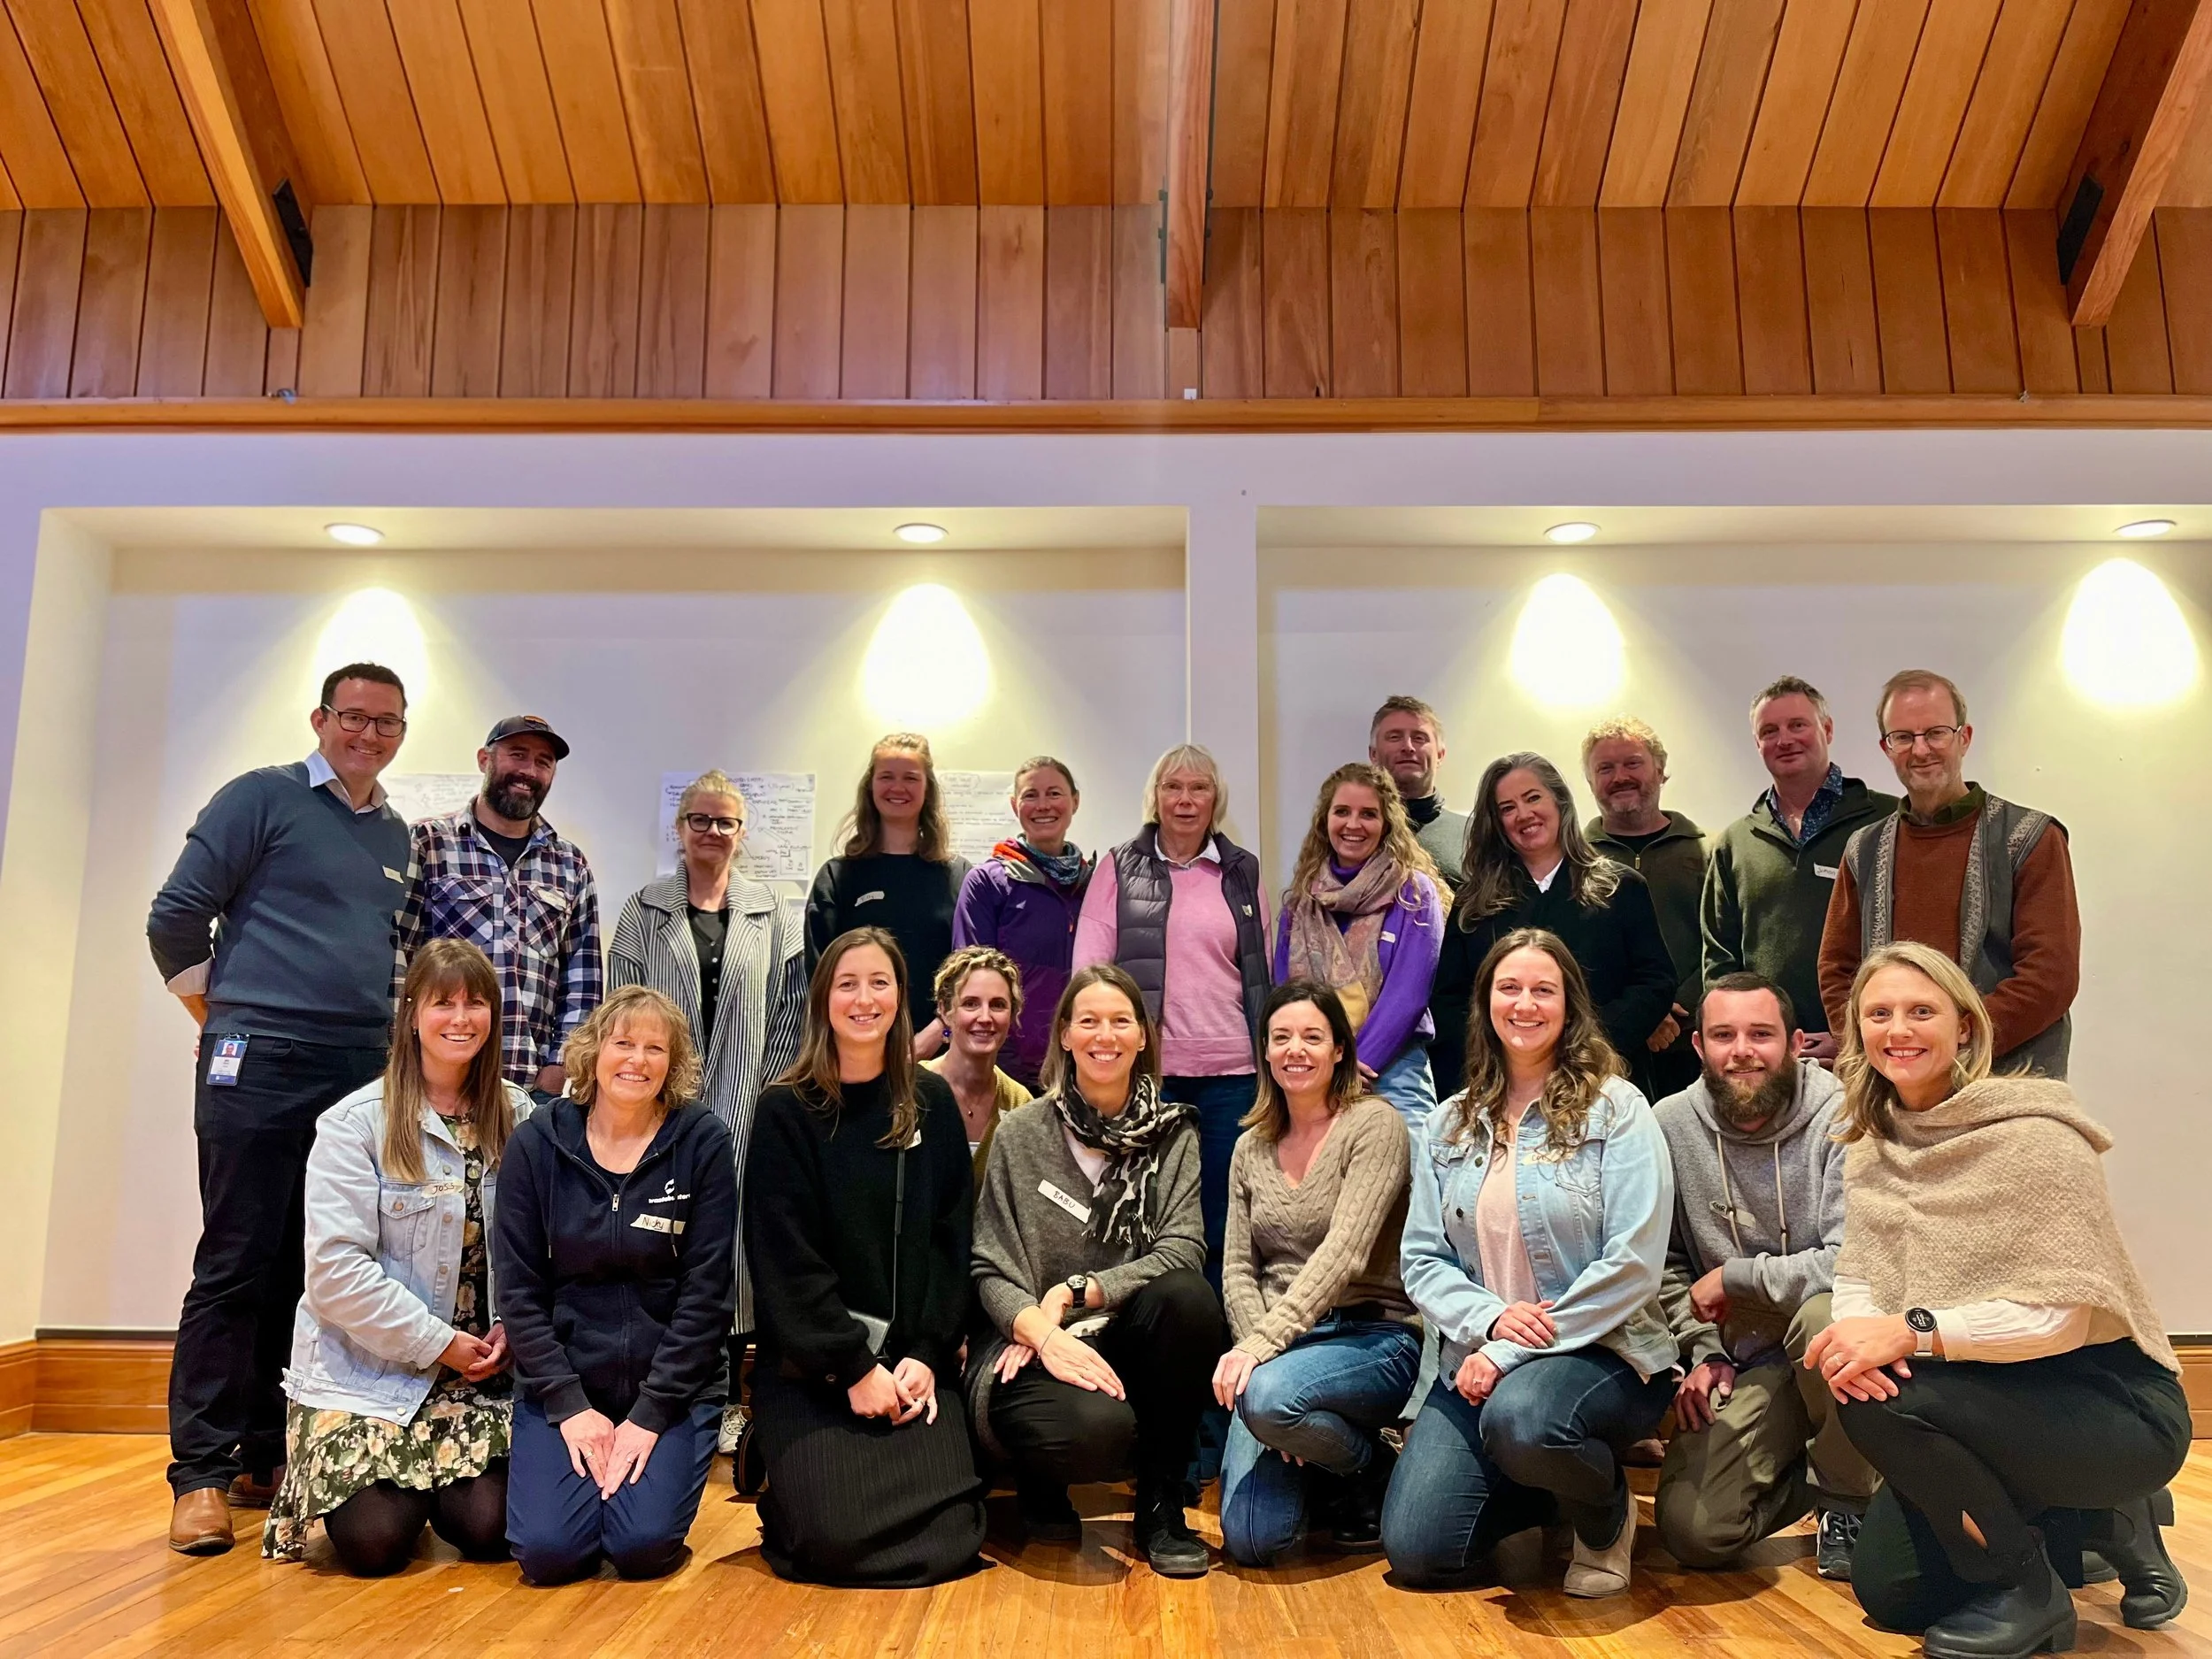
The Southern Lakes Kai Collective at its inception in September 2024. It has since grown to 49 members from across the district and the wider food ecosystem.
-
The Southern Lakes Kai Collective is a think tank focused on increasing the district’s food resilience. The food growers generously contributing their time and knowledge to this gardening blog are:
Adele (Del) Holland - Dishes with Del : recipes, food preserving, avoiding food waste
Ali Soper - Your Garden Coach : podcast & food garden consultations
Ben Elms - Dr.Compost (Wastebusters): compost systems, soil health, gardening workshops, etc.
Brendan Lopez - Welcome Rock Gardens (bio intensive market garden)
Bruce Thurlow - Otago Polytechnic
Diana Manson - Hawea Food Forest : Community Garden
Emberly Wetherall - Grow Wānaka : Community Garden
Erin Allison -harvesthomegrown.co.nz : Homegrown organic produce and seasonal Veggie Growing Workshops for home gardeners.
Louise Wilson - Forager & home gardener
Loran Verpillot - Herbal Culture: Medical Herbalist, forager & home gardener / orchardist
Michael Sly - Waste to Wilderness: composting and microbial soil systems
Mikey Dahlstrom - Millbrook resort food garden
Neal McAloon - Queenstown Harvest Community Garden and Bee The Change
Sydney Telfer - Aspiring market gardener / regenerative agriculture
Theo Richard - The Sherwood restaurant food gardens
-
We welcome your feedback and invite you to use this form to share your thoughts, ideas, and suggestions
More about the Southern Lakes Kai Collective mahi here.